共计 13192 个字符,预计需要花费 33 分钟才能阅读完成。
需求:安装部署 OEM 13.2
环境:两台主机,系统 RHEL 6.5,分别部署 OMS 和 OMR:
OMS,也就是 OEMCC 的服务端 IP:192.168.1.88 内存:12G+ 硬盘:100G+
OMR,也就是 OEM 底层的资料库 IP:192.168.1.89 内存:8G+ 硬盘:100G+
步骤:
- 1. 准备安装介质
- 2.OMR:安装 Oracle 12.1.0.2 软件
- 3.OMR:使用 OEM 模板 dbca 建库
- 4.OMS:安装部署 OEM13.2
- 5.OMS:添加监控资源
参考文档:
- https://docs.oracle.com/cd/E73210_01/index.htm
- http://d-prototype.com/archives/4712
1. 准备安装介质
需要下载的介质:
- http://www.oracle.com/technetwork/oem/enterprise-manager/downloads/index.html
OEMCC 13.2.0.0 介质(8G):
em13200p1_linux64.bin
em13200p1_linux64-2.zip
em13200p1_linux64-3.zip
em13200p1_linux64-4.zip
em13200p1_linux64-5.zip
em13200p1_linux64-6.zip
em13200p1_linux64-7.zip
dbca 建库模板文件(360M):
12.1.0.2.0_Database_Template_for_EM13_2_0_0_0_Linux_x64.zip
Oracle 12.1.0.2 介质(2.5G):
linuxamd64_12102_database_1of2.zip
linuxamd64_12102_database_2of2.zip
总共大概要下载 11G 大小的安装介质。这同时也反映出 OEM 的庞大。
2.OMR:安装 Oracle 12.1.0.2 软件
这一步就是安装 12.1.0.2 的数据库软件,可以参考:
- Linux 平台 Oracle 12.1.0.2 单实例安装部署
注:选用 12.1.0.2 版本的软件,是因为 OEM13.2 提供的资料库模板是 12.1.0.2 版本的。
3.OMR:使用 OEM 模板 dbca 建库
使用 Oracle 提供的 EM 模板 12.1.0.2.0_Database_Template_for_EM13_2_0_0_0_Linux_x64.zip,dbca 创建需要的资料库 oemrepo 实例:
3.1 将模板文件拷贝到 Oracle 数据库的 DBCA 模板目录下并解压:
DBCA 的模板目录位于:$ORACLE_HOME/assistants/dbca/templates/
[oracle@OMR u01]$ cd $ORACLE_HOME/assistants/dbca/templates/
[oracle@OMR templates]$ pwd
/u01/app/oracle/product/12.1.0/dbhome_1/assistants/dbca/templates
[oracle@OMR templates]$ cp /u01/12.1.0.2.0_Database_Template_for_EM13_2_0_0_0_Linux_x64.zip ./
[oracle@OMR templates]$ unzip 12.1.0.2.0_Database_Template_for_EM13_2_0_0_0_Linux_x64.zip
[oracle@OMR templates]$ ls -lrth
total 1.4G
-rw-r–r–. 1 oracle oinstall 11K Dec 23 2013 New_Database.dbt
-rw-r–r–. 1 oracle oinstall 2.3M Jul 7 2014 example.dmp
-rw-r–r–. 1 oracle oinstall 22M Jul 7 2014 example01.dfb
-rw-r–r–. 1 oracle oinstall 171M Jul 7 2014 sampleschema.dfb
-rw-r–r–. 1 oracle oinstall 5.3K Jul 7 2014 sampleschema.xml
-rw-r–r–. 1 oracle oinstall 148M Jul 7 2014 pdbseed.dfb
-rw-r–r–. 1 oracle oinstall 4.0K Jul 7 2014 pdbseed.xml
-rw-r–r–. 1 oracle oinstall 305M Jul 7 2014 Seed_Database.dfb
-rw-r–r–. 1 oracle oinstall 18M Jul 7 2014 Seed_Database.ctl
-rw-r–r–. 1 oracle oinstall 5.0K Jul 7 2014 Data_Warehouse.dbc
-rw-r–r–. 1 oracle oinstall 4.8K Jul 7 2014 General_Purpose.dbc
-rw-r—–. 1 oracle oinstall 387M Sep 30 2016 12.1.0.2.0_Database_Template_for_EM13_2_0_0_0.dfb
-rw-r—–. 1 oracle oinstall 9.9M Sep 30 2016 12.1.0.2.0_Database_Template_for_EM13_2_0_0_0.ctl
-rw-rw-r–. 1 oracle oinstall 167 Sep 30 2016 shpool_12.1.0.2.0_Database_SQL_for_EM13_2_0_0_0.sql
-rw-rw-r–. 1 oracle oinstall 5.5K Sep 30 2016 12.1.0.2.0_Database_Template_for_EM13_2_0_0_0_Small_deployment.dbc
-rw-rw-r–. 1 oracle oinstall 5.5K Sep 30 2016 12.1.0.2.0_Database_Template_for_EM13_2_0_0_0_Medium_deployment.dbc
-rw-rw-r–. 1 oracle oinstall 5.5K Sep 30 2016 12.1.0.2.0_Database_Template_for_EM13_2_0_0_0_Large_deployment.dbc
-rw-rw-r–. 1 oracle oinstall 2.0K Sep 30 2016 set_repo_param_12.1.0.2.0_Database_SQL_for_EM13_2_0_0_0_Small_deployment.sql
-rw-rw-r–. 1 oracle oinstall 2.1K Sep 30 2016 set_repo_param_12.1.0.2.0_Database_SQL_for_EM13_2_0_0_0_Medium_deployment.sql
-rw-rw-r–. 1 oracle oinstall 2.1K Sep 30 2016 set_repo_param_12.1.0.2.0_Database_SQL_for_EM13_2_0_0_0_Large_deployment.sql
-rwxr-xr-x. 1 oracle oinstall 360M Jan 19 07:04 12.1.0.2.0_Database_Template_for_EM13_2_0_0_0_Linux_x64.zip
3.2 dbca 创建资料库 oemrepo 实例的关键步骤:
第 2 步:选择高级选项
第 3 步:可以看到多出的 3 个模板,根据需求,我这里选择 small 的 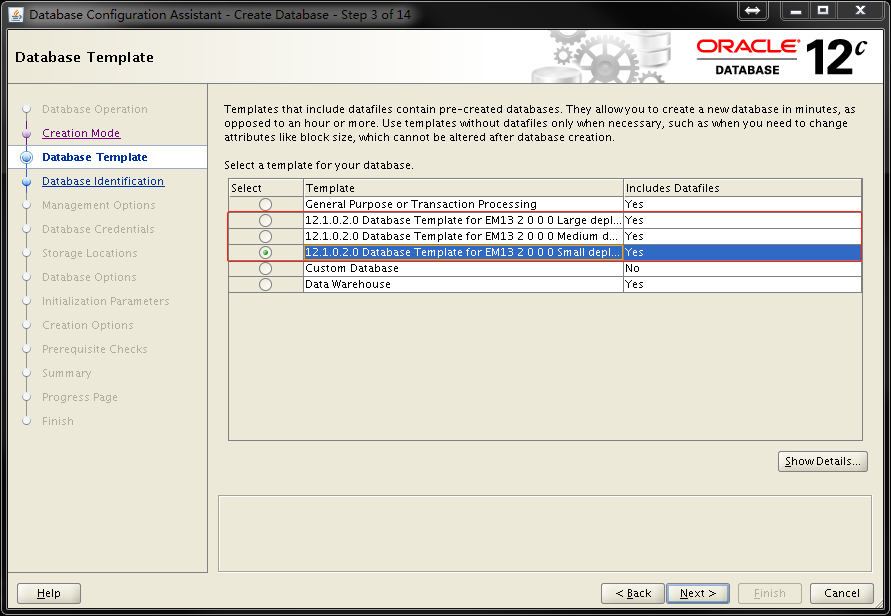
第 6 步:输入统一密码,我这里是 OEMrepo123
第 13 步:安装概览 
第 15 步:完成实例 oemrepo 的安装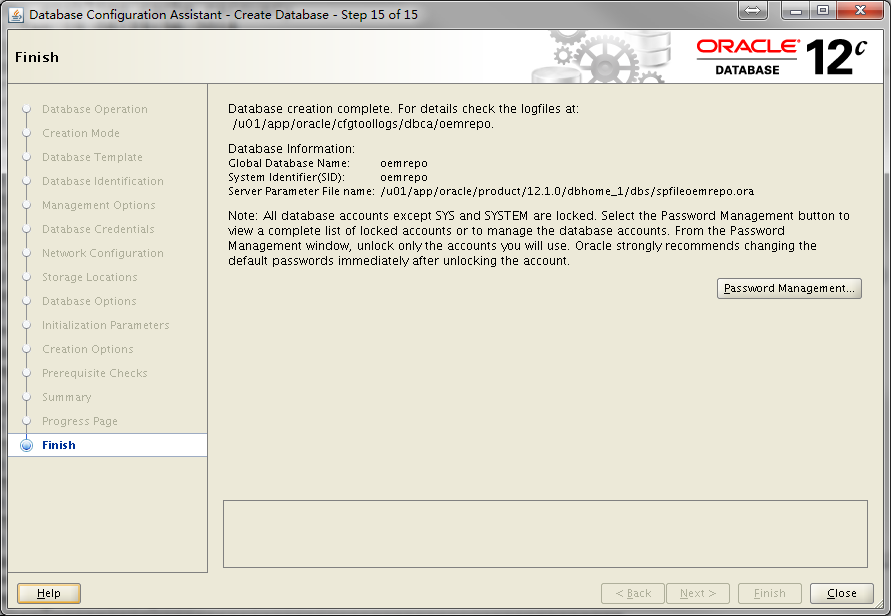
最后使用 netca 创建监听,至此 OMR 的所有操作就已经完成了。
4.OMS:安装部署 OEM13.2
4.1 创建 oracle 用户
groupadd -g 501 oinstall
groupadd -g 502 dba
useradd -u 502 -g oinstall -G dba oracle
4.2 安装依赖的 rpm 软件包
直接使用 yum 安装所有需要的软件包:
yum install -y binutils.x86_64 compat-libcap1.x86_64 compat-libstdc++-33.i686 compat-libstdc++-33.x86_64 gcc.x86_64 gcc-c++.x86_64 glibc.x86_64 glibc.i686 glibc-devel.x86_64 glibc-devel.i686 ksh.x86_64 libgcc.x86_64 libgcc.i686 libstdc++.i686 libstdc++.x86_64 libstdc++-devel.i686 libstdc++-devel.x86_64 libaio.x86_64 libaio.i686 libaio-devel.i686 libaio-devel.x86_64 libXext.x86_64 libXext.i686 libXtst.x86_64 libXtst.i686 libX11.x86_64 libX11.i686 libXau.x86_64 libXau.i686 libxcb.x86_64 libxcb.i686 libXi.x86_64 libXi.i686 make.x86_64 sysstat.x86_64
yum 本地源配置参考:https://www.linuxidc.com/Linux/2017-01/139140.htm
4.3 系统参数调整
/etc/sysctl.conf
# Oracle EM 13c
fs.aio-max-nr = 1048576
fs.file-max = 65536
kernel.shmall = 2097152
kernel.shmmax = 6442450944
kernel.shmmni = 4096
kernel.sem = 250 32000 100 128
kernel.panic_on_oops = 1
net.ipv4.ip_local_port_range = 11000 65000
net.core.rmem_default = 262144
net.core.rmem_max = 4194304
net.core.wmem_default = 262144
net.core.wmem_max = 1048586
sysctl -p 生效。
vi /etc/security/limits.conf
# Oracle EM 13c
oracle soft nproc 2047
oracle hard nproc 16384
oracle soft nofile 1024
oracle hard nofile 65536
oracle soft stack 10240
vi /etc/pam.d/login
# Oracle EM 13c
session required pam_limits.so
4.4 oracle 环境变量:
环境变量中包含了两个产品目录:
- OMS
- Agent
oracle 环境变量:
# Oracle OMS
export ORACLE_BASE=/u01/app/oracle
export OMS_HOME=$ORACLE_BASE/product/oem13.2/middleware
export AGENT_HOME=$ORACLE_BASE/product/oem13.2/agent/agent_13.2.0.0.0
4.5 创建目录:
chown oracle.oinstall /u01
su – oracle
mkdir -p /u01/app/oracle/product/oem13.2/agent
mkdir -p /u01/app/oracle/product/oem13.2/middleware
4.6 开始安装:
[oracle@OMS u01]$ ./em13200p1_linux64.bin
0%….
OEMCC13.2 安装截图:
第 1 步: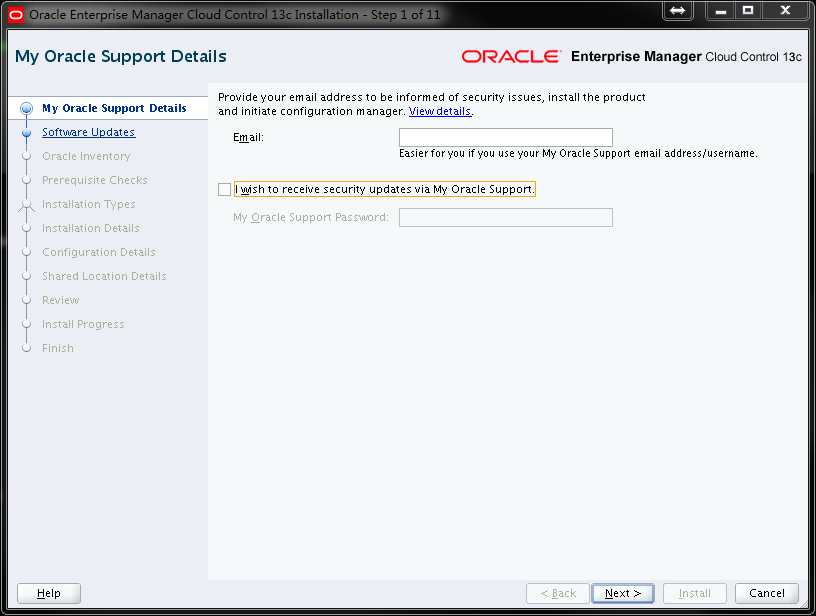
第 2 步: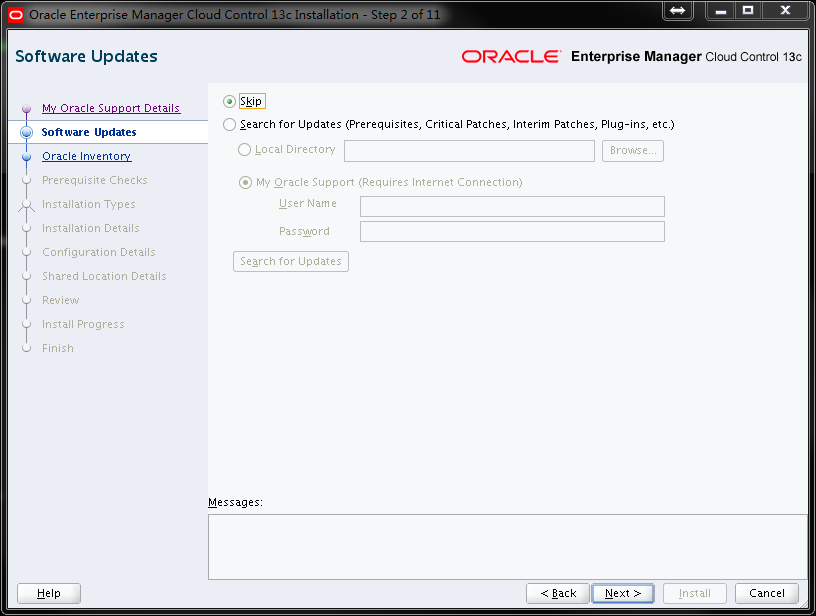
第 3 步:
第 4 步: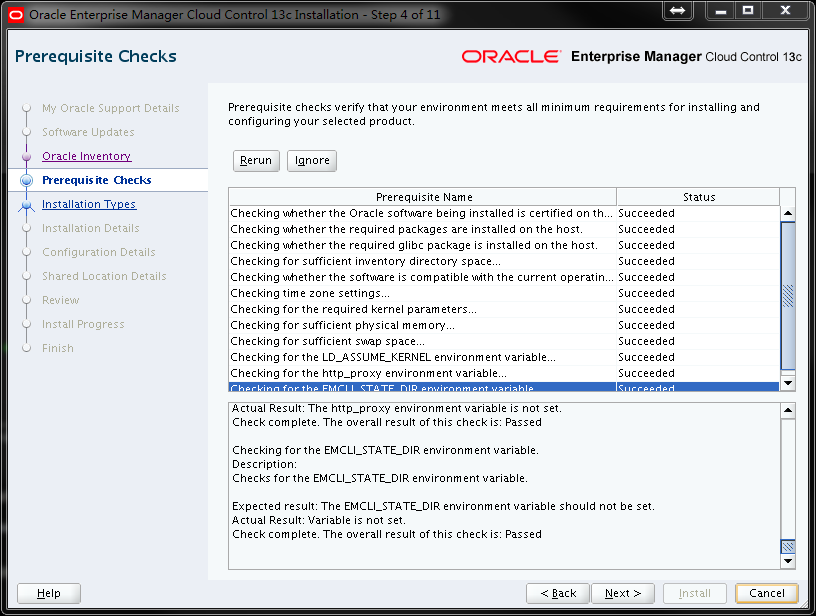
第 5 步:
第 6 步: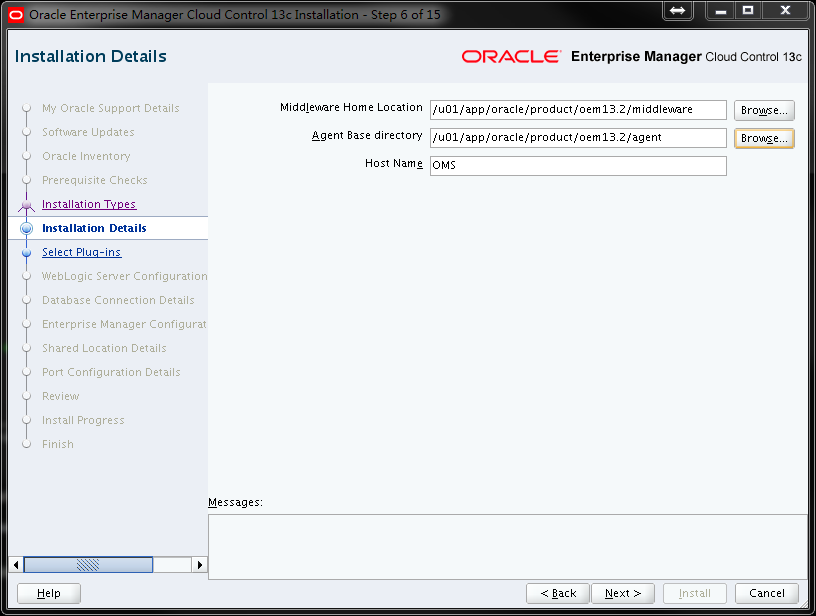
第 7 步: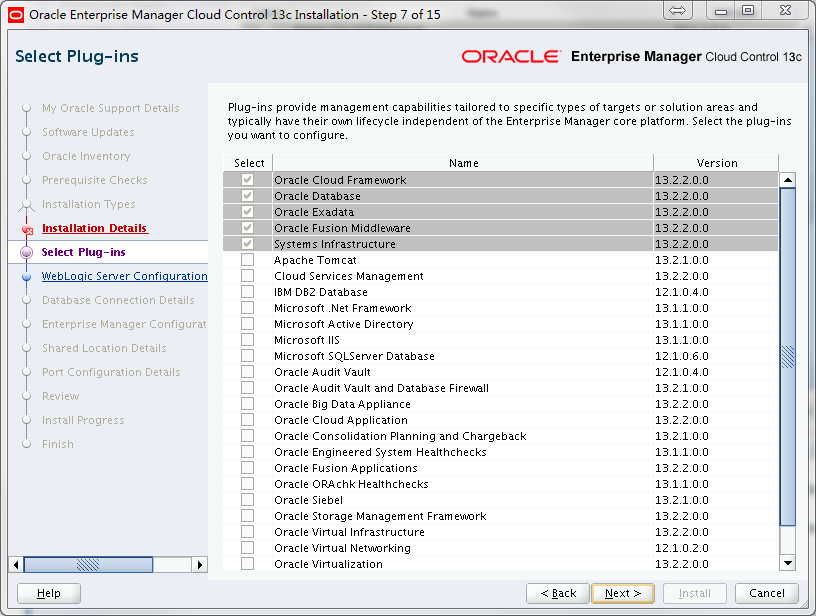
第 8 步:
注:weblogic/Weblogic123
nodemanager/nodemanager123
第 9 步:
第 10 步: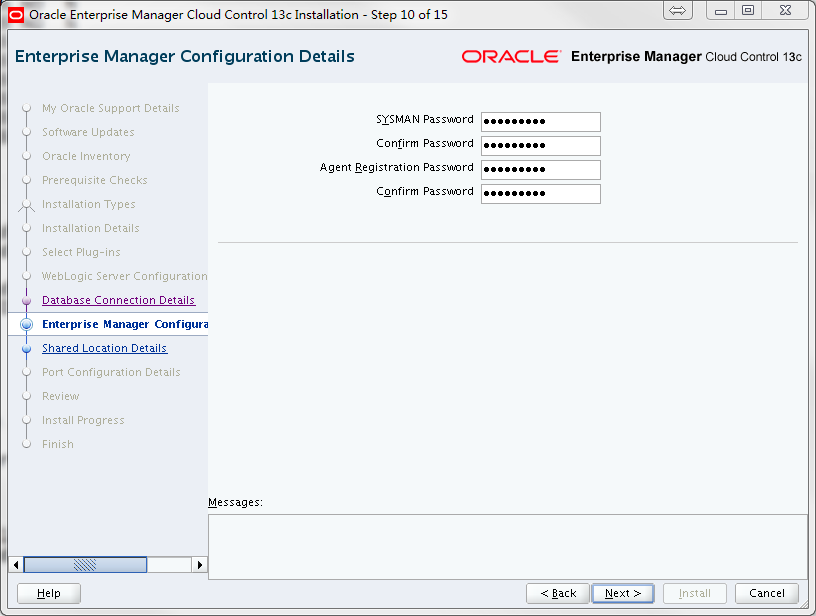
注:sysman 和 agent registration 密码都是:Oracle123
第 11 步: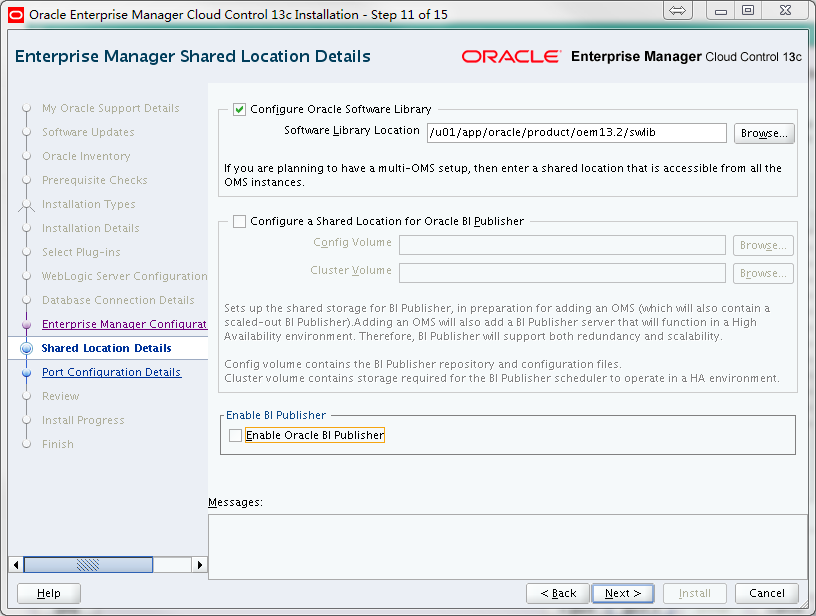
第 12 步:
第 13 步:
第 14 步: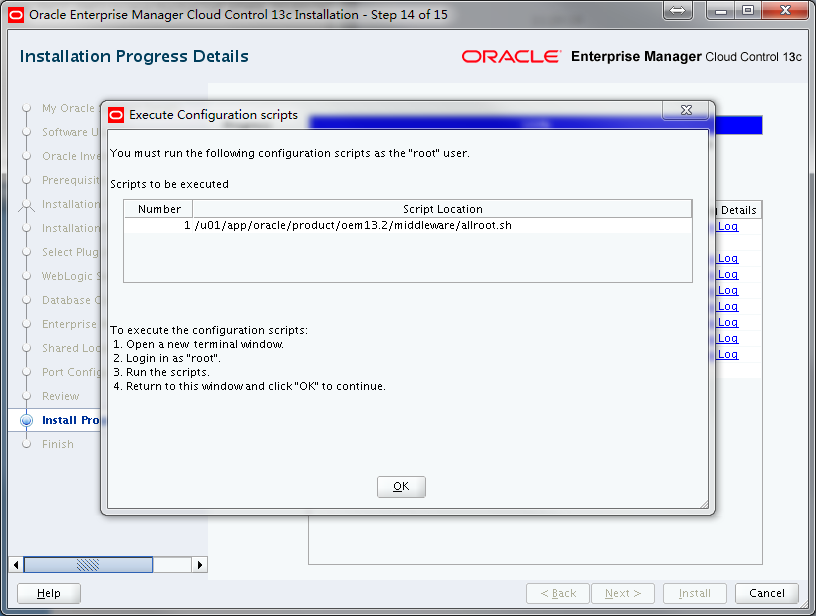
注:根据提示 root 用户执行脚本。
第 15 步: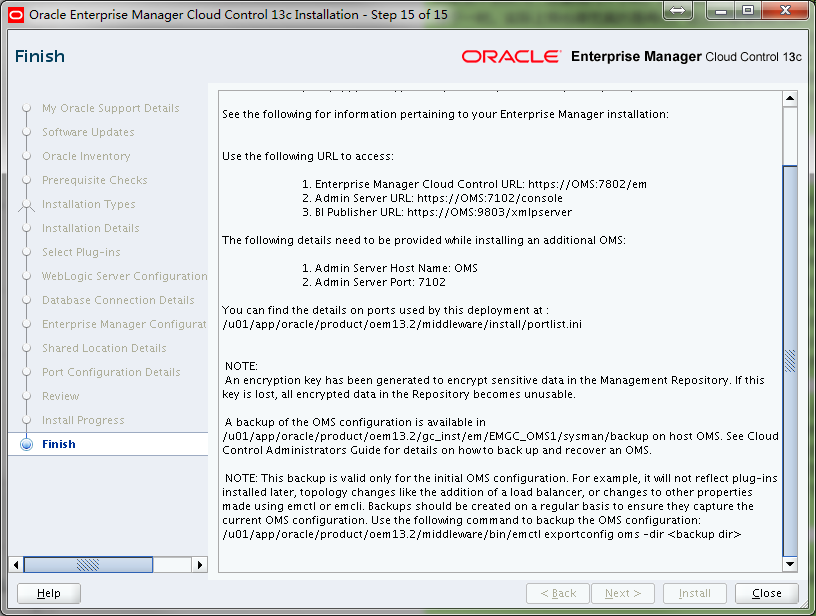
该界面显示了后续访问服务的地址:
This information is also available at:
/u01/app/oracle/product/oem13.2/middleware/install/setupinfo.txt
See the following for information pertaining to your Enterprise Manager installation:
Use the following URL to access:
1. Enterprise Manager Cloud Control URL: https://OMS:7802/em
2. Admin Server URL: https://OMS:7102/console
3. BI Publisher URL: https://OMS:9803/xmlpserver
The following details need to be provided while installing an additional OMS:
1. Admin Server Host Name: OMS
2. Admin Server Port: 7102
You can find the details on ports used by this deployment at : /u01/app/oracle/product/oem13.2/middleware/install/portlist.ini
NOTE:
An encryption key has been generated to encrypt sensitive data in the Management Repository. If this key is lost, all encrypted data in the Repository becomes unusable.
A backup of the OMS configuration is available in /u01/app/oracle/product/oem13.2/gc_inst/em/EMGC_OMS1/sysman/backup on host OMS. See Cloud Control Administrators Guide for details on how to back up and recover an OMS.
NOTE: This backup is valid only for the initial OMS configuration. For example, it will not reflect plug-ins installed later, topology changes like the addition of a load balancer, or changes to other properties made using emctl or emcli. Backups should be created on a regular basis to ensure they capture the current OMS configuration. Use the following command to backup the OMS configuration:
/u01/app/oracle/product/oem13.2/middleware/bin/emctl exportconfig oms -dir <backup dir>
至此完成 OMS 的安装。
4.7 查看 oms 和 agent 状态:
/u01/app/oracle/product/oem13.2/middleware/bin/emctl status oms
/u01/app/oracle/product/oem13.2/agent/agent_13.2.0.0.0/bin/emctl status agent
[oracle@OMS u01]$ /u01/app/oracle/product/oem13.2/middleware/bin/emctl status oms
Oracle Enterprise Manager Cloud Control 13c Release 2
Copyright (c) 1996, 2016 Oracle Corporation. All rights reserved.
WebTier is Up
Oracle Management Server is Up
JVMD Engine is Up
BI Publisher Server is Down
BI Publisher is disabled, to enable BI Publisher on this host, use the ’emctl config oms -enable_bip’ command
[oracle@OMS u01]$
[oracle@OMS u01]$ /u01/app/oracle/product/oem13.2/agent/agent_13.2.0.0.0/bin/emctl status agent
Oracle Enterprise Manager Cloud Control 13c Release 2
Copyright (c) 1996, 2016 Oracle Corporation. All rights reserved.
—————————————————————
Agent Version : 13.2.0.0.0
OMS Version : 13.2.0.0.0
Protocol Version : 12.1.0.1.0
Agent Home : /u01/app/oracle/product/oem13.2/agent/agent_inst
Agent Log Directory : /u01/app/oracle/product/oem13.2/agent/agent_inst/sysman/log
Agent Binaries : /u01/app/oracle/product/oem13.2/agent/agent_13.2.0.0.0
Core JAR Location : /u01/app/oracle/product/oem13.2/agent/agent_13.2.0.0.0/jlib
Agent Process ID : 16465
Parent Process ID : 16389
Agent URL : https://OMS:3872/emd/main/
Local Agent URL in NAT : https://OMS:3872/emd/main/
Repository URL : https://OMS:4903/empbs/upload
Started at : 2018-01-20 11:56:07
Started by user : oracle
Operating System : Linux version 2.6.32-431.el6.x86_64 (amd64)
Number of Targets : 27
Last Reload : (none)
Last successful upload : 2018-01-22 10:08:01
Last attempted upload : 2018-01-22 10:08:01
Total Megabytes of XML files uploaded so far : 4.33
Number of XML files pending upload : 0
Size of XML files pending upload(MB) : 0
Available disk space on upload filesystem : 69.22%
Collection Status : Collections enabled
Heartbeat Status : Ok
Last attempted heartbeat to OMS : 2018-01-22 10:08:50
Last successful heartbeat to OMS : 2018-01-22 10:08:50
Next scheduled heartbeat to OMS : 2018-01-22 10:09:50
—————————————————————
Agent is Running and Ready
可以看到,除了 BI Publisher Server 我没有安装,其他一切正常。
最终用户使用浏览器登录 Enterprise Manager Cloud Control 界面: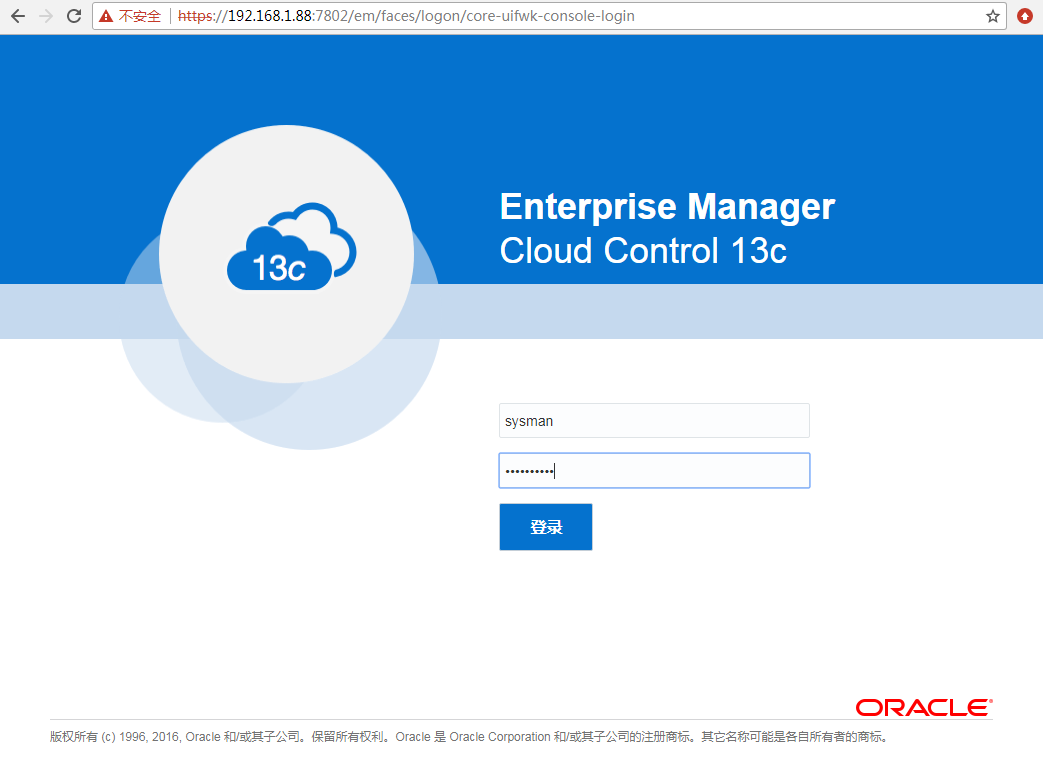
使用浏览器登录 Admin Server 界面: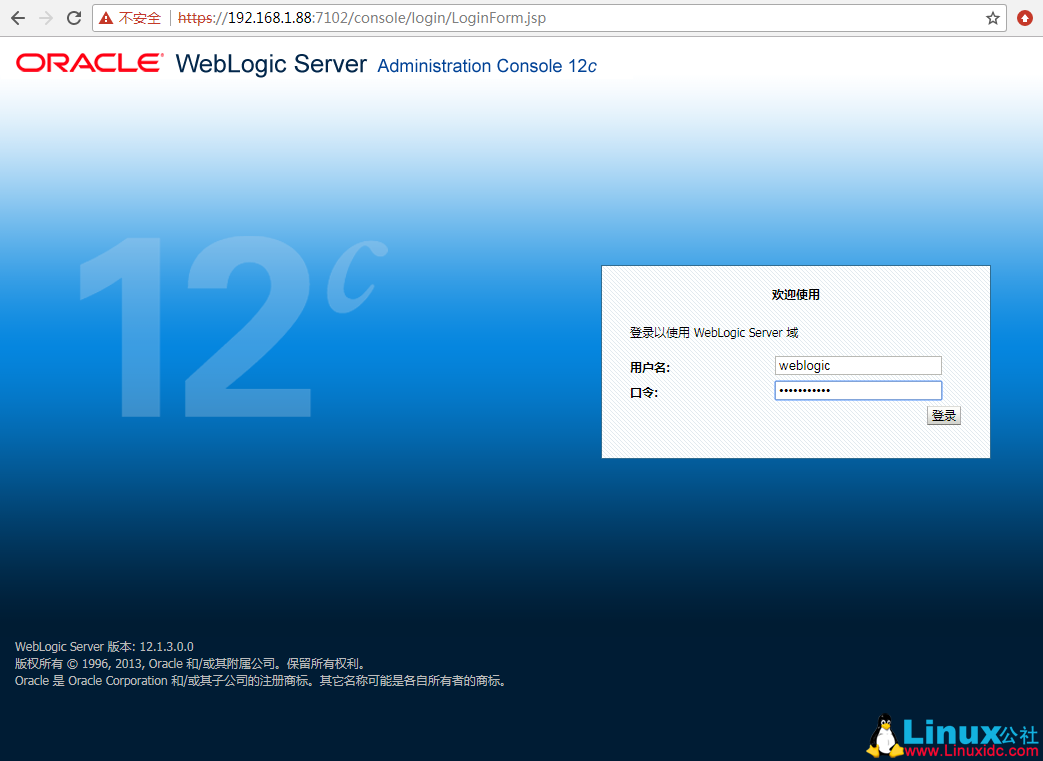
5.OMS:添加监控资源
OEMCC 监控的主机需要部署对应的 agent,官档描述如下:
Oracle Management Agent (Management Agent) is one of the core components of Enterprise Manager Cloud Control that enables you to convert an unmanaged host to a managed host in the Enterprise Manager system. The Management Agent works in conjunction with the plug-ins to monitor the targets running on that managed host.
我直接在 OEMCC 上手动添加目标: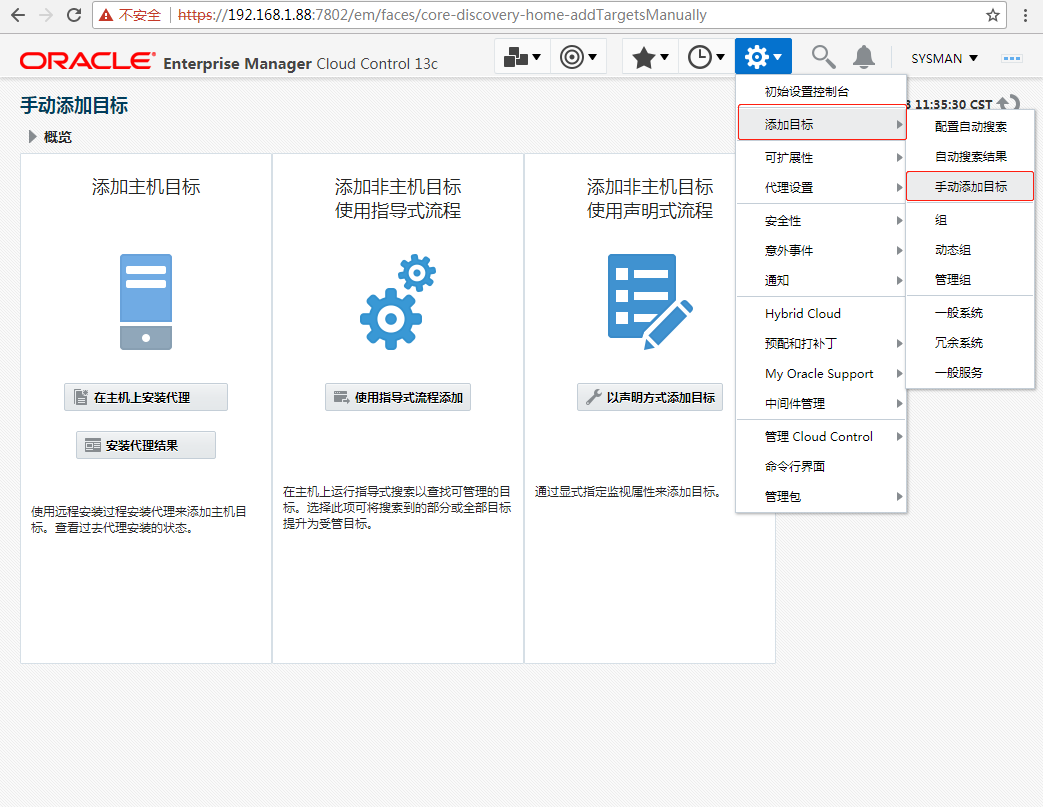
起初在被监控的主机上部署 agent 时,碰到报错,如下: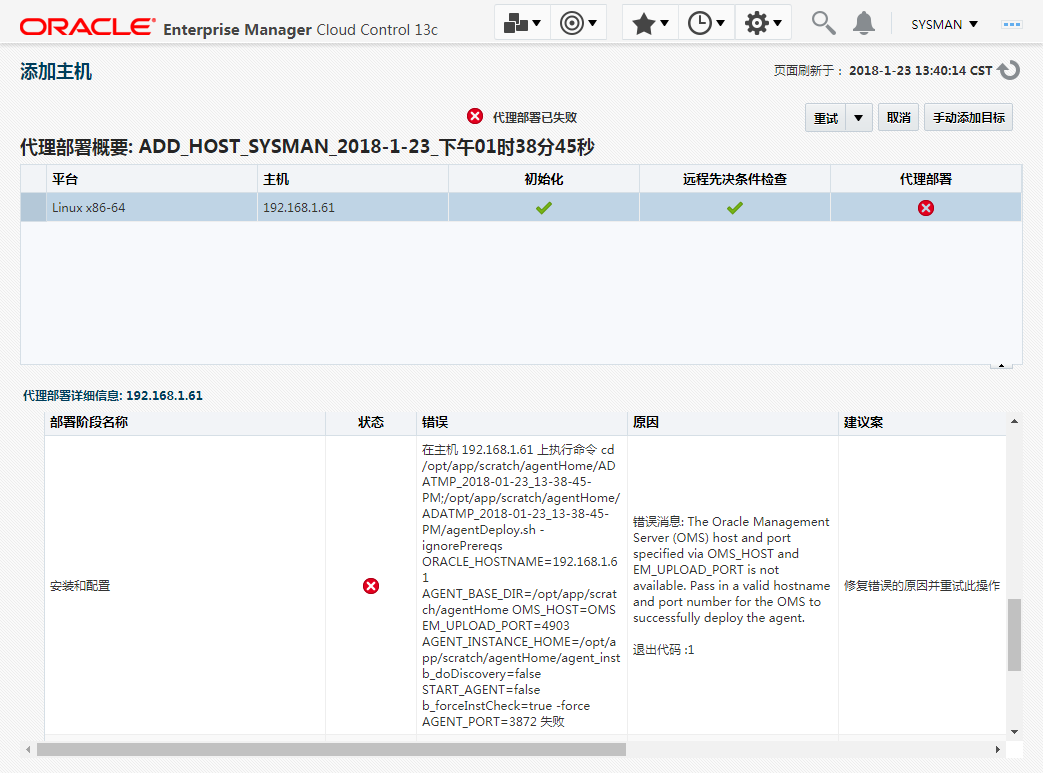
报错信息文字:
在主机 192.168.1.61 上执行命令 cd /opt/app/scratch/agentHome/ADATMP_2018-01-23_13-38-45-PM;/opt/app/scratch/agentHome/ADATMP_2018-01-23_13-38-45-PM/agentDeploy.sh -ignorePrereqs ORACLE_HOSTNAME=192.168.1.61 AGENT_BASE_DIR=/opt/app/scratch/agentHome OMS_HOST=OMS EM_UPLOAD_PORT=4903 AGENT_INSTANCE_HOME=/opt/app/scratch/agentHome/agent_inst b_doDiscovery=false START_AGENT=false b_forceInstCheck=true -force AGENT_PORT=3872 失败
错误消息: The Oracle Management Server (OMS) host and port specified via OMS_HOST and EM_UPLOAD_PORT is not available. Pass in a valid hostname and port number for the OMS to successfully deploy the agent.
退出代码 :1
开始认为是主机间可能有防火墙没关闭,或者是端口配置不对,进一步根据 MOS 的一些文档说明:
- EM 12C: Enterprise Manager 12c Cloud Control Agent Silent Installation Fails while Validating OMS Host and Port (文档 ID 1368010.1)
- EM 12c Agent Install fails with ERROR: The Oracle Management Server (OMS) host and port specified via OMS_HOST and EM_UPLOAD_PORT is not available (文档 ID 1524756.1)
首先确认 OMS 的端口配置正确:
[oracle@OMS ~]$ /u01/app/oracle/product/oem13.2/middleware/bin/emctl status oms -details
Oracle Enterprise Manager Cloud Control 13c Release 2
Copyright (c) 1996, 2016 Oracle Corporation. All rights reserved.
Enter Enterprise Manager Root (SYSMAN) Password :
Console Server Host : OMS
HTTP Console Port : 7788
HTTPS Console Port : 7802
HTTP Upload Port : 4889
HTTPS Upload Port : 4903 <<<===== ======== OMS Upload Port is same the port configured at the agent
EM Instance Home : /u01/app/oracle/product/oem13.2/gc_inst/em/EMGC_OMS1
OMS Log Directory Location : /u01/app/oracle/product/oem13.2/gc_inst/em/EMGC_OMS1/sysman/log
OMS is not configured with SLB or virtual hostname
Agent Upload is locked.
OMS Console is locked.
Active CA ID: 1
Console URL: https://OMS:7802/em
Upload URL: https://OMS:4903/empbs/upload
WLS Domain Information
Domain Name : GCDomain
Admin Server Host : OMS
Admin Server HTTPS Port: 7102
Admin Server is RUNNING
Oracle Management Server Information
Managed Server Instance Name: EMGC_OMS1
Oracle Management Server Instance Host: OMS
WebTier is Up
Oracle Management Server is Up
JVMD Engine is Up
BI Publisher Server Information
BI Publisher Managed Server Name: BIP
BI Publisher Server is Down
BI Publisher is disabled, to enable BI Publisher on this host, use the ’emctl config oms -enable_bip’ command
[oracle@OMS ~]$
查看日志发现是这一段之后报错:
/opt/app/scratch/agentHome/agent_13.2.0.0.0/jdk/jre/bin/java -classpath /opt/app/scratch/agentHome/agent_13.2.0.0.0/jlib/agentInstaller.jar:/opt/app/scratch/agentHome/agent_13.2.0.0.0/oui/modules/OraInstaller.jar oracle.sysman.agent.installer.AgentInstaller /opt/app/scratch/agentHome/agent_13.2.0.0.0 /opt/app/scratch/agentHome/ADATMP_2018-01-23_13-38-45-PM /opt/app/scratch/agentHome $args -prereq
Validating the OMS_HOST & EM_UPLOAD_PORT has failed
根据文档 1368010.1 的思路排查:
1). OMS status
[oracle@OMS ~]$ $OMS_HOME/bin/emctl status oms
Oracle Enterprise Manager Cloud Control 13c Release 2
Copyright (c) 1996, 2016 Oracle Corporation. All rights reserved.
WebTier is Up
Oracle Management Server is Up
JVMD Engine is Up
BI Publisher Server is Down
BI Publisher is disabled, to enable BI Publisher on this host, use the ’emctl config oms -enable_bip’ command
OMS is ok.
2). ping OMS
[oracle@jystdrac1 ADATMP_2018-01-23_13-38-45-PM]$ ping OMS
ping: unknown host OMS
[oracle@jystdrac1 ADATMP_2018-01-23_13-38-45-PM]$ ping 192.168.1.88
PING 192.168.1.88 (192.168.1.88) 56(84) bytes of data.
64 bytes from 192.168.1.88: icmp_seq=1 ttl=64 time=1.37 ms
64 bytes from 192.168.1.88: icmp_seq=2 ttl=64 time=0.615 ms
配置 /etc/hosts, 增加:
#OMS
192.168.1.88 OMS
3).
wget http://192.168.1.88:4903/empbs/genwallet
or
wget https://192.168.1.88:4903/empbs/genwallet
wget http://OMS:4903/empbs/genwallet
[oracle@jystdrac1 ~]$ wget http://OMS:4903/empbs/genwallet
–2018-01-23 16:02:03– http://oms:4903/empbs/genwallet
Resolving oms… 192.168.1.88
Connecting to oms|192.168.1.88|:4903… connected.
HTTP request sent, awaiting response… No data received.
Retrying.
–2018-01-23 16:02:04– (try: 2) http://oms:4903/empbs/genwallet
Connecting to oms|192.168.1.88|:4903… connected.
HTTP request sent, awaiting response… No data received.
Retrying.
–2018-01-23 16:02:06– (try: 3) http://oms:4903/empbs/genwallet
Connecting to oms|192.168.1.88|:4903… connected.
HTTP request sent, awaiting response… No data received.
Retrying.
^C
4).
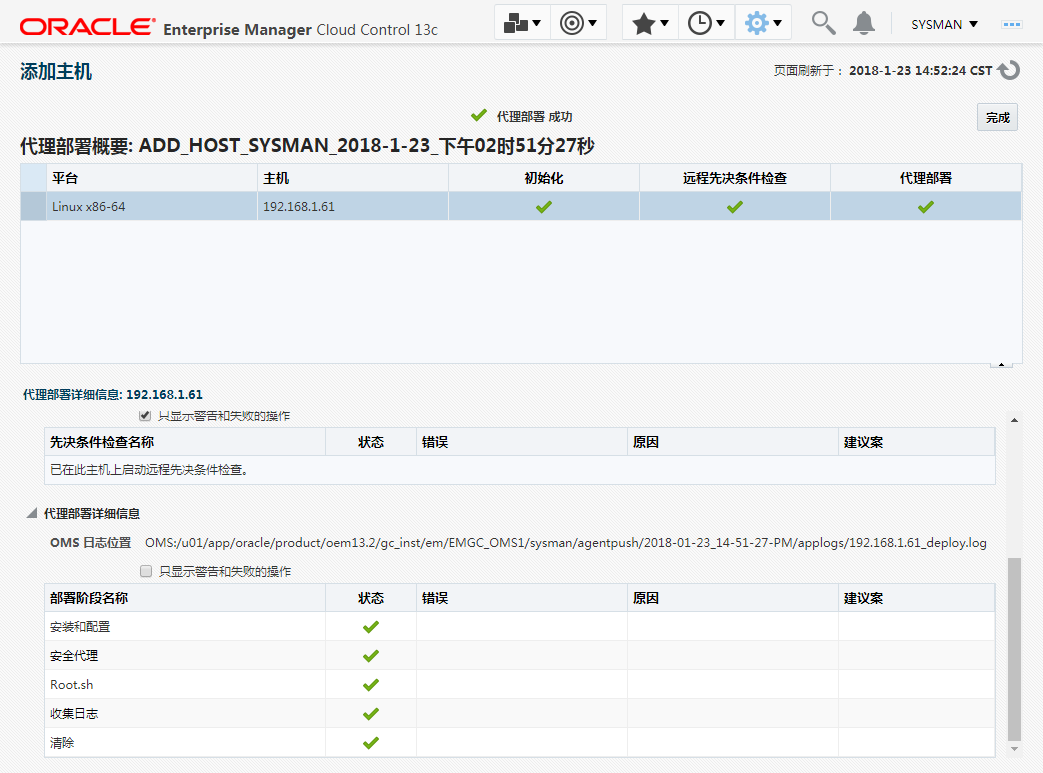
再次尝试重新部署 agent 成功。
在 OEMCC 上部署 agent(推送方式)步骤截图如下: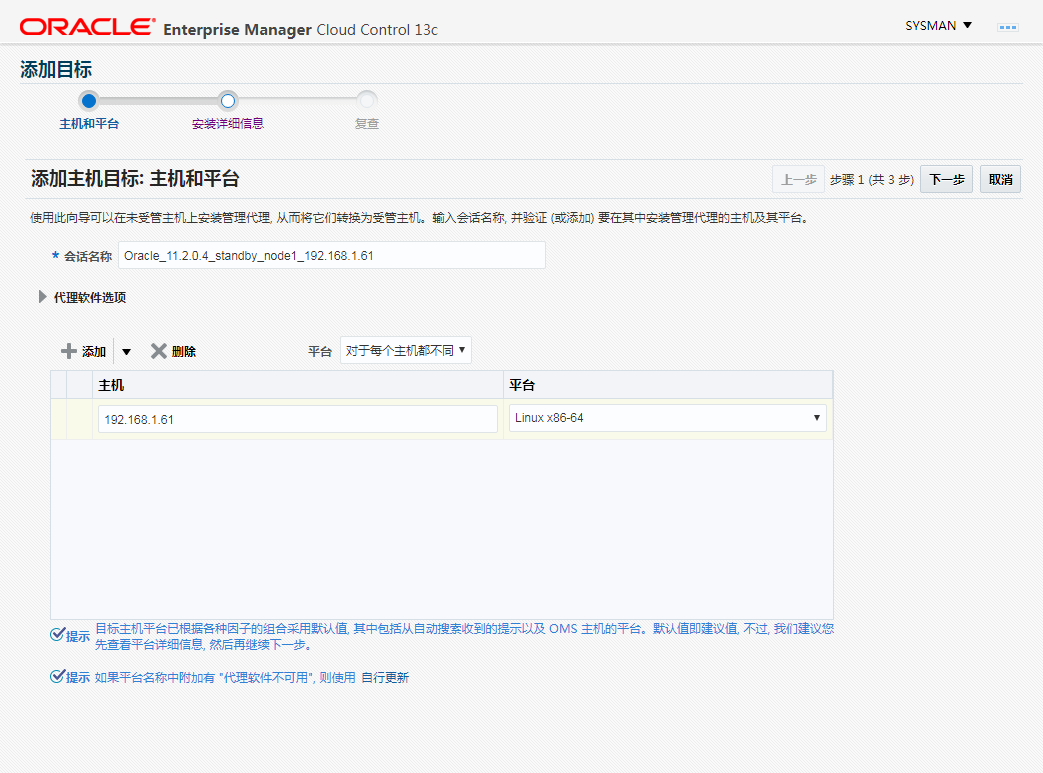


最后就可以在 OEMCC 上直观看到该主机的相关监控数据:
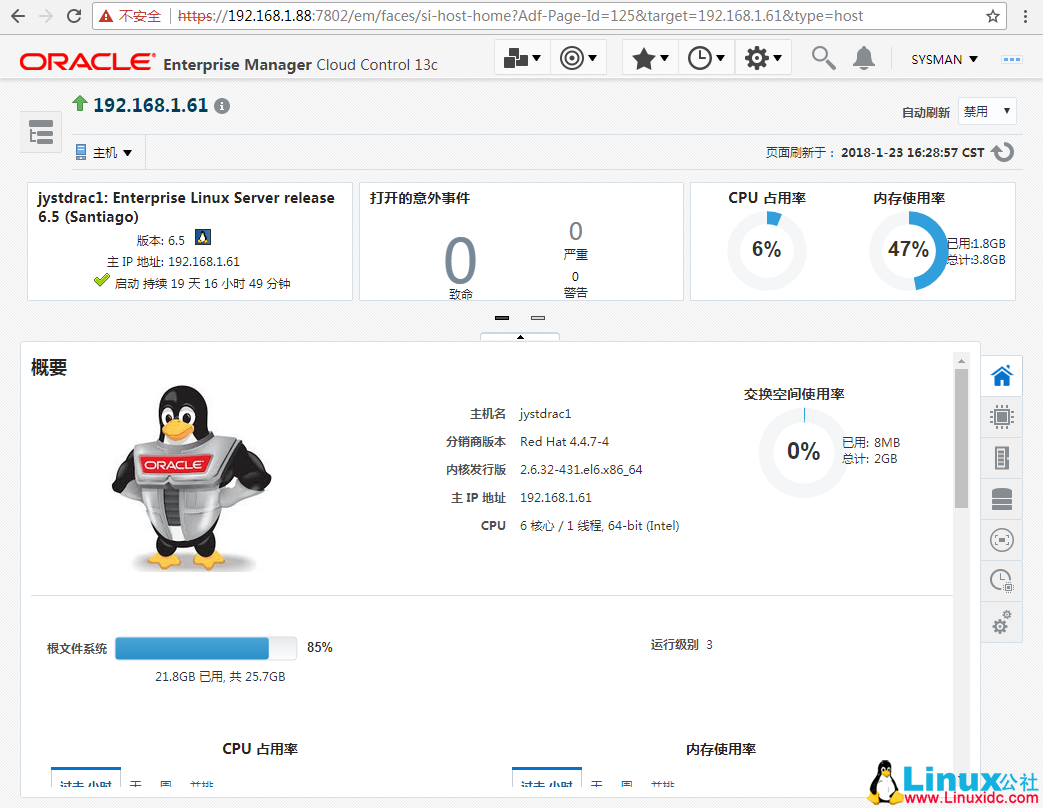
至此,我们就熟悉了 OEMCC 13.2 的整体安装、部署、配置 agent 等基本操作,后续就可以在这个环境下逐渐深入学习并感受 OEMCC 的强大功能了。
更多 Oracle 相关信息见Oracle 专题页面 http://www.linuxidc.com/topicnews.aspx?tid=12
本文永久更新链接地址:http://www.linuxidc.com/Linux/2018-01/150537.htm


