共计 4764 个字符,预计需要花费 12 分钟才能阅读完成。
1. 前言
WebLogic 是美国 Oracle 公司出品的一个 application server,确切的说是一个基于 JavaEE 架构的中间件,WebLogic 是用于开发、集成、部署和管理大型分布式 Web 应用、网络应用和数据库应用的 Java 应用服务器。将 Java 的动态功能和 Java Enterprise 标准的安全性引入大型网络应用的开发、集成、部署和管理之中。
我相信刚刚接触 weblogic 的部署很多人都会遇到很多坑,我也不例外,遇到很多坑,最后才总结出来,希望能给你们带来帮助!!!
2. 准备环境
操作系统:CentOS 7
Weblogic 版本:fmw_12.1.3.0.0_wls.jar
JAVA 版本:jdk-7u75-linux-x64.tar.gz
3. 创建用户
groupadd weblogic
useradd weblogic -g weblogic
添加用户密码:
echo “weblogic” | passwd –stdin weblogic
4. 安装 JAVA 环境
创建 weblogic 安装目录:mkdir /bea
授权:chown weblogic:weblogic /bea
上传 jdk-7u75-linux-x64.tar.gz 至 /home/weblogic 目录下
解压至 /usr/local/ 目录下
tar –zxvf jdk-7u75-linux-x64.tar.gz –C /usr/local
添加环境变量:vim /etc/profile
export JAVA_HOME=/usr/local/jdk1.7.0_75
export JRE_HOME=/usr/local/jdk1.7.0_75/jre
export CLASSPATH=.:$JAVA_HOME/lib:$JRE_HOME/lib:$CLASSPATH
export PATH=$JAVA_HOME/bin:$JRE_HOME/bin:$PATH
export ORACLE_HOME=/bea
使其环境变量生效:source /etc/profile
验证 JAVA 是否安装成功:java –version

5. 创建安装配置文件
cd /home/weblogic
创建响应文件 wls.rsp
响应文件中的项一定要写全,否则会报奇怪的错误。
[ENGINE]
#DO NOT CHANGE THIS.
Response File Version=1.0.0.0.0
[GENERIC]
#The oracle home location. This can be an existing Oracle Home or a new Oracle Home
ORACLE_HOME=/bea
#Set this variable value to the Installation Type selected. e.g. WebLogic Server, Coherence, Complete with Examples.
INSTALL_TYPE=WebLogic Server
#Provide the My Oracle Support Username. If you wish to ignore Oracle Configuration Manager configuration provide empty string for user name.
MYORACLESUPPORT_USERNAME=
#Provide the My Oracle Support Password
MYORACLESUPPORT_PASSWORD=<SECURE VALUE>
DECLINE_SECURITY_UPDATES=true
#Set this to true if My Oracle Support Password is specified
SECURITY_UPDATES_VIA_MYORACLESUPPORT=false
#Provide the Proxy Host
PROXY_HOST=
#Provide the Proxy Port
PROXY_PORT=
#Provide the Proxy Username
PROXY_USER=
#Provide the Proxy Password
PROXY_PWD=<SECURE VALUE>
COLLECTOR_SUPPORTHUB_URL=
创建 Loc 文件 oraInst.loc
inventory_loc=/home/weblogic/oraInventory
# 用户的组名称,根据实际的修改
inst_group=weblogic
6. 安装 weblogic
cd /home/weblogic
授权:chown weblogic:weblogic fmw_12.1.3.0.0_wls.jar
切换 weblogic 用户:su – weblogic
java -jar fmw_12.1.3.0.0_wls.jar -silent -responseFile /home/weblogic/wls.rsp -invPtrLoc /home/weblogic/oraInst.loc
安装过程:
启动程序日志文件为 /tmp/OraInstall2016-05-13_01-02-56PM/launcher2016-05-13_01-02-56PM.log。正在提取文件 ………
启动 Oracle Universal Installer
检查 CPU 速度是否大于 300 MHz。实际为 2400.217 MHz 通过
检查交换空间: 必须大于 512 MB。实际为 18513912 MB 通过
检查此平台是否需要 64 位 JVM。实际为 64 通过 (不需要 64 位)
检查临时空间: 必须大于 300 MB。实际为 36518 MB 通过 准备从 /tmp/OraInstall2016-05-13_01-02-56PM 启动 Oracle Universal Installer 日志:/tmp/OraInstall2016-05-13_01-02-56PM/install2016-05-13_01-02-56PM.log 版权所有 (c) 1996, 2014, Oracle 和 / 或其附属公司。保留所有权利。
正在读取响应文件 … 开始检查: CertifiedVersions 预期的结果: enterprise-4,enterprise-5,enterprise-6,RedHat-6,redhat-4,redhat-5,SUSE-11 之一 实际结果: unkown()
此次检查的总体结果为: 通过 CertifiedVersions 检查: 成功。
开始检查: CheckJDKVersion 预期的结果: 1.7.0_15 实际结果: 1.7.0_80
检查完成。此次检查的总体结果为: 通过 CheckJDKVersion 检查: 成功。
已启用此会话的验证。正在验证数据 … 正在复制文件 … 可以在以下位置找到本次安装会话的日志: /tmp/OraInstall2016-05-13_01-02-56PM/install2016-05-13_01-02-56PM.log ———–20%———-40%———-60%———-80%——–100%
Oracle Fusion Middleware 12c WebLogic Server 和 Coherence 12.1.3.0.0 的 安装 已成功完成。
日志已成功复制到 /home/weblogic/oraInventory/logs。
7. 创建域
导入环境变量:
export MW_HOME=”/bea”
export WL_HOME=”/bea/oracle_common”
进入目录:cd /bea/wlserver/common/bin
./commEnv.sh #设置环境变量
方法一:
直接运行:./wlst.sh
Initializing WebLogic Scripting Tool (WLST) … Welcome to WebLogic Server Administration Scripting Shell Type help() for help on available commands wls:/offline>readTemplate(‘/bea/wlserver/common/templates/wls/wls.jar’)
wls:/offline/base_domain>cd(‘Servers/AdminServer’)
wls:/offline/base_domain/Server/AdminServer>set(‘ListenAddress’,”)
wls:/offline/base_domain/Server/AdminServer>set(‘ListenPort’,7001)
wls:/offline/base_domain/Server/AdminServer>cd(‘../..’)
wls:/offline/base_domain>cd(‘Security/base_domain/User/weblogic’)
wls:/offline/base_domain/Security/base_domain/User/weblogic>cmo.setPassword(‘weblogic123’) wls:/offline/base_domain/Security/base_domain/User/weblogic>setOption(‘OverwriteDomain’,’true’) wls:/offline/base_domain/Security/base_domain/User/weblogic>writeDomain(‘/bea/user_projects/domains/servyou_domain’)
closeTemplate()
exit()
这一步的时间比较长一点,耐心等待……
方法二:
进入目录:cd /bea/wlserver/common/bin
vim create_domain.py
create_domain.py
readTemplate(‘/bea/wlserver/common/templates/wls/wls.jar’)
cd(‘Servers/AdminServer’)
set(‘ListenAddress’,”)
set(‘ListenPort’,7001)
cd(‘../..’)
cd(‘Security/base_domain/User/weblogic’)
cmo.setPassword(‘weblogic123’)
setOption(‘OverwriteDomain’,’true’)
writeDomain(‘/bea/user_projects/domains/servyou_domain’)
closeTemplate()
exit()
执行:./wlst.sh ./create_domain.py
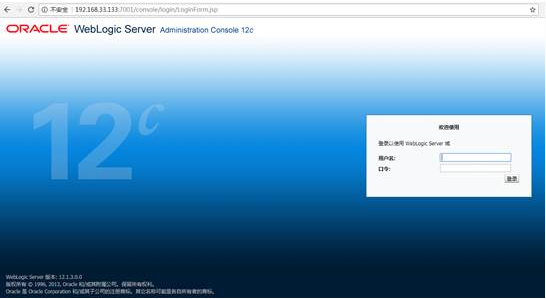
8. 启动 weblogic
cd /bea/user_projects/domains/servyou_domain
./startWeblogic.sh
或者 nohup startWeblogic.sh > note.log & tail -f note.log

修改 Weblogic 默认的 SERVER NAME
步骤:
1 重命名..\ 你的域名 \servers 下 AdminServer 文件夹。
2 将..\ 你的域名 \config\config.xml 中所有的 AdminServer 修改成新名称,与第 1 步中一致。
3 编辑..\ 你的域名 \bin 下 setDomainEnv.cmd(setDomainEnv.sh),找到
set SERVER_NAME=AdminServer 并修改。
4 重启服务。
更多 Oracle 相关信息见Oracle 专题页面 https://www.linuxidc.com/topicnews.aspx?tid=12
:


