共计 1314 个字符,预计需要花费 4 分钟才能阅读完成。
1. 用 Nacos 实现 ” 配置中心 ”
1.1 创建配置客户端工程,添加依赖
| <dependency> | |
| <groupId>org.springframework.boot</groupId> | |
| <artifactId>spring-boot-starter-web</artifactId> | |
| </dependency> | |
| <dependency> | |
| <groupId>com.alibaba.cloud</groupId> | |
| <artifactId>spring-cloud-starter-alibaba-nacos-config</artifactId> | |
| </dependency> |
1.2 添加配置信息
步骤 :
1 添加 bootstrap.properties 文件, 在文件中添加 Nacos 配置中心的地址
| spring.cloud.nacos.config.server-addr=127.0.0.1:8848 | |
| mysql.address=''mysql.port='' |
2 在 application.properties 中添加配置中心的名称、端口号等信息
| spring.application.name=config-example | |
| # 应用服务 WEB 访问端口 | |
| server.port=8088 | |
| #设置日志级别 | |
| logging.level.root=info |
1.3 创建测试类
| public class SampleController { | |
| String mysqlAddress; | |
| String mysqlPort; | |
| public String get(){return mysqlAddress+mysqlPort; | |
| } | |
| } |
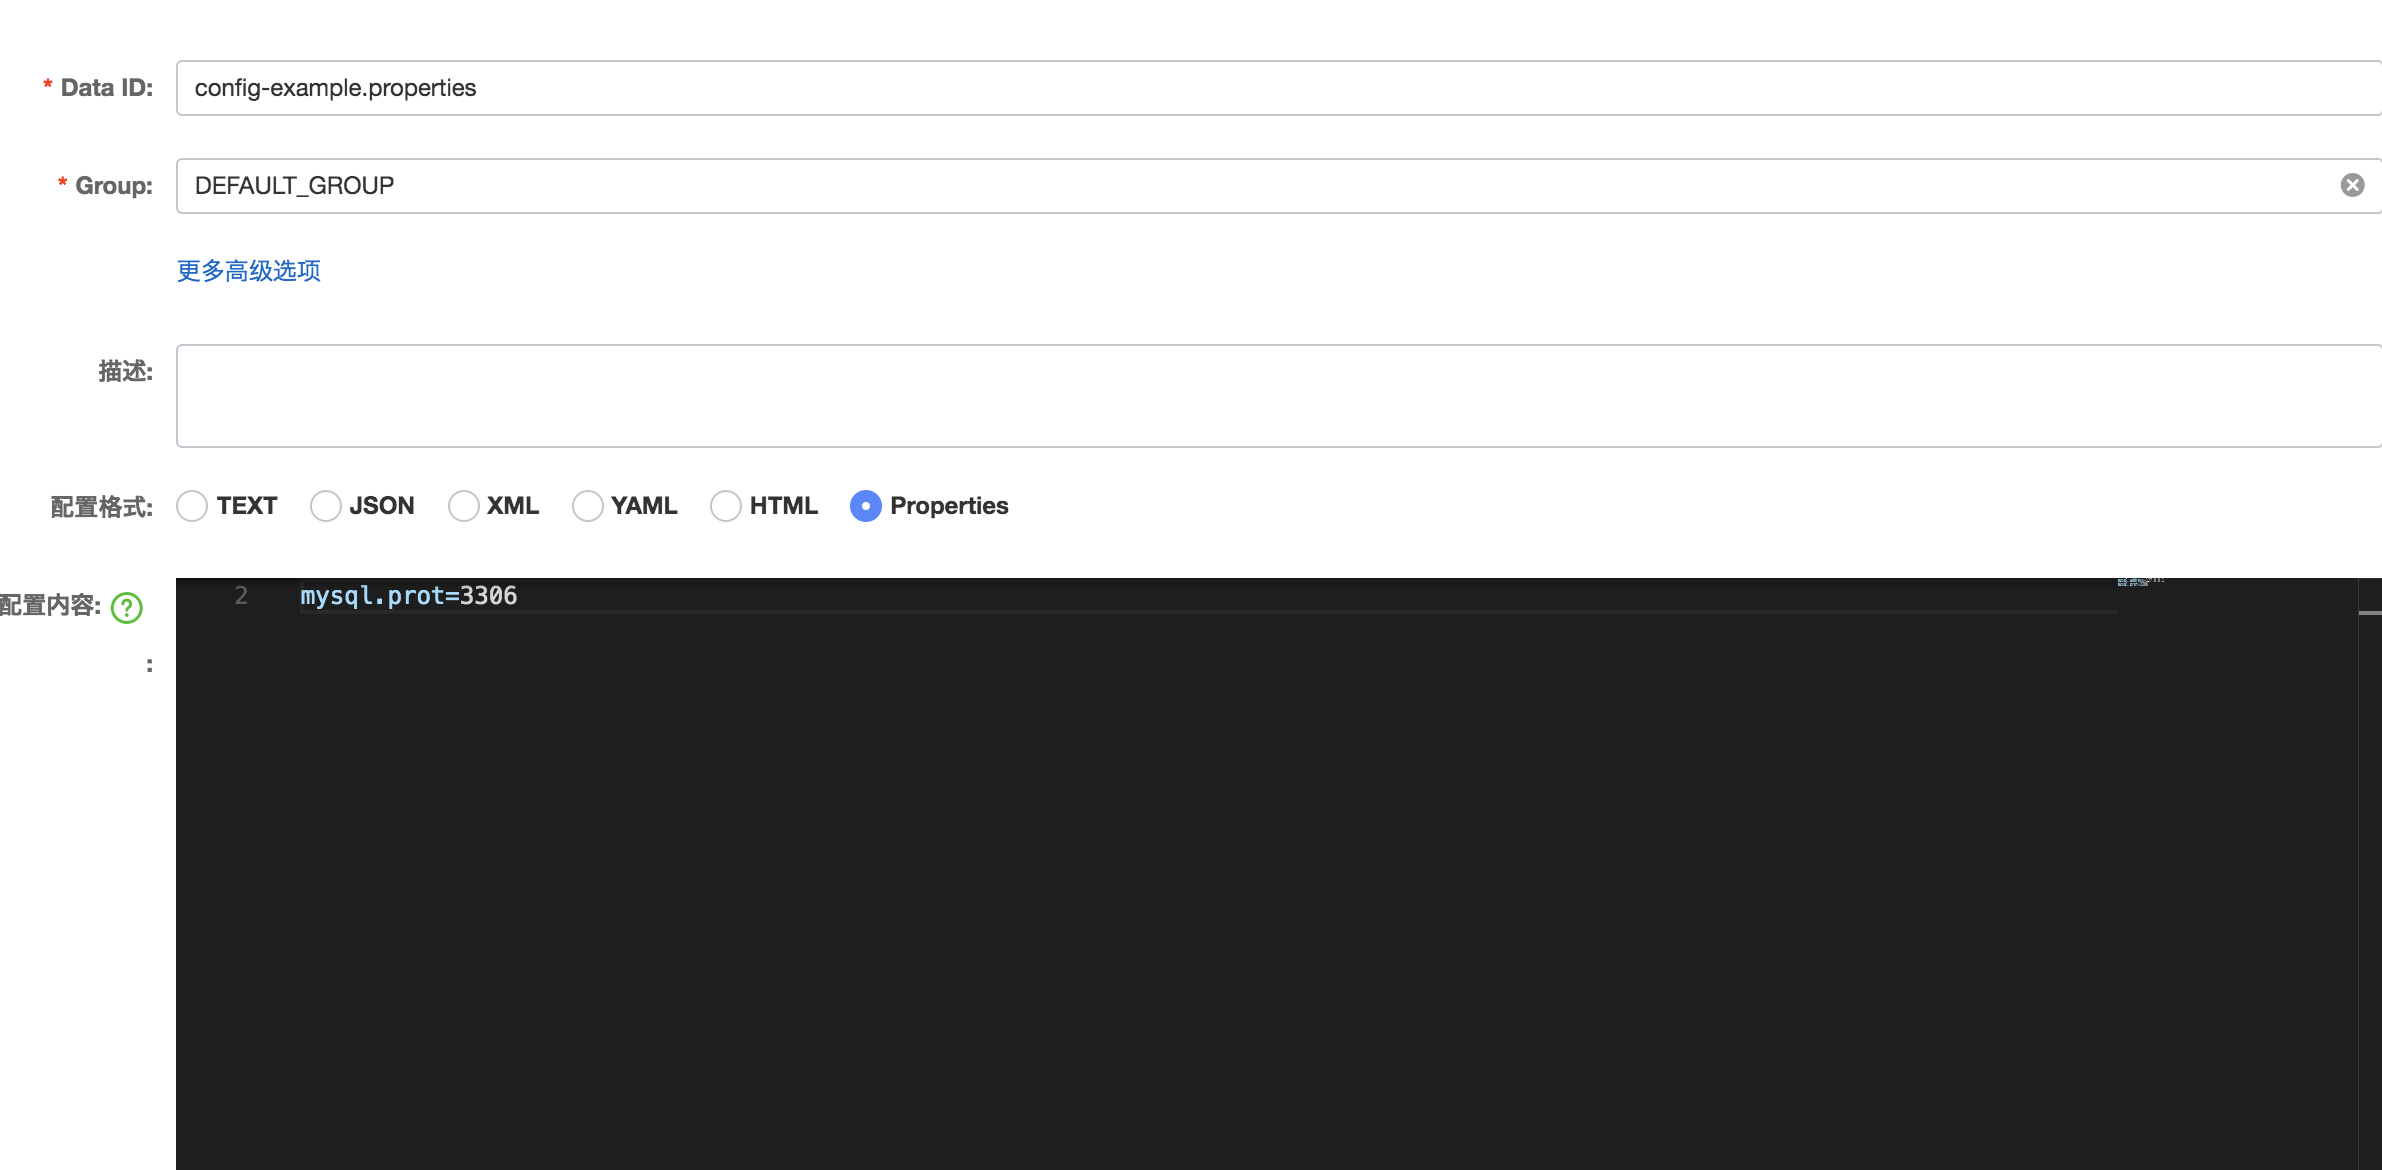
1.4 在 Nacos 控制台中添加配置
步骤:
1. 启动项目,在控制台显示
c.a.c.n.c.NacosPropertySourceBuilder : Ignore the empty nacos configuration and get it based on dataId[config-example.properties] & group[DEFAULT_GROUP]
2. 根据这个信息,在 Nacos 的配置管理里添加配置

1.5 测试动态刷新
步骤:
1. 启动项目,访问 http://localhost:8089/getProperties 即可获取到配置在配置中心的配置
2. 在 Controller 类中添加注解 @RefreshScope
3. 重启项目
4. 访问 http://localhost:8080/getProperties , 获取到配置信息
5. 在 Nacos 配置中心中修改配置内容
6. 再次访问 http://localhost:8089/getProperties
1.6 测试配置回滚
步骤:
1. 在控制中心的配置列表中,单击 Data Id 为 ”config-example.properties” 后面的操作栏的更多
2. 在弹出的按钮中单击 ” 历史版本 ” 按钮
3. 在弹出的界面中选中相应的版本, 单击 ” 回滚 ” 按钮
4. 在弹出的界面中单击 ” 确认 ” 按钮回滚到历史版本
正文完
星哥玩云-微信公众号


