共计 22426 个字符,预计需要花费 57 分钟才能阅读完成。
通过 Cobbler 可以用来快速建立 Linux 网络安装环境。
一、安装 cobbler 软件
网络环境及安装计划
网关服务器:硬件路由,192.168.88.2
域名服务器:dnsmasq 程序,192.168.88.253
DHCP 服务器:dnsmasq 程序,192.168.88.253 动态地址范围 192.168.88.100-254
tFTP 服务器:tfpd-hpa 程序,192.168.88.253
cobbler 服务器:192.168.88.253
1. 安装 cobbler 和 cobbler-web
其中 cobbler-web,是 cobbler 的 web 接口,可以通过它来使 cobbler 操作形象。
# sudo apt-get install cobbler cobbler-web
建议把 debmirror 和 createrepo 也一并安装好了。其中 debmirror 是用来建立 Debinan 系统镜像源的工具,而 createrepo 是用来建立 RedHat 系列镜像源的工具。
安装完成后,cobbler 和 apache 的服务都会启动。
2. 检查安装 cobbler 结果
在这里我用 curl 小工具来测试
# curl -I 192.168.88.253/cobbler/
HTTP/1.1 200 OK
Date: Fri, 01 Nov 2013 19:24:07 GMT
Server: Apache/2.2.22 (Ubuntu)
Vary: Accept-Encoding
Content-Type: text/html;charset=UTF-8
返回 200OK 就说明工作正常了。
3. 初步配置 cobbler
3.1 检查配置是否正确
运行 cobbler check 检查配置
# sudo cobbler check
The following are potential configuration items that you may want to fix:
1 : debmirror package is not installed, it will be required to manage debian deployments and repositories
Restart cobblerd and then run ‘cobbler sync’ to apply changes.
根据上面的提示修复错误。
# sudo apt-get install debmirror
同时配置 debmirror
生成 /etc/debmirror.conf 配置文件
# cp /usr/share/doc/debmirror/examples/debmirror.conf /etc/
修改 /etc/debmirror.conf 配置文件
注释掉 @dists 和 @arches 两行
# vi /etc/debmirror.conf
…
#@dists=”sid”;
@sections=”main,main/debian-installer,contrib,non-free”;
#@arches=”i386″;
…
使配置生效
# sudo cobbler sync
task started: 2013-11-02_033214_sync
task started (id=Sync, time=Sat Nov 2 03:32:14 2013)
running pre-sync triggers
cleaning trees
mkdir: /var/lib/tftpboot/pxelinux.cfg
mkdir: /var/lib/tftpboot/grub
mkdir: /var/lib/tftpboot/images
mkdir: /var/lib/tftpboot/s390x
mkdir: /var/www/cobbler/rendered
mkdir: /var/lib/tftpboot/ppc
mkdir: /var/lib/tftpboot/etc
removing: /var/lib/tftpboot/grub/images
copying bootloaders
trying hardlink /usr/lib/syslinux/pxelinux.0 -> /var/lib/tftpboot/pxelinux.0
trying hardlink /usr/lib/syslinux/menu.c32 -> /var/lib/tftpboot/menu.c32
trying hardlink /usr/lib/syslinux/chain.c32 -> /var/lib/tftpboot/chain.c32
trying hardlink /boot/memtest86+_multiboot.bin -> /var/lib/tftpboot/images/memtest86+_multiboot.bin
trying hardlink /boot/memtest86+.bin -> /var/lib/tftpboot/images/memtest86+.bin
trying hardlink /usr/lib/syslinux/memdisk -> /var/lib/tftpboot/memdisk
copying distros to tftpboot
copying images
generating GPXE/PXE configuration files
generating PXE menu structure
rendering TFTPD files
generating /etc/xinetd.d/tftp
cleaning link caches
running post-sync triggers
running Python triggers from /var/lib/cobbler/triggers/sync/post/*
running python trigger cobbler.modules.sync_post_restart_services
running shell triggers from /var/lib/cobbler/triggers/sync/post/*
running python triggers from /var/lib/cobbler/triggers/change/*
running python trigger cobbler.modules.scm_track
running shell triggers from /var/lib/cobbler/triggers/change/*
*** TASK COMPLETE ***
重新检查配置
# sudo cobbler check
No configuration problems found. All systems go.
4. 配置 cobbler web
安装好 cobbler web 后,默认的访问信息如下,
URL:http://<Chostname>/cobbler_web
用户名:cobbler
密码:cobbler
apache 配置文件:/etc/apache2/conf.d/cobbler_web.conf
出于安全考虑,可以通过 htdigest 命令来修改用户 cobbler 的密码。
# htdigest /etc/cobbler/users.digest “Cobbler” cobbler
Changing password for user cobbler in realm Cobbler
New password:
Re-type new password:
使配置生效
以后我们也可以随时通过 cobbler sync 来重新加载配置文件。
# cobbler sync
task started: 2013-11-02_034250_sync
task started (id=Sync, time=Sat Nov 2 03:42:50 2013)
running pre-sync triggers
cleaning trees
removing: /var/lib/tftpboot/pxelinux.cfg/default
removing: /var/lib/tftpboot/grub/images
removing: /var/lib/tftpboot/grub/efidefault
removing: /var/lib/tftpboot/images/memtest86+_multiboot.bin
removing: /var/lib/tftpboot/images/memtest86+.bin
removing: /var/lib/tftpboot/s390x/profile_list
copying bootloaders
trying hardlink /boot/memtest86+_multiboot.bin -> /var/lib/tftpboot/images/memtest86+_multiboot.bin
trying hardlink /boot/memtest86+.bin -> /var/lib/tftpboot/images/memtest86+.bin
copying distros to tftpboot
copying images
generating GPXE/PXE configuration files
generating PXE menu structure
rendering TFTPD files
generating /etc/xinetd.d/tftp
cleaning link caches
running post-sync triggers
running python triggers from /var/lib/cobbler/triggers/sync/post/*
running python trigger cobbler.modules.sync_post_restart_services
running shell triggers from /var/lib/cobbler/triggers/sync/post/*
running python triggers from /var/lib/cobbler/triggers/change/*
running python trigger cobbler.modules.scm_track
running shell triggers from /var/lib/cobbler/triggers/change/*
*** TASK COMPLETE ***
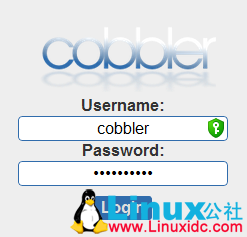
cobbler web 登录界面

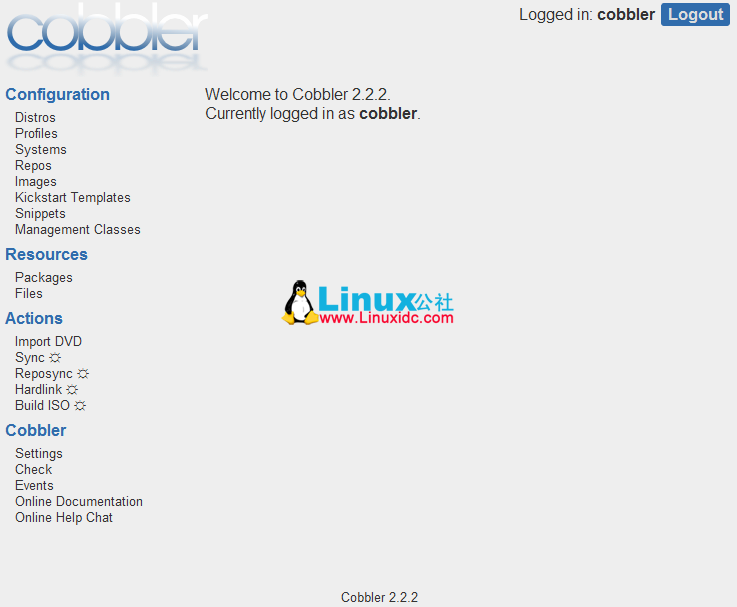
cobbler web 界面

更多详情见请继续阅读下一页的精彩内容:http://www.linuxidc.com/Linux/2013-11/92573p2.htm
相关阅读:
Linux 运维工程师笔试题 http://www.linuxidc.com/Linux/2013-09/90621.htm
运维自动化之 Cobbler 安装配置 http://www.linuxidc.com/Linux/2013-03/81575.htm
RHEL5.5 下 Cobbler 的配置 http://www.linuxidc.com/Linux/2013-06/86115.htm
运维自动化部署 Cobbler 之服务安装篇 http://www.linuxidc.com/Linux/2013-02/80133.htm
利用 Cobbler 批量快速网络安装 CentOS http://www.linuxidc.com/Linux/2012-12/75838.htm
CentOS 6.3 上安装部署 Cobbler http://www.linuxidc.com/Linux/2012-10/72094.htm
DNSmasq 的详细介绍:请点这里
DNSmasq 的下载地址:请点这里
Ubuntu 10.10 下 DNSmasq 和 Named 似有冲突 http://www.linuxidc.com/Linux/2010-12/30338.htm
Ubuntu 8.10 下使用 DNSmasq 提供 DNS 和 DHCP 服务 http://www.linuxidc.com/Linux/2008-12/17589.htm
用 DNSmasq 搭建小型的内网 DNS http://www.linuxidc.com/Linux/2013-04/82073.htm
二、安装和配置 dnsmasq 和 tftpd-hpa
1. 安装 dnsmasq 和 tftpd-hpa
1.1 安装 dnsmasq
dnsmasq 是一个轻量级的 tFTP、DHCP、PXE 和 DNS 服务器。其中 PXE、DHCP 和 tFTP 服务是 PXE 网卡网络启动安装程序所必须的。我们在这里使用它提供 DHCP 和 DNS 服务。
# apt-get install dnsmasq
1.2 安装 tftpd-hpa
tfpd-hpa 是另外一个 tFTP 服务器。我们用 tftpd-hpa 来提供 tFTP 服务。
# apt-get install tftpd-hpa
2 配置 cobbler 接管 dnsmasq 和 tftpd-hpa
cobbler 本身具备管理 dnsmasq 和 tftpd-hpa 的功能。所以我们只需要配置 cobbler 就可以了。
2.1 配置 cobbler 接管 DHCP、DNS 和 tFTP 服务
修改配置文件 /etc/cobbler/settings
需修改和修改后的值如下:
manage_dhcp: 1
manage_dns: 1
manage_tftpd: 1
restart_dhcp: 1
restart_dns: 1
pxe_just_once: 1
next_server: <server’s IP address>
server: <server’s IP address>
修改后:
# egrep -v ‘^#|^$’ /etc/cobbler/settings
—
allow_duplicate_hostnames: 0
allow_duplicate_ips: 0
allow_duplicate_macs: 0
anamon_enabled: 0
build_reporting_enabled: 0
build_reporting_sender: “”
build_reporting_email: [‘root@localhost’]
build_reporting_smtp_server: “localhost”
build_reporting_subject: “”
cheetah_import_whitelist:
– “random”
– “re”
– “time”
– “orchestra”
createrepo_flags: “-c cache -s sha”
default_kickstart: /var/lib/cobbler/kickstarts/Ubuntu-server.preseed
default_name_servers: []
default_ownership:
– “admin”
default_password_crypted: “”
default_virt_bridge: virbr0
default_virt_file_size: 5
default_virt_ram: 512
default_virt_type: qemu
enable_menu: 1
func_auto_setup: 0
func_master: overlord.example.org
http_port: 80
kernel_options:
ksdevice: bootif
lang: ‘ ‘
text: ~
locale: en_US
priority: critical
kernel_options_s390x:
RUNKS: 1
ramdisk_size: 40000
root: /dev/ram0
ro: ~
ip: off
vnc: ~
ldap_server: “ldap.example.com”
ldap_base_dn: “DC=example,DC=com”
ldap_port: 389
ldap_tls: 1
ldap_anonymous_bind: 1
ldap_search_bind_dn: ”
ldap_search_passwd: ”
ldap_search_prefix: ‘uid=’
mgmt_classes: []
mgmt_parameters:
from_cobbler: 1
puppet_auto_setup: 0
sign_puppet_certs_automatically: 0
puppetca_path: “/usr/sbin/puppetca”
remove_old_puppet_certs_automatically: 0
manage_dhcp: 1
manage_dns: 1
manage_tftpd: 1
manage_rsync: 0
manage_forward_zones: []
manage_reverse_zones: []
next_server: 192.168.88.253
power_management_default_type: ‘ether_wake’
power_template_dir: “/etc/cobbler/power”
pxe_just_once: 1
pxe_template_dir: “/etc/cobbler/pxe”
consoles: “/var/consoles”
RedHat_management_type: “off”
redhat_management_server: “xmlrpc.rhn.redhat.com”
redhat_management_key: “”
redhat_management_permissive: 0
register_new_installs: 0
reposync_flags: “-l -m -d”
restart_dns: 1
restart_dhcp: 1
run_install_triggers: 1
scm_track_enabled: 0
scm_track_mode: “git”
server: 192.168.88.253
snippetsdir: /var/lib/cobbler/snippets
template_remote_kickstarts: 0
use_gpxe: 0
virt_auto_boot: 1
webdir: /var/www/cobbler
xmlrpc_port: 25151
yum_post_install_mirror: 1
yum_distro_priority: 1
2.2 指定接管的 DHCP、DNS 和 tFTP 服务器类型
修改配置文件 /etc/cobbler/modules.conf
修改后
# egrep -v ‘^#|^[\t]*$’ /etc/cobbler/modules.conf
[authentication]
module = authn_configfile
[authorization]
module = authz_allowall
[dns]
module = manage_dnsmasq # uses dnsmasq
[dhcp]
module = manage_dnsmasq # uses dnsmasq
[tftpd]
module = manage_in_tftpd # defaut, uses the system’s tftp server, in this example, use tftpd-hpa
3 配置 DHCP、DNS、tFTP 服务
由于我们配置了 cobbler 接管 DHCP、DNS 和 tFTP 服务,所以我们不需要单独修改 dnsmasq 和 tftpd-hpa 的配置文件,只需要修改 Cobbler 中 DHCP、DNS 和 tFTP 相应的配置模板即可。
Cobbler 会自动帮助我们做同步工作。
3.1 配置 DHCP 和 DNS 服务
3.1.1 修改配置
修改 /etc/cobbler/dnsmasq.template
修改后:
# Cobbler generated configuration file for dnsmasq
# $date
#
# resolve.conf .. ?
#no-poll
#enable-dbus
read-ethers
addn-hosts = /var/lib/cobbler/cobbler_hosts
#domain=
dhcp-range=192.168.88.100,192.168.88.254
dhcp-option=3,$next_server
dhcp-lease-max=1000
dhcp-authoritative
dhcp-boot=pxelinux.0
dhcp-boot=net:normalarch,pxelinux.0
dhcp-boot=net:ia64,$elilo
$insert_cobbler_system_definitions
3.1.2 同步配置
同步配置到 dnsmasq
# cobbler sync
3.2 配置 tFTP 服务
3.2.1 修改配置
修改配置文件 /etc/cobbler/tftpd.template
修改后:
# default: off
# description: The tftp server serves files using the trivial file transfer \
# protocol. The tftp protocol is often used to boot diskless \
# workstations, download configuration files to network-aware printers, \
# and to start the installation process for some operating systems.
service tftp
{
disable = no
socket_type = dgram
protocol = udp
wait = yes
user = $user
server = $binary
server_args = -B 1380 $args
per_source = 11
cps = 100 2
flags = IPv4
}
3.2.2 同步配置
同步配置到 tftp-hpa
# cobbler sync
4. 检查前边的操作
4.1 检查端口开放
# netstat -tunlp
Active Internet connections (only servers)
Proto Recv-Q Send-Q Local Address Foreign Address State PID/Program name
tcp 0 0 0.0.0.0:80 0.0.0.0:* LISTEN 7548/apache2
tcp 0 0 0.0.0.0:53 0.0.0.0:* LISTEN 8875/dnsmasq
tcp 0 0 0.0.0.0:22 0.0.0.0:* LISTEN 2217/sshd
tcp 0 0 127.0.0.1:3350 0.0.0.0:* LISTEN 1083/xrdp-sesman
tcp 0 0 0.0.0.0:3389 0.0.0.0:* LISTEN 1078/xrdp
tcp 0 0 127.0.0.1:25151 0.0.0.0:* LISTEN 8387/Python
tcp6 0 0 :::53 :::* LISTEN 8875/dnsmasq
tcp6 0 0 :::22 :::* LISTEN 2217/sshd
udp 0 0 0.0.0.0:53 0.0.0.0:* 8875/dnsmasq
udp 0 0 0.0.0.0:67 0.0.0.0:* 8875/dnsmasq
udp 0 0 0.0.0.0:69 0.0.0.0:* 7274/in.tftpd
udp 0 0 0.0.0.0:177 0.0.0.0:* 1213/lightdm
udp6 0 0 :::53 :::* 8875/dnsmasq
udp6 0 0 :::177 :::* 1213/lightdm
服务说明
80 Aapche 服务
53 dnsmasqt 程序的 dns 服务
67 dnsmasq 程序的 DHCP 服务
69 tftp-hpa 程序的 tftp 服务
25151 Apache2 的 cobbler-web 站点支持
4.2 检查 PXE 网络启动
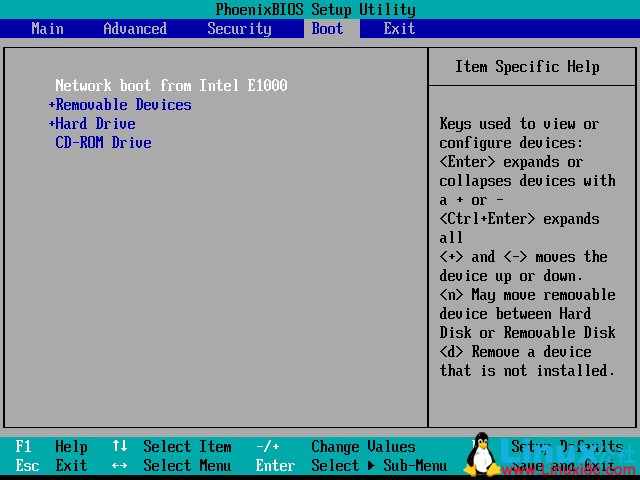
在与 cobbler 服务器同一个网络找一台机器,BIOS 调整从网络启动:

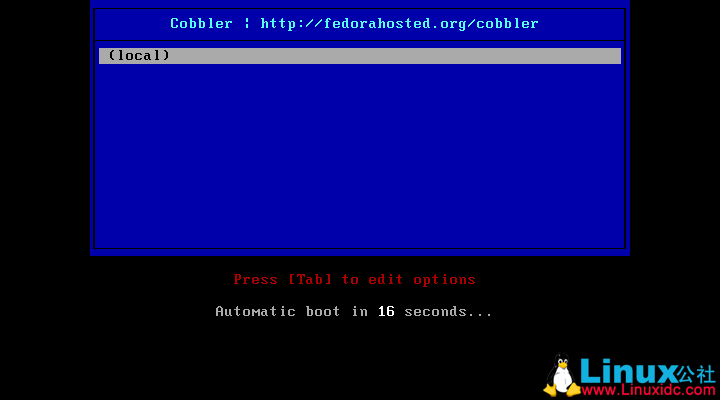
重新启动机器,正常情况下应该会进入 Cobbler 的网络启动菜单:

如果不能进入这个菜单,首先需要检查前边的步骤是否正确。还可以检查 cobbler 程序的日志。
通过 Cobbler 可以用来快速建立 Linux 网络安装环境。
一、安装 cobbler 软件
网络环境及安装计划
网关服务器:硬件路由,192.168.88.2
域名服务器:dnsmasq 程序,192.168.88.253
DHCP 服务器:dnsmasq 程序,192.168.88.253 动态地址范围 192.168.88.100-254
tFTP 服务器:tfpd-hpa 程序,192.168.88.253
cobbler 服务器:192.168.88.253
1. 安装 cobbler 和 cobbler-web
其中 cobbler-web,是 cobbler 的 web 接口,可以通过它来使 cobbler 操作形象。
# sudo apt-get install cobbler cobbler-web
建议把 debmirror 和 createrepo 也一并安装好了。其中 debmirror 是用来建立 Debinan 系统镜像源的工具,而 createrepo 是用来建立 RedHat 系列镜像源的工具。
安装完成后,cobbler 和 apache 的服务都会启动。
2. 检查安装 cobbler 结果
在这里我用 curl 小工具来测试
# curl -I 192.168.88.253/cobbler/
HTTP/1.1 200 OK
Date: Fri, 01 Nov 2013 19:24:07 GMT
Server: Apache/2.2.22 (Ubuntu)
Vary: Accept-Encoding
Content-Type: text/html;charset=UTF-8
返回 200OK 就说明工作正常了。
3. 初步配置 cobbler
3.1 检查配置是否正确
运行 cobbler check 检查配置
# sudo cobbler check
The following are potential configuration items that you may want to fix:
1 : debmirror package is not installed, it will be required to manage debian deployments and repositories
Restart cobblerd and then run ‘cobbler sync’ to apply changes.
根据上面的提示修复错误。
# sudo apt-get install debmirror
同时配置 debmirror
生成 /etc/debmirror.conf 配置文件
# cp /usr/share/doc/debmirror/examples/debmirror.conf /etc/
修改 /etc/debmirror.conf 配置文件
注释掉 @dists 和 @arches 两行
# vi /etc/debmirror.conf
…
#@dists=”sid”;
@sections=”main,main/debian-installer,contrib,non-free”;
#@arches=”i386″;
…
使配置生效
# sudo cobbler sync
task started: 2013-11-02_033214_sync
task started (id=Sync, time=Sat Nov 2 03:32:14 2013)
running pre-sync triggers
cleaning trees
mkdir: /var/lib/tftpboot/pxelinux.cfg
mkdir: /var/lib/tftpboot/grub
mkdir: /var/lib/tftpboot/images
mkdir: /var/lib/tftpboot/s390x
mkdir: /var/www/cobbler/rendered
mkdir: /var/lib/tftpboot/ppc
mkdir: /var/lib/tftpboot/etc
removing: /var/lib/tftpboot/grub/images
copying bootloaders
trying hardlink /usr/lib/syslinux/pxelinux.0 -> /var/lib/tftpboot/pxelinux.0
trying hardlink /usr/lib/syslinux/menu.c32 -> /var/lib/tftpboot/menu.c32
trying hardlink /usr/lib/syslinux/chain.c32 -> /var/lib/tftpboot/chain.c32
trying hardlink /boot/memtest86+_multiboot.bin -> /var/lib/tftpboot/images/memtest86+_multiboot.bin
trying hardlink /boot/memtest86+.bin -> /var/lib/tftpboot/images/memtest86+.bin
trying hardlink /usr/lib/syslinux/memdisk -> /var/lib/tftpboot/memdisk
copying distros to tftpboot
copying images
generating GPXE/PXE configuration files
generating PXE menu structure
rendering TFTPD files
generating /etc/xinetd.d/tftp
cleaning link caches
running post-sync triggers
running Python triggers from /var/lib/cobbler/triggers/sync/post/*
running python trigger cobbler.modules.sync_post_restart_services
running shell triggers from /var/lib/cobbler/triggers/sync/post/*
running python triggers from /var/lib/cobbler/triggers/change/*
running python trigger cobbler.modules.scm_track
running shell triggers from /var/lib/cobbler/triggers/change/*
*** TASK COMPLETE ***
重新检查配置
# sudo cobbler check
No configuration problems found. All systems go.
4. 配置 cobbler web
安装好 cobbler web 后,默认的访问信息如下,
URL:http://<Chostname>/cobbler_web
用户名:cobbler
密码:cobbler
apache 配置文件:/etc/apache2/conf.d/cobbler_web.conf
出于安全考虑,可以通过 htdigest 命令来修改用户 cobbler 的密码。
# htdigest /etc/cobbler/users.digest “Cobbler” cobbler
Changing password for user cobbler in realm Cobbler
New password:
Re-type new password:
使配置生效
以后我们也可以随时通过 cobbler sync 来重新加载配置文件。
# cobbler sync
task started: 2013-11-02_034250_sync
task started (id=Sync, time=Sat Nov 2 03:42:50 2013)
running pre-sync triggers
cleaning trees
removing: /var/lib/tftpboot/pxelinux.cfg/default
removing: /var/lib/tftpboot/grub/images
removing: /var/lib/tftpboot/grub/efidefault
removing: /var/lib/tftpboot/images/memtest86+_multiboot.bin
removing: /var/lib/tftpboot/images/memtest86+.bin
removing: /var/lib/tftpboot/s390x/profile_list
copying bootloaders
trying hardlink /boot/memtest86+_multiboot.bin -> /var/lib/tftpboot/images/memtest86+_multiboot.bin
trying hardlink /boot/memtest86+.bin -> /var/lib/tftpboot/images/memtest86+.bin
copying distros to tftpboot
copying images
generating GPXE/PXE configuration files
generating PXE menu structure
rendering TFTPD files
generating /etc/xinetd.d/tftp
cleaning link caches
running post-sync triggers
running python triggers from /var/lib/cobbler/triggers/sync/post/*
running python trigger cobbler.modules.sync_post_restart_services
running shell triggers from /var/lib/cobbler/triggers/sync/post/*
running python triggers from /var/lib/cobbler/triggers/change/*
running python trigger cobbler.modules.scm_track
running shell triggers from /var/lib/cobbler/triggers/change/*
*** TASK COMPLETE ***
cobbler web 登录界面

cobbler web 界面

更多详情见请继续阅读下一页的精彩内容:http://www.linuxidc.com/Linux/2013-11/92573p2.htm
相关阅读:
Linux 运维工程师笔试题 http://www.linuxidc.com/Linux/2013-09/90621.htm
运维自动化之 Cobbler 安装配置 http://www.linuxidc.com/Linux/2013-03/81575.htm
RHEL5.5 下 Cobbler 的配置 http://www.linuxidc.com/Linux/2013-06/86115.htm
运维自动化部署 Cobbler 之服务安装篇 http://www.linuxidc.com/Linux/2013-02/80133.htm
利用 Cobbler 批量快速网络安装 CentOS http://www.linuxidc.com/Linux/2012-12/75838.htm
CentOS 6.3 上安装部署 Cobbler http://www.linuxidc.com/Linux/2012-10/72094.htm
DNSmasq 的详细介绍:请点这里
DNSmasq 的下载地址:请点这里
Ubuntu 10.10 下 DNSmasq 和 Named 似有冲突 http://www.linuxidc.com/Linux/2010-12/30338.htm
Ubuntu 8.10 下使用 DNSmasq 提供 DNS 和 DHCP 服务 http://www.linuxidc.com/Linux/2008-12/17589.htm
用 DNSmasq 搭建小型的内网 DNS http://www.linuxidc.com/Linux/2013-04/82073.htm
三、导入操作系统源
1 导入操作系统
这里提供三个范例,Ubuntu、CentOS 和 Fedora,实际上通过额外的设定,Unix 和 Windows 也可以导入。
1.1 导入 Ubuntu Server 12.04
光盘已自动挂载到了这个目录,/media/Ubuntu-Server\ 12.04\ LTS\ amd64/,可以通过 cobbler import 命令把光盘导入 cobbler 站点。
# cobbler import –path=/media/Ubuntu-Server\ 12.04\ LTS\ amd64/ –name=Ubuntu-Server-12.04 –arch=x86_64
task started: 2013-11-02_040257_import
task started (id=Media import, time=Sat Nov 2 04:02:57 2013)
Found a debian/ubuntu compatible signature: pool
adding distros
avoiding symlink loop
avoiding symlink loop
avoiding symlink loop
avoiding symlink loop
creating new distro: Ubuntu-Server-12.04-x86_64
creating new profile: Ubuntu-Server-12.04-x86_64
associating repos
traversing distro Ubuntu-Server-12.04-x86_64
descent into /var/www/cobbler/ks_mirror/Ubuntu-Server-12.04-x86_64
associating kickstarts
Found ubuntu release file: /var/www/cobbler/ks_mirror/Ubuntu-Server-12.04-x86_64/dists/precise/Release
skipping /var/www/cobbler/ks_mirror/Ubuntu-Server-12.04-x86_64/dists/unstable
skipping /var/www/cobbler/ks_mirror/Ubuntu-Server-12.04-x86_64/dists/stable
*** TASK COMPLETE ***
1. 2 导入 CentOS 6.4
光盘已经挂载到 /media/cdrom 下。
注意,如果要导入 CentOS 系列的操作系统,需要事先安装 createrepo,否则便会导入会失败。
# cobbler import –path=/media/cdrom/ –name=CentOS-6.4 –arch=x86_64
task started: 2013-11-02_040109_import
task started (id=Media import, time=Sat Nov 2 04:01:09 2013)
Found a RedHat compatible signature: Packages
adding distros
creating new distro: CentOS-6.4-x86_64
creating new profile: CentOS-6.4-x86_64
associating repos
traversing distro CentOS-6.4-x86_64
descent into /var/www/cobbler/ks_mirror/CentOS-6.4-x86_64
processing repo at : /var/www/cobbler/ks_mirror/CentOS-6.4-x86_64
need to process repo/comps: /var/www/cobbler/ks_mirror/CentOS-6.4-x86_64
looking for /var/www/cobbler/ks_mirror/CentOS-6.4-x86_64/repodata/*comps*.xml
running: createrepo -c cache -s sha –groupfile /var/www/cobbler/ks_mirror/CentOS-6.4-x86_64/repodata/2727fcb43fbe4c1a3588992af8c19e4d97167aee2f6088959221fc285cab6f72-c6-x86_64-comps.xml /var/www/cobbler/ks_mirror/CentOS-6.4-x86_64
received on stdout:
received on stderr: /bin/sh: 1: createrepo: not found
associating kickstarts
*** TASK COMPLETE ***
安装 createrepo 工具
# apt-get install createrepo
继续导入
# cobbler import –path=/media/cdrom/ –name=CentOS-6.4 –arch=x86_64
task started: 2013-11-02_041443_import
task started (id=Media import, time=Sat Nov 2 04:14:43 2013)
Found a redhat compatible signature: Packages
adding distros
skipping import, as distro name already exists: CentOS-6.4-x86_64
associating repos
associating kickstarts
*** TASK COMPLETE ***
1.3 导入 Fedora19
# mount Fedora-19-x86_64-DVD.iso /media/cdrom/
mount: block device /mnt/hgfs/OS-2/Fedora/V19/Fedora-19-x86_64-DVD.iso is write-protected, mounting read-only
root@localhost:/mnt/hgfs/OS-2/Fedora/V19# cobbler import –path=/media/cdrom/ –name=Fedora-19 –arch=x86_64
task started: 2013-11-02_042013_import
task started (id=Media import, time=Sat Nov 2 04:20:13 2013)
Found a redhat compatible signature: Packages
adding distros
creating new distro: Fedora-19-x86_64
creating new profile: Fedora-19-x86_64
associating repos
traversing distro Fedora-19-x86_64
descent into /var/www/cobbler/ks_mirror/Fedora-19-x86_64
processing repo at : /var/www/cobbler/ks_mirror/Fedora-19-x86_64
need to process repo/comps: /var/www/cobbler/ks_mirror/Fedora-19-x86_64
looking for /var/www/cobbler/ks_mirror/Fedora-19-x86_64/repodata/*comps*.xml
running: createrepo -c cache -s sha –groupfile /var/www/cobbler/ks_mirror/Fedora-19-x86_64/repodata/bf4e62e367e9b80e4f7c75092ef729f69d5d8e2d3eadd3c852ba6c5eb7a85353-Fedora-19-comps.xml /var/www/cobbler/ks_mirror/Fedora-19-x86_64
3949/3949 – Packages/i/ifuse-1.1.2-4.fc19.x86_64.rpm rpmpm.rpmm.fc19.x86_64.rpm
Saving Primary metadata
Saving file lists metadata
Saving other metadata
received on stderr: This option is deprecated
Error opening package – Packages/l/lensfun-0.2.7-1.fc19.x86_64.rpm
associating kickstarts
*** TASK COMPLETE ***
四、自定义 kickstart 文件
Kickstart 最早是 RedHat 公司用来自动部署 RedHat 操作系统的,通过 Kickstart 配置文件,通常安装过程中需要交互输入的信息就都可以自动应答。
通过 Kickstart 安装操作系统一般是这样几个步骤:
Create a kickstart file.
创建单一的 kickstart 文件
Create a boot media with the kickstart file or make the kickstart file available on the network.
创建包含 kickstart 文件的启动介质,或者使 kickstart 文件可以通过网络访问
Make the installation tree available.
准备所安装操作系统,要包括完整的目录树
Start the kickstart installation.
开始 kickstart 安装过程
Cobbler 中默认的 kickstart 文件目录为,/var/lib/cobbler/kickstarts/,默认的 Ks 文件为 /var/lib/cobbler/kickstarts/sample.ks。
1. 更改配置文件
修改配置文件
语法:
# cobbler profile edit –name <cobbler profile list 中显示的名称 > –kickstart=”/var/lib/cobbler/kickstarts/< 新编辑好的 ks 文件名称 >”
查看已修改的配置文件
语法:
# cobbler profile getks –name <cobbler profile list 中显示的名称 >
2. 自定义范例一
这里以 CentOS 操作系统的 kickstart 文件为例。
2.1 配置 CentOS6.4 的 kickstart 自动安装脚本
通常安装程序根据在安装过程中的选择创建一个简单的 kickstart 文件, 这个文件会被写入到 /root/anaconda-ks.cfg,所以我们可以在它的基础上做修改即可。
2.1.1 CentOS6.4kickstart 范例
文件路径和文件名:/var/lib/cobbler/kickstarts/CentOS6.4_example.ks
#platform=x86, AMD64, or Intel EM64T
#version=DEVEL
# Firewall configuration
firewall –disabled
# Install OS instead of upgrade
install
# Use network installation
url –url=”http://192.168.88.253/cobbler/ks_mirror/CentOS-6.4-x86_64/”
# Root password
rootpw –iscrypted $1$6.5.pvtY$78zocSFzXqL6o2RiKy7Ow0
# System authorization information
auth –useshadow –passalgo=sha512
# Use text mode install
text
#graphical
# Debug
#interactive
firstboot –disable
# System keyboard
keyboard us
# System language
lang en_US
# SELinux configuration
selinux –disabled
# Installation logging level
logging –level=info
# Reboot after installation
reboot
# System timezone
timezone –isUtc Asia/Hong_Kong
# Network information
network –bootproto=dhcp –device=eth0 –onboot=on
network –bootproto=dhcp –device=eth1 –onboot=on
network –bootproto=dhcp –device=eth2 –onboot=on
network –bootproto=dhcp –device=eth3 –onboot=on
# System bootloader configuration
bootloader –location=mbr –driveorder=sda –append=”crashkernel=auto rhgb quiet”
# Clear the Master Boot Record
zerombr
# Partition clearing information
clearpart –linux –drives=sda
# Partition
part /boot –fstype=ext4 –size=500
part pv.008002 –grow –size=1
volgroup VolGroup –pesize=4096 pv.008002
logvol / –fstype=ext4 –name=lv_root –vgname=VolGroup –grow –size=1024 –maxsize=51200
logvol swap –name=lv_swap –vgname=VolGroup –grow –size=4000 –maxsize=4000
%packages
@additional-devel
@base
@chinese-support
@compat-libraries
@console-internet
@desktop-platform-devel
@development
@eclipse
@Fedora-packager
@internet-browser
@network-file-system-client
@network-tools
@perl-runtime
@ruby-runtime
@server-platform-devel
@storage-client-iscsi
bzr
cjkuni-fonts-ghostscript
ftp
git
iptraf
lftp
mercurial
mock
mutt
nmap
screen
rpmdevtools
wireshark
-ibus-table-cangjie
-ibus-table-erbi
-ibus-table-wubi
%end
2.1.2 配置 cobbler CentOS6.4 安装时使用的 kickstart 文件
请按照步骤 1 更改配置文件 来操作。
2.1.3 关于用户密码的设置
我们可以通过在 kickstart 中引用如下语句来设置你的用户密码:
rootpw –iscrypted $1$6.5.pvtY$78zocSFzXqL6o2RiKy7Ow0
用户密码的加密可以通过如下命令来生成:
# echo “Your password” | openssl passwd -1 -stdin
$1$YybbL2kO$Z35pIGEghtr7AQwUaH7GN1
也可以在 kickstart 文件中直接引用 cobbler 变量 $default_password_crypted,如下:
# Root password
rootpw –iscrypted $default_password_crypted
配置 default_password_crypted 默认值:
可以通过 配置 /etc/cobbler/settings 中 default_password_crypted 为新值。如下:
default_password_crypted: “$1$YybbL2kO$Z35pIGEghtr7AQwUaH7GN1”
2.1.4 安装操作系统后修改下载源配置文件
2.1.4.1 添加 cobbler 安装过程中使用的安装源
默认安装程序不会修改 CentOS 的下载源配置文件。我们可以通过配置 /etc/cobbler/setting 中的 yum_post_install_mirror 参数为 1。
然后在 kickstart 文件中 %post 部分添加如下的行:
# Start yum configuration
$yum_config_stanza
# End yum configuration
2.1.4.2 添加其它第三方安装源
以添加 mirror.163.com 的源为例,在 kickstart 文件中 %post 部分添加如下的行:
wget http://mirrors.163.com/.help/CentOS6-Base-163.repo -O /etc/yum.repos.d/CentOS6-Base-163.repo
增加其它第三方的方法也类似
这样 cobbler 源就会自动添加到新安装好的操作系统中,文件路径和文件名为 /etc/yum.repos.d/cobbler-config.repo。
更多 Ubuntu 相关信息见Ubuntu 专题页面 http://www.linuxidc.com/topicnews.aspx?tid=2


