共计 7774 个字符,预计需要花费 20 分钟才能阅读完成。
首先引用百度介绍下 redmine:
Redmine 是用 Ruby 开发的基于 web 的项目管理软件,是用 ROR 框架开发的一套跨平台项目管理系统,据说是源于 Basecamp 的 ror 版而来,支持多种数据库,有不少自己独特的功能,例如提供 wiki、新闻台等,还可以集成其他版本管理系统和 BUG 跟踪系统,例如 Perforce、SVN、CVS、TD 等等。这种 Web 形式的项目管理系统通过“项目(Project)”的形式把成员、任务(问题)、文档、讨论以及各种形式的资源组织在一起,大家参与更新任务、文档等内容来推动项目的进度,同时系统利用时间线索和各种动态的报表形式来自动给成员汇报项目进度 。
在安装 redmine 前,我们需要先来看下各个组件的版本要求:
| Redmine version | Supported Ruby versions | Rails version used |
|---|---|---|
| current trunk | ruby 1.9.3, 2.0.01, 2.1, 2.2 | Rails 4.2 |
| trunk < r13482 | ruby 1.8.72, 1.9.2, 1.9.3, 2.0.01, 2.1, jruby-1.7.6 | Rails 3.2 |
| 3.0 | ruby 1.9.3, 2.0.01, 2.1, 2.2 | Rails 4.2 |
| 2.6 | ruby 1.8.72, 1.9.2, 1.9.3, 2.0.01, 2.1, jruby-1.7.6 | Rails 3.2 |
目前官网 2.0 以上版本最新为 2.6.3,由上图可以看到我们需要选择哪个版本的组件。
1.CentOS 6.5 下安装基本的软件环境
yum -y install libyaml-devel zlib-devel curl-devel openssl-devel httpd-devel apr-devel apr-util-devel gcc ruby-devel gcc-c++ make postgresql-devel ImageMagick-devel sqlite-devel perl-LDAP mod_perl perl-Digest-SHA
2. 安装 apache 和 mysql, 并配置 redmine 数据库
rpm -Uvh http://dev.mysql.com/get/mysql-community-release-el6-5.noarch.rpm
yum install mysql-community-server httpd -y
安装完成后,service mysqld start,并进行相关数据库配置
mysql> create database redmine_db character set utf8;
Query OK, 1 row affected (0.00 sec)
mysql> create user ‘redmine’@’localhost’ identified by ‘redmine’;
Query OK, 0 rows affected (0.00 sec)
mysql> grant all privileges on redmine.* to ‘redmine’@’localhost’;
Query OK, 0 rows affected (0.00 sec)
mysql> flush privileges;
Query OK, 0 rows affected (0.00 sec)
3.iptables 设置
如果服务器开了防火墙,我们需要进行相关设置
/sbin/iptables -A INPUT -m state –state NEW -m tcp -p tcp –dport 80 -j ACCEPT
/sbin/iptables -A INPUT -m state –state NEW -m tcp -p tcp –dport 443 -j ACCEPT
4. 安装 php 环境
yum -y install php php-mysql php-gd php-imap php-ldap php-mbstring php-odbc php-pear php-xml php-xmlrpc php-pecl-apc php-soap
5. 安装 ruby 环境
\curl -L https://get.rvm.io | bash
source /etc/profile.d/rvm.sh
[root@usvr-126 ~]# source /etc/profile.d/rvm.sh
[root@usvr-126 ~]# rvm list known
# MRI Rubies
[ruby-]1.8.6[-p420]
[ruby-]1.8.7[-head] # security released on head
[ruby-]1.9.1[-p431]
[ruby-]1.9.2[-p330]
[ruby-]1.9.3[-p551]
[ruby-]2.0.0[-p643]
[ruby-]2.1.4
[ruby-]2.1[.5]
[ruby-]2.2[.1]
[ruby-]2.2-head
2.6 版本需要 ruby 支持的版本,在这我们选择 1.9.3 稳定版
rvm install 1.9.3
[root@usvr-126 ~]# ruby -v
ruby 1.9.3p551 (2014-11-13 revision 48407) [x86_64-linux]
6. 安装 rubygems
yum -y install rubygems
7. 安装 redmine 的 apache 支持,这样可以通过 apache 访问
gem install passenger
passenger-install-apache2-module
命令执行完后按照提示进行配置 http:
vim /etc/httpd/conf.d/passenger.conf
LoadModule passenger_module /usr/local/rvm/gems/ruby-1.9.3-p551/gems/passenger-5.0.5/buildout/apache2/mod_passenger.so
<IfModule mod_passenger.c>
PassengerRoot /usr/local/rvm/gems/ruby-1.9.3-p551/gems/passenger-5.0.5
PassengerDefaultRuby /usr/local/rvm/gems/ruby-1.9.3-p551/wrappers/ruby
</IfModule>
vim /etc/http/conf.d/redmine.conf
<VirtualHost *:80>
ServerName www.yourhost.com
# !!! Be sure to point DocumentRoot to ‘public’!
DocumentRoot /somewhere/public
<Directory /somewhere/public>
# This relaxes Apache security settings.
AllowOverride all
# MultiViews must be turned off.
Options -MultiViews
# Uncomment this if you’re on Apache >= 2.4:
#Require all granted
</Directory>
</VirtualHost>
由于我们的 redmine 还没有安装,因此路径暂时还不配置,等按完 redmine 后在来配置具体路径,注意 root 目录必须是 redmine 下的 public 目录。
8. 安装 redmine
wget http://www.redmine.org/releases/redmine-2.6.3.tar.gz
tar -zxvf redmine-2.6.3.tar.gz
mv redmine-2.6.3 /data
安装完毕后,我们需要在 httpd 的 redmine.conf 中进行修改:
<VirtualHost *:80>
ServerName 192.168.3.126
# !!! Be sure to point DocumentRoot to ‘public’!
DocumentRoot /data/redmine-2.6.3/public
ErrorLog logs/redmine_error_log
<Directory /data/redmine-2.6.3/public>
<span style=”white-space:pre”> </span> Options Indexes ExecCGI FollowSymLinks
Order allow,deny
Allow from all
# This relaxes Apache security settings.
AllowOverride all
# MultiViews must be turned off.
Options -MultiViews
# Uncomment this if you’re on Apache >= 2.4:
#Require all granted
</Directory>
</VirtualHost>
不要忘了 service httpd restart
9.redmine 相关配置
cd /data/redmine-2.6.3/public
cp database.yml.example database.yml
注意:官网中说 MySQL database using ruby 1.9 (adapter must be set to mysql2)
vim database.yml
production:
adapter: mysql2
database: redmine
host: localhost
username: redmine
password: “redmine”
encoding: utf8
10. 安装 rails,安装过程中会出现很多问题,我们来一一解决吧。
cd /data/redmine-2.6.3
gem install bundler
bundle install
这里会报错:
An error occurred while installing rack-cache (1.2), and Bundler cannot continue.
Make sure that `gem install rack-cache -v ‘1.2’` succeeds before bundling.
我们按照提示安装所需组件
gem install rack-cache -v ‘1.2’
然后再次 bundle install,报错:
An error occurred while installing nokogiri (1.6.6.2), and Bundler cannot continue.
Make sure that `gem install nokogiri -v ‘1.6.6.2’` succeeds before bundling.
按照提示 gem install nokogiri -v ‘1.6.6.2’, 再运行 bundle install,报错:
ERROR: Error installing nokogiri:
ERROR: Failed to build gem native extension.
按照提示:
If you are using Bundler, tell it to use the option:
bundle config build.nokogiri –use-system-libraries
bundle install
我们来输入命令:
bundle config build.nokogiri –use-system-libraries
bundle install
再次报错:
An error occurred while installing json (1.8.2), and Bundler cannot continue.
Make sure that `gem install json -v ‘1.8.2’` succeeds before bundling.
按照提示安装 gem install json -v ‘1.8.2’,然后再次 bundle install
又报错:
An error occurred while installing railties (3.2.21), and Bundler cannot continue.
Make sure that `gem install railties -v ‘3.2.21’` succeeds before bundling.
按照提示安装 gem install railties -v ‘3.2.21’,然后再次 bundle install
又报错:
An error occurred while installing mysql2 (0.3.18), and Bundler cannot continue.
Make sure that `gem install mysql2 -v ‘0.3.18’` succeeds before bundling.
执行 gem install mysql2 -v ‘0.3.18’ 报错:
checking for mysql.h… no
checking for mysql/mysql.h… no
—–
mysql.h is missing
我们执行 yum install mysql-devel 后成功安装,接着 bundle install
报错:
An error occurred while installing redcarpet (2.3.0), and Bundler cannot continue.
Make sure that `gem install redcarpet -v ‘2.3.0’` succeeds before bundling.
按照提示安装 gem install redcarpet -v ‘2.3.0’,然后再次 bundle install
Please report any bugs. See https://github.com/gemhome/rmagick/compare/RMagick_2-13-2…master and https://github.com/rmagick/rmagick/issues/18
ok, 终于安装成功。
rake generate_secret_token
初始化 redmine 数据库表名
RAILS_ENV=production rake db:migrate
RAILS_ENV=production rake redmine:load_default_data
11. 修改 fastcgi‘
cd /data/redmine-2.6.3/public
mkdir plugin_assets
cp dispatch.fcgi.example dispatch.fcgi
cp htaccess.fcgi.example .htaccess
12. 安装 mod_fcgi
rpm –import https://Fedoraproject.org/static/0608B895.txt
wget http://dl.fedoraproject.org/pub/epel/6/x86_64/epel-release-6-8.noarch.rpm
rpm -ivh epel-release-6-8.noarch.rpm
yum -y install mod_fcgid
13. 创建文件目录
mkdir -p /data/redmine-2.6.3/files
cd /data/redmine-2.6.3/config
cp configuration.yml.example configuration.yml
由于我们的 files 目录在 redmine 根目录下,因此 configuration 不用配置了,如果 files 目录在其他地方,我们需要
vim configuration.yml
attachments_storage_path: /var/redmine/files
14. 最后启动 redmine
cd /data/redmine-2
chown -R apache:apache redmine-2.6.3
chmod -R 755 redmine-2.6.3
service httpd restart
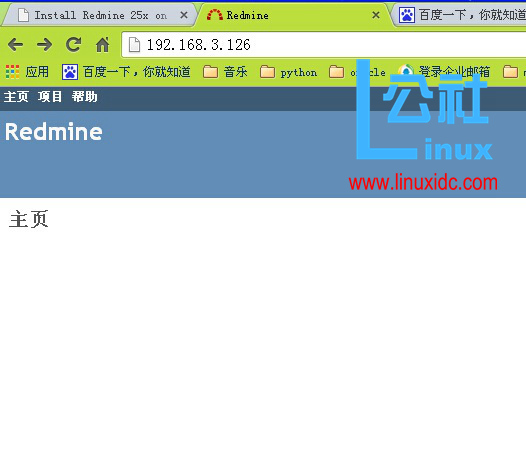
测试吧,让我们访问下看看

默认的用户名和密码都为 admin
另外若 apache 访问不了,我们可以先用 redmine 自己的启动方式启动,然后 ip:3000 端口进行访问,如果访问成功,则 redmine 配置没问题,可能是 apache 的配置问题或漏改配置了
下面是 redmine 的启动方式,
[root@usvr-126 redmine-2.6.3]# cd /data/redmine-2.6.3
[root@usvr-126 redmine-2.6.3]# ruby script/rails server webrick -e production
=> Booting WEBrick
=> Rails 3.2.21 application starting in production on http://0.0.0.0:3000
=> Call with -d to detach
=> Ctrl-C to shutdown server
[2015-03-28 01:09:30] INFO WEBrick 1.3.1
[2015-03-28 01:09:30] INFO ruby 1.9.3 (2014-11-13) [x86_64-linux]
[2015-03-28 01:09:30] INFO WEBrick::HTTPServer#start: pid=14577 port=3000
好了,就介绍到这里吧,这是第二次配,相比第一次容易很多,根据错误提示来就可,希望能给大家带来帮助。
CentOS 下安装 Redmine 并集成 Git http://www.linuxidc.com/Linux/2015-01/111848.htm
最简化的 Ubuntu 10.04 下 Redmine 部署方法 http://www.linuxidc.com/Linux/2010-07/27076.htm
Ubuntu 10.04 默认安装 Redmine 注意事项 http://www.linuxidc.com/Linux/2010-07/27075.htm
CentOS 5 下 Redmine 的安装及配置 http://www.linuxidc.com/Linux/2009-12/23311.htm
Ubuntu 9.10 下搭建基于 PostgreSQL 的 Redmine http://www.linuxidc.com/Linux/2009-11/22697.htm
Ubuntu 中安装开源项目管理软件 Redmine http://www.linuxidc.com/Linux/2008-03/11819.htm
如何将 Turnkey Redmine 虚拟机从 Redmine 1.0.5 升级到 1.2 http://www.linuxidc.com/Linux/2011-09/42882.htm
CentOS5 下进行 Redmine 环境搭建, 邮件服务配置,LDAP 配置 http://www.linuxidc.com/Linux/2013-04/83619.htm
Redmine 的详细介绍 :请点这里
Redmine 的下载地址 :请点这里
本文永久更新链接地址 :http://www.linuxidc.com/Linux/2015-03/115545.htm


