")

共计 27253 个字符,预计需要花费 69 分钟才能阅读完成。
实验系统:CentOS 6.6_x86_64
实验前提:
1)提前准备好编译环境,防火墙和 selinux 都关闭;
2)本配置共有两个测试节点,分别 coro1 和 coro2,对应的 IP 地址分别为 192.168.19.55 和 192.168.19.98;
3)集群服务为 nginx 服务;
实验软件:corosync-0:1.4.7-1.el6 pacemaker-0:1.1.12-4.el6 crmsh-2.1-1.6 drbd-8.4.4 php-5.6.11 mariadb-10.0.20 tengine-2.1.0
软件下载 :
—————————————— 分割线 ——————————————
免费下载地址在 http://linux.linuxidc.com/
用户名与密码都是 www.linuxidc.com
具体下载目录在 /2015 年资料 / 7 月 /25 日 / 基于 Corosync+Pacemaker+DRBD+LNMP 实现 Web 服务器高可用集群 /
下载方法见 http://www.linuxidc.com/Linux/2013-07/87684.htm
—————————————— 分割线 ——————————————
注意事项:单主机操作会有标注,除此之外的是两台主机都要完成的
实验拓扑:

MySQL+Corosync+Pacemaker+DRBD 构建高可用 MySQL http://www.linuxidc.com/Linux/2013-09/90408.htm
搭建基于 Corosync+DRBD 的高可用 MySQL 集群 http://www.linuxidc.com/Linux/2013-10/91386.htm
分别基于 NFS 服务和 DRBD 服务利用 Corosync 配置高可用集群 http://www.linuxidc.com/Linux/2013-09/90410.htm
Linux 高可用(HA)集群之 Corosync 详解 http://www.linuxidc.com/Linux/2013-08/88733.htm
pacemaker + Corosync 搭建高可用集群 http://www.linuxidc.com/Linux/2013-06/85972.htm
Corosync+pacemaker+RA 实现 MySQL 高可用 http://www.linuxidc.com/Linux/2012-08/67949.htm
Corosync 部署 MySQL+DRBD 高可用服务 http://www.linuxidc.com/Linux/2014-07/104694.htm
一、准备工作
1. 所有节点的主机名称和对应的 IP 地址解析服务可以正常工作,且每个节点的主机名称需要跟“uname -n”命令的结果保持一致。因此,需要保证两个节点上的 /etc/hosts 文件均添加了下面的内容:

2. 为了使得重新启动系统后仍能保持如上的主机名称,还分别需要在各节点执行类似如下的命令:
coro1 上:
| 1 sed -i 's@\(HOSTNAME=\).*@\1coro1@g' /etc/sysconfig/network | |
| 2 hostname coro1 |
coro2 上:
| 1 sed -i 's@\(HOSTNAME=\).*@\1coro2@g' /etc/sysconfig/network | |
| 2 hostname coro2 |
3. 设定两个节点可以基于密钥进行 ssh 通信,并测试:
coro1 上:
| 1 ssh-keygen -t rsa | |
| 2 ssh-copy-id -i ~/.ssh/id_rsa.pub root |
coro2 上:
| ssh-keygen -t rsa | |
| ssh-copy-id -i ~/.ssh/id_rsa.pub root |

4. 两个节点时间必须同步:一般使用 ntpdate 进行操作,这里不再演示。
二、安装 corosync 和 pacemaker 并配置
1. 安装 epel 源:
1 yum -y install epel*
2. 安装 corosync 和 pacemaker:
1 yum -y install corosync pacemaker
3. 在 coro1 上编辑 /etc/corosync.conf
| 1 cd /etc/corosync/ | |
| 2 cp corosync.conf.example corosync.conf | |
| 3 vim corosync.conf | |
| 4 ------------------------------------ | |
| 5 bindnetaddr: 192.168.19.0 // 为你的网卡所在网络的网络地址 | |
| 6 mcastaddr: 239.255.19.1 // 组播地址 | |
| 7 service {// 添加此部分 | |
| 8 ver: 0 | |
| 9 name: pacemaker | |
| 10 # use_mgmtd: yes | |
| 11 } |
4. 在 coro1 上生成节点间通信时用到的认证密钥文件:
1 corosync-keygen
5. 将 corosync.conf 和 authkey 复制至 coro2 上:
1 scp -p corosync.conf authkey coro2:/etc/corosync/
三、安装 crmsh 并启动 corosync
1. 安装 crmsh,需要提前下好 rpm 包:
1 yum -y install crmsh-2.1-1.6.x86_64.rpm
2. 启动 corosync(在 coro1 上执行):
1 service corosync start
3. 查看 corosync 引擎是否正常启动:
1 grep -e "Corosync Cluster Engine" -e "configuration file" /var/log/cluster/corosync.log

4. 查看初始化成员节点通知是否正常发出:
1 grep TOTEM /var/log/cluster/corosync.log

5. 检查启动过程中是否有错误产生。下面的错误信息表示 packmaker 不久之后将不再作为 corosync 的插件运行,因此,建议使用 cman 作为集群基础架构服务,此处可安全忽略:
1 grep ERROR: /var/log/cluster/corosync.log

6. 查看 pacemaker 是否正常启动:
1 grep pcmk_startup /var/log/cluster/corosync.log

7. 如果上面命令执行均没有问题,接着可以在 coro1 上执行如下命令启动 coro2 上的 corosync:
1 ssh coro2 'service corosync start'
8. 如果安装了 crmsh,可使用如下命令查看集群节点的启动状态。从下面的信息可以看出两个节点都已经正常启动,并且集群已经处于正常工作状态:
1 crm status

四、编译安装 drbd 并配置
drbd 共有两部分组成:内核模块和用户空间的管理工具。其中 drbd 内核模块代码已经整合进 Linux 内核 2.6.33 以后的版本中,因此,如果您的内核版本高于此版本的话,你只需要安装管理工具即可;否则,您需要同时安装内核模块和管理工具两个软件包,并且此两者的版本号一定要保持对应。
1. 安装用户空间工具:
| 1 tar xf drbd-8.4.4.tar.gz | |
| 2 cd drbd-8.4.4 | |
| 3 ./configure --prefix=/usr/local/drbd --with-km | |
| 4 make KDIR=/usr/src/kernels/2.6.32-504.30.3.el6.x86_64 // 换成自己的内核版本 | |
| 5 make install | |
| 6 mkdir -pv /usr/local/drbd/var/run/drbd | |
| 7 cp /usr/local/drbd/etc/rc.d/init.d/drbd /etc/rc.d/init.d | |
| 8 chkconfig --add drbd | |
| 9 chkconfig drbd off // 一会作为 corosync 的资源,所以不要开机自动启动 |
2. 安装 drbd 模块:
| 1 cd drbd | |
| 2 make clean | |
| 3 make KDIR=/usr/src/kernels/2.6.32-504.30.3.el6.x86_64 // 换成自己的内核版本 | |
| 4 cp drbd.ko /lib/modules/`uname -r`/kernel/lib | |
| 5 depmod |
3. 给主机分区,大小为 5G。这里不再给出具体步骤,两台主机的 /dev/sda7 为一会要使用的分区:

4. 配置 drbd(在 coro1 上操作):
drbd 的主配置文件为 /etc/drbd.conf;为了管理的便捷性,目前通常会将些配置文件分成多个部分,且都保存至 /etc/drbd.d/ 目录中,主配置文件中仅使用 ”include” 指令将这些配置文件片断整合起来。通常 /etc/drbd.d 目录中的配置文件为 global_common.conf 和所有以.res 结尾的文件。其中 global_common.conf 中主要定义 global 段和 common 段,而每一个.res 的文件用于定义一个资源。
| 1 cd /usr/local/drbd/etc/drbd.d/ | |
| 2 vim global_common.conf | |
| 3 -------------------------------------- | |
| 4 global { 5 usage-count no; | |
| 6 # minor-count dialog-refresh disable-ip-verification | |
| 7 } | |
| 8 | |
| 9 common {10 protocol C; | |
| 11 | |
| 12 handlers {13 # These are EXAMPLE handlers only. | |
| 14 # They may have severe implications, | |
| 15 # like hard resetting the node under certain circumstances. | |
| 16 # Be careful when chosing your poison. | |
| 17 | |
| 18 # pri-on-incon-degr "/usr/lib/drbd/notify-pri-on-incon-degr.sh; /usr/lib/drbd/notify-emergency-reboot.sh; echo b > /p | |
| 19 roc/sysrq-trigger ; reboot -f"; | |
| 20 # pri-lost-after-sb "/usr/lib/drbd/notify-pri-lost-after-sb.sh; /usr/lib/drbd/notify-emergency-reboot.sh; echo b > /p | |
| 21 roc/sysrq-trigger ; reboot -f"; | |
| 22 # local-io-error "/usr/lib/drbd/notify-io-error.sh; /usr/lib/drbd/notify-emergency-shutdown.sh; echo o > /proc/sysrq- | |
| 23 trigger ; halt -f"; | |
| 24 # fence-peer "/usr/lib/drbd/crm-fence-peer.sh"; | |
| 25 # split-brain "/usr/lib/drbd/notify-split-brain.sh root"; | |
| 26 # out-of-sync "/usr/lib/drbd/notify-out-of-sync.sh root"; | |
| 27 # before-resync-target "/usr/lib/drbd/snapshot-resync-target-lvm.sh -p 15 -- -c 16k"; | |
| 28 # after-resync-target /usr/lib/drbd/unsnapshot-resync-target-lvm.sh; | |
| 29 } | |
| 30 | |
| 31 startup {32 # wfc-timeout degr-wfc-timeout outdated-wfc-timeout wait-after-sb | |
| 33 } | |
| 34 | |
| 35 options {36 # cpu-mask on-no-data-accessible | |
| 37 } | |
| 38 | |
| 39 disk {40 #on-io-error detach; | |
| 41 # size max-bio-bvecs on-io-error fencing disk-barrier disk-flushes | |
| 42 # disk-drain md-flushes resync-rate resync-after al-extents | |
| 43 # c-plan-ahead c-delay-target c-fill-target c-max-rate | |
| 44 # c-min-rate disk-timeout | |
| 45 } | |
| 46 net {47 #cram-hmac-alg "sha1"; | |
| 48 #shared-secret "mydrbd"; | |
| 49 # protocol timeout max-epoch-size max-buffers unplug-watermark | |
| 50 # connect-int ping-int sndbuf-size rcvbuf-size ko-count | |
| 51 # allow-two-primaries cram-hmac-alg shared-secret after-sb-0pri | |
| 52 # after-sb-1pri after-sb-2pri always-asbp rr-conflict | |
| 53 # ping-timeout data-integrity-alg tcp-cork on-congestion | |
| 54 # congestion-fill congestion-extents csums-alg verify-alg | |
| 55 # use-rle | |
| 56 } | |
| 57 } |
5. 定义一个资源,web 是资源名,可以自己改:
| 1 vim /usr/local/drbd/etc/drbd.d/web.res | |
| 2 -------------------------------------- | |
| 3 resource web { 4 on coro1 { 5 device /dev/drbd0; | |
| 6 disk /dev/sda7; | |
| 7 address 192.168.19.55:7789; | |
| 8 meta-disk internal; | |
| 9 } | |
| 10 on coro2 {11 device /dev/drbd0; | |
| 12 disk /dev/sda7; | |
| 13 address 192.168.19.98:7789; | |
| 14 meta-disk internal; | |
| 15 } | |
| 16 } |
6. 以上文件在两个节点上必须相同,因此,可以基于 ssh 将刚才配置的文件全部同步至 coro2 节点:
1 scp /usr/local/drbd/etc/drbd.d/* coro2:/usr/local/drbd/etc/drbd.d/
7. 在两个节点上初始化已定义的资源并启动服务:
| 1 drbdadm create-md web | |
| 2 service drbd start |
8. 查看启动状态,从下面的信息中可以看出此时两个节点均处于 Secondary 状态:
1 cat /proc/drbd

9. 我们接下来需要将其中一个节点设置为 Primary,在要设置为 Primary 的节点上执行如下命令,这里在 coro1 上操作:
| 1 drbdadm primary --force web | |
| 2 cat /proc/drbd |

而后再次查看状态,可以发现数据同步过程已经开始。等数据同步完成以后再次查看状态,可以发现主次位置显示是不一样的。斜线前面的代表当前主机,后面的代表对方主机。
在 coro1 上查看:

在 coro2 上查看:

10. 创建文件系统并挂载:
文件系统的挂载只能在 Primary 节点进行,因此,也只有在设置了主节点后才能对 drbd 设备进行格式化,这里在 coro1 上进行操作。
| 1 mke2fs -t ext4 -L DRBD /dev/drbd0 | |
| 2 mkdir /mydata // 创建挂载点 | |
| 3 mount /dev/drbd0 /mydata/ | |
| 4 mkdir /mydata/www // 创建网页目录 | |
| 5 mkdir /mydata/data // 创建数据库目录 |
11. 切换 Primary 和 Secondary 节点:
对主 Primary/Secondary 模型的 drbd 服务来讲,在某个时刻只能有一个节点为 Primary,因此要切换两个节点的角色,只能在先将原有的 Primary 节点设置为 Secondary 后,才能原来的 Secondary 节点设置为 Primary。
在 coro1 上:
| 1 umount /mydata/ | |
| 2 drbdadm secondary web // 变为 secondary 节点 |
在 coro2 上:
| 1 drbdadm primary web // 变为 primary 节点 | |
| 2 cat /proc/drbd | |
| 3 mkdir /mydata // 创建挂载点 | |
| 4 mount /dev/drbd0 /mydata/ | |
| 5 ls /mydata/ |
可以看到,coro2 已经成为了 Primary,之前在 coro1 上创建的目录也能够访问到。测试完成后,再次将 coro1 变为 Primary 并挂载。


更多详情见请继续阅读下一页的精彩内容 :http://www.linuxidc.com/Linux/2015-07/120576p2.htm
五、准备 LNMP 环境
1. 编译安装 tengine:
| 1 yum -y install pcre-devel | |
| 2 useradd -r nginx // 要保证两台主机的 nginx 用户 id 和组 id 完全一致 | |
| 3 tar xf tengine-2.1.0.tar.gz | |
| 4 cd tengine-2.1.0 | |
| 5 ./configure --prefix=/usr/local/nginx --sbin-path=/usr/local/nginx/sbin/nginx --conf-path=/etc/nginx/nginx.conf --error-log-path=/var/log/nginx/error.log --http-log-path=/var/log/nginx/access.log --pid-path=/var/run/nginx/nginx.pid --lock-path=/var/lock/nginx.lock --user=nginx --group=nginx --with-http_ssl_module --with-http_flv_module --with-http_stub_status_module --with-http_gzip_static_module --http-client-body-temp-path=/var/tmp/nginx/client/ --http-proxy-temp-path=/var/tmp/nginx/proxy/ --http-fastcgi-temp-path=/var/tmp/nginx/fcgi/ --http-uwsgi-temp-path=/var/tmp/nginx/uwsgi --http-scgi-temp-path=/var/tmp/nginx/scgi --with-pcre | |
| 6 make && make install |
2. 为 tengine 提供脚本:
| 1 vim /etc/init.d/nginx | |
| 2 ------------------------------------ | |
| 3 #!/bin/sh | |
| 4 # | |
| 5 # nginx - this script starts and stops the nginx daemon | |
| 6 # | |
| 7 # chkconfig: - 85 15 | |
| 8 # description: Nginx is an HTTP(S) server, HTTP(S) reverse 9 # proxy and IMAP/POP3 proxy server | |
| 10 # processname: nginx | |
| 11 # config: /etc/nginx/nginx.conf | |
| 12 # config: /etc/sysconfig/nginx | |
| 13 # pidfile: /var/run/nginx.pid | |
| 14 | |
| 15 # Source function library. | |
| 16 . /etc/rc.d/init.d/functions | |
| 17 | |
| 18 # Source networking configuration. | |
| 19 . /etc/sysconfig/network | |
| 20 | |
| 21 # Check that networking is up. | |
| 22 ["$NETWORKING" = "no" ] && exit 0 | |
| 23 | |
| 24 nginx="/usr/local/nginx/sbin/nginx" | |
| 25 prog=$(basename $nginx) | |
| 26 | |
| 27 NGINX_CONF_FILE="/etc/nginx/nginx.conf" | |
| 28 | |
| 29 [-f /etc/sysconfig/nginx] && . /etc/sysconfig/nginx | |
| 30 | |
| 31 lockfile=/var/lock/subsys/nginx | |
| 32 | |
| 33 make_dirs() { 34 # make required directories | |
| 35 user=`nginx -V 2>&1 | grep "configure arguments:" | sed 's/[^*]*--user=\([^]*\).*/\1/g' -` | |
| 36 options=`$nginx -V 2>&1 | grep 'configure arguments:'` | |
| 37 for opt in $options; do | |
| 38 if [`echo $opt | grep '.*-temp-path'` ]; then | |
| 39 value=`echo $opt | cut -d "=" -f 2` | |
| 40 if [! -d "$value" ]; then | |
| 41 # echo "creating" $value | |
| 42 mkdir -p $value && chown -R $user $value | |
| 43 fi | |
| 44 fi | |
| 45 done | |
| 46 } | |
| 47 | |
| 48 start() { 49 [-x $nginx] || exit 5 | |
| 50 [-f $NGINX_CONF_FILE] || exit 6 | |
| 51 make_dirs | |
| 52 echo -n $"Starting $prog: " | |
| 53 daemon $nginx -c $NGINX_CONF_FILE | |
| 54 retval=$? | |
| 55 echo | |
| 56 [$retval -eq 0 ] && touch $lockfile | |
| 57 return $retval | |
| 58 } | |
| 59 | |
| 60 stop() { 61 echo -n $"Stopping $prog: " | |
| 62 killproc $prog -QUIT | |
| 63 retval=$? | |
| 64 echo | |
| 65 [$retval -eq 0 ] && rm -f $lockfile | |
| 66 return $retval | |
| 67 } | |
| 68 | |
| 69 restart() { 70 configtest || return $? | |
| 71 stop | |
| 72 sleep 1 | |
| 73 start | |
| 74 } | |
| 75 | |
| 76 reload() { 77 configtest || return $? | |
| 78 echo -n $"Reloading $prog: " | |
| 79 killproc $nginx -HUP | |
| 80 RETVAL=$? | |
| 81 echo | |
| 82 } | |
| 83 | |
| 84 force_reload() { 85 restart | |
| 86 } | |
| 87 | |
| 88 configtest() { 89 $nginx -t -c $NGINX_CONF_FILE | |
| 90 } | |
| 91 | |
| 92 rh_status() { 93 status $prog | |
| 94 } | |
| 95 | |
| 96 rh_status_q() { 97 rh_status >/dev/null 2>&1 | |
| 98 } | |
| 99 | |
| 100 case "$1" in | |
| 101 start) | |
| 102 rh_status_q && exit 0 | |
| 103 $1 | |
| 104 ;; | |
| 105 stop) | |
| 106 rh_status_q || exit 0 | |
| 107 $1 | |
| 108 ;; | |
| 109 restart|configtest) | |
| 110 $1 | |
| 111 ;; | |
| 112 reload) | |
| 113 rh_status_q || exit 7 | |
| 114 $1 | |
| 115 ;; | |
| 116 force-reload) | |
| 117 force_reload | |
| 118 ;; | |
| 119 status) | |
| 120 rh_status | |
| 121 ;; | |
| 122 condrestart|try-restart) | |
| 123 rh_status_q || exit 0 | |
| 124 ;; | |
| 125 *) | |
| 126 echo $"Usage: $0 {start|stop|status|restart|condrestart|try-restart|reload|force-reload|configtest}" | |
| 127 exit 2 | |
| 128 esac | |
| 129 ------------------------------------ | |
| 130 chmod +x /etc/init.d/nginx | |
| 131 chkconfig --add nginx | |
| 132 chkconfig nginx off // 一会作为 corosync 的资源,所以不要开机自动启动 |
3. 安装 mysql,man 和 path 路径输出这里不再演示:
| 1 useradd -r mysql // 保证两台主机的 mysql 用户 id 和组 id 完全一致 | |
| 2 tar xf mariadb-10.0.20-linux-x86_64.tar.gz -C /usr/local/ | |
| 3 cd /usr/local/ | |
| 4 ln -sv mariadb-10.0.20-linux-x86_64 mysql | |
| 5 cd mysql/ | |
| 6 chown -R root:mysql . | |
| 7 ln -sv /usr/local/mysql/include /usr/include/mysql // 输出 mysql 的头文件至系统头文件路径 | |
| 8 echo '/usr/local/mysql/lib' > /etc/ld.so.conf.d/mysql.conf // 输出 mysql 的库文件给系统库查找路径 | |
| 9 ldconfig |
本试验中 coro1 为 drbd 的 Primary,所以下面的操作在 coro1 上进行,提前将 /dev/brbd0 挂载至 /mydata:
| 1 chown -R mysql:mysql /mydata/data/ | |
| 2 /usr/local/mysql/scripts/mysql_install_db --user=mysql --datadir=/mydata/data/ // 初始化 mysql | |
| 3 cp /usr/local/mysql/support-files/my-large.cnf /etc/my.cnf // 提供配置文件 | |
| 4 vim /etc/my.cnf | |
| 5 ------------------------------------ | |
| 6 datadir = /mydata/data // 增加此项 | |
| 7 ------------------------------------ | |
| 8 cp /usr/local/mysql/support-files/mysql.server /etc/init.d/mysqld // 提供服务脚本 | |
| 9 scp -p /etc/init.d/mysqld coro2:/etc/init.d/ | |
| 10 scp -p /etc/my.cnf coro2:/etc/ | |
| 11 chkconfig --add mysqld | |
| 12 chkconfig mysqld off // 一会作为 corosync 的资源,所以不要开机自动启动 | |
| 13 service mysqld start | |
| 14 /usr/local/mysql/bin/mysql // 连接 mysql | |
| 15 ------------------------------------ | |
| 16 CREATE DATABASE abcd; // 创建 abcd 数据库 | |
| 17 SHOW DATABASES; // 显示数据库列表 |

停掉 mysql,让 drbd 主节点切换至 coro2 并挂载,在 coro2 上连接 mysql,切换主次步骤请参考前面:
| 1 chkconfig --add mysqld | |
| 2 chkconfig mysqld off | |
| 3 service mysqld start | |
| 4 /usr/local/mysql/bin/mysql | |
| 5 ----------------------------------- | |
| 6 SHOW DATABASES; |

mysql 测试成功,coro2 上也可以看到 coro1 创建的数据。停掉 mysql,让主节点再次切换到 coro1 上并挂载 /dev/drbd0。
4. 编译安装 php:
| 1 yum -y install libxml2-devel bzip2-devel libcurl-devel libmcrypt-devel | |
| 2 tar xf php-5.6.11.tar.bz2 | |
| 3 cd php-5.6.11 | |
| 4 ./configure --prefix=/usr/local/php --with-mysql=/usr/local/mysql --with-openssl --enable-fpm --enable-sockets --enable-sysvshm --with-mysqli=/usr/local/mysql/bin/mysql_config --enable-mbstring --with-freetype-dir --with-jpeg-dir --with-png-dir --with-zlib-dir --with-libxml-dir=/usr --enable-xml --with-mhash --with-mcrypt --with-config-file-path=/etc --with-config-file-scan-dir=/etc/php.d --with-bz2 --with-curl --with-pdo-mysql=/usr/local/mysql | |
| 5 make && make install |
5. 为 php 和 php-fpm 提供配置文件:
| 1 cp php.ini-production /etc/php.ini // 提供 php 配置文件 | |
| 2 cp sapi/fpm/init.d.php-fpm /etc/init.d/php-fpm // 提供脚本 | |
| 3 chmod +x /etc/init.d/php-fpm | |
| 4 chkconfig --add php-fpm | |
| 5 chkconfig php-fpm off // 一会作为 corosync 的资源,所以不要开机自动启动 | |
| 6 cp /usr/local/php/etc/php-fpm.conf.default /usr/local/php/etc/php-fpm.conf // 提供 php-fpm 配置文件 | |
| 7 vim /usr/local/php/etc/php-fpm.conf | |
| 8 --------------------------------------------------- | |
| 9 pm.max_children = 150 | |
| 10 pm.start_servers = 8 | |
| 11 pm.min_spare_servers = 5 | |
| 12 pm.max_spare_servers = 10 | |
| 13 pid = /usr/local/php/var/run/php-fpm.pid | |
| 14 user = nginx | |
| 15 group = nginx | |
| 16 listen = 192.168.19.150:9000 // 监听在 VIP 的 9000 端口 |
六、LNMP 与 DRBD 结合
1. 现在试验中 coro1 为 drbd 的 Primary 节点,所以以下操作在 coro1 上进行:
| 1 chown -R nginx:nginx /mydata/www/ | |
| 2 vim /etc/nginx/nginx.conf | |
| 3 ---------------------------------------- | |
| 4 location / { 5 root /mydata/www; | |
| 6 index index.php index.html index.htm; | |
| 7 } | |
| 8 location ~ \.php$ { 9 root /mydata/www; | |
| 10 fastcgi_pass 192.168.19.150:9000; | |
| 11 fastcgi_index index.php; | |
| 12 fastcgi_param SCRIPT_FILENAME /scripts$fastcgi_script_name; | |
| 13 include fastcgi_params; | |
| 14 } | |
| 15 ---------------------------------------- | |
| 16 vim /etc/nginx/fastcgi_params // 将此文件内容改为如下几行 | |
| 17 ---------------------------------------- | |
| 18 fastcgi_param GATEWAY_INTERFACE CGI/1.1; | |
| 19 fastcgi_param SERVER_SOFTWARE nginx; | |
| 20 fastcgi_param QUERY_STRING $query_string; | |
| 21 fastcgi_param REQUEST_METHOD $request_method; | |
| 22 fastcgi_param CONTENT_TYPE $content_type; | |
| 23 fastcgi_param CONTENT_LENGTH $content_length; | |
| 24 fastcgi_param SCRIPT_FILENAME $document_root$fastcgi_script_name; | |
| 25 fastcgi_param SCRIPT_NAME $fastcgi_script_name; | |
| 26 fastcgi_param REQUEST_URI $request_uri; | |
| 27 fastcgi_param DOCUMENT_URI $document_uri; | |
| 28 fastcgi_param DOCUMENT_ROOT $document_root; | |
| 29 fastcgi_param SERVER_PROTOCOL $server_protocol; | |
| 30 fastcgi_param REMOTE_ADDR $remote_addr; | |
| 31 fastcgi_param REMOTE_PORT $remote_port; | |
| 32 fastcgi_param SERVER_ADDR $server_addr; | |
| 33 fastcgi_param SERVER_PORT $server_port; | |
| 34 fastcgi_param SERVER_NAME $server_name; | |
| 35 ---------------------------------------- | |
| 36 scp /etc/nginx/nginx.conf coro2:/etc/nginx/ | |
| 37 scp /etc/nginx/fastcgi_params coro2:/etc/nginx/ | |
| 38 ifconfig eth0:0 192.168.19.150/24 up // 手动启动 VIP | |
| 39 service nginx start | |
| 40 service mysqld start | |
| 41 service php-fpm start |
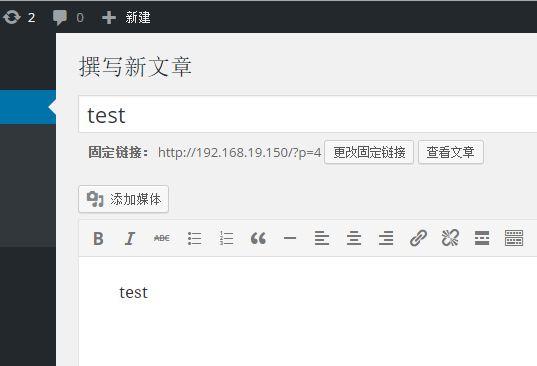
在 /mydata/www 下放入网页文件,此处以 wordpress 为例。用浏览器打开 http://192.168.19.150,如果没问题,则会出现安装页面,按照提示安装即可。我这里手动创建了 wordpress 数据库,并给 root 用户添加了密码,安装时就直接使用 root。
| 1 /usr/local/mysql/bin/mysql | |
| 2 ----------------------------------------- | |
| 3 CREATE DATABASE wordpress; | |
| 4 UPDATE mysql.user SET Password=PASSWORD(123456) WHERE User='root'; | |
| 5 FLUSH PRIVILEGES; |

2. 切换 drbd 的 Primary 节点为 coro2,并测试:
在 coro1 上操作:
| 1 service nginx stop | |
| 2 service mysqld stop | |
| 3 service php-fpm stop | |
| 4 umount /mydata/ | |
| 5 drbdadm secondary web6 ifconfig eth0:0 down |
在 coro2 上操作:
| 1 drbdadm primary web | |
| 2 mount /dev/drbd0 /mydata/ | |
| 3 ifconfig eth0:0 192.168.19.150/24 up | |
| 4 service nginx start | |
| 5 service mysqld start | |
| 6 service php-fpm start |
手动切换完毕之后,同样打开 http://192.168.19.150,进行任何操作均没问题。至此,drbd+LNMP 搭建完毕。下一步,就要将 corosync 和 pacemaker 整合进来了。现在检查两台主机的 VIP、nginx、php-fpm、mysql、drbd 均为关闭状态,且不能开机自动启动。
实验系统:CentOS 6.6_x86_64
实验前提:
1)提前准备好编译环境,防火墙和 selinux 都关闭;
2)本配置共有两个测试节点,分别 coro1 和 coro2,对应的 IP 地址分别为 192.168.19.55 和 192.168.19.98;
3)集群服务为 nginx 服务;
实验软件:corosync-0:1.4.7-1.el6 pacemaker-0:1.1.12-4.el6 crmsh-2.1-1.6 drbd-8.4.4 php-5.6.11 mariadb-10.0.20 tengine-2.1.0
软件下载 :
—————————————— 分割线 ——————————————
免费下载地址在 http://linux.linuxidc.com/
用户名与密码都是 www.linuxidc.com
具体下载目录在 /2015 年资料 / 7 月 /25 日 / 基于 Corosync+Pacemaker+DRBD+LNMP 实现 Web 服务器高可用集群 /
下载方法见 http://www.linuxidc.com/Linux/2013-07/87684.htm
—————————————— 分割线 ——————————————
注意事项:单主机操作会有标注,除此之外的是两台主机都要完成的
实验拓扑:
MySQL+Corosync+Pacemaker+DRBD 构建高可用 MySQL http://www.linuxidc.com/Linux/2013-09/90408.htm
搭建基于 Corosync+DRBD 的高可用 MySQL 集群 http://www.linuxidc.com/Linux/2013-10/91386.htm
分别基于 NFS 服务和 DRBD 服务利用 Corosync 配置高可用集群 http://www.linuxidc.com/Linux/2013-09/90410.htm
Linux 高可用(HA)集群之 Corosync 详解 http://www.linuxidc.com/Linux/2013-08/88733.htm
pacemaker + Corosync 搭建高可用集群 http://www.linuxidc.com/Linux/2013-06/85972.htm
Corosync+pacemaker+RA 实现 MySQL 高可用 http://www.linuxidc.com/Linux/2012-08/67949.htm
Corosync 部署 MySQL+DRBD 高可用服务 http://www.linuxidc.com/Linux/2014-07/104694.htm
一、准备工作
1. 所有节点的主机名称和对应的 IP 地址解析服务可以正常工作,且每个节点的主机名称需要跟“uname -n”命令的结果保持一致。因此,需要保证两个节点上的 /etc/hosts 文件均添加了下面的内容:
2. 为了使得重新启动系统后仍能保持如上的主机名称,还分别需要在各节点执行类似如下的命令:
coro1 上:
| 1 sed -i 's@\(HOSTNAME=\).*@\1coro1@g' /etc/sysconfig/network | |
| 2 hostname coro1 |
coro2 上:
| 1 sed -i 's@\(HOSTNAME=\).*@\1coro2@g' /etc/sysconfig/network | |
| 2 hostname coro2 |
3. 设定两个节点可以基于密钥进行 ssh 通信,并测试:
coro1 上:
| 1 ssh-keygen -t rsa | |
| 2 ssh-copy-id -i ~/.ssh/id_rsa.pub root |
coro2 上:
| ssh-keygen -t rsa | |
| ssh-copy-id -i ~/.ssh/id_rsa.pub root |
4. 两个节点时间必须同步:一般使用 ntpdate 进行操作,这里不再演示。
二、安装 corosync 和 pacemaker 并配置
1. 安装 epel 源:
1 yum -y install epel*
2. 安装 corosync 和 pacemaker:
1 yum -y install corosync pacemaker
3. 在 coro1 上编辑 /etc/corosync.conf
| 1 cd /etc/corosync/ | |
| 2 cp corosync.conf.example corosync.conf | |
| 3 vim corosync.conf | |
| 4 ------------------------------------ | |
| 5 bindnetaddr: 192.168.19.0 // 为你的网卡所在网络的网络地址 | |
| 6 mcastaddr: 239.255.19.1 // 组播地址 | |
| 7 service {// 添加此部分 | |
| 8 ver: 0 | |
| 9 name: pacemaker | |
| 10 # use_mgmtd: yes | |
| 11 } |
4. 在 coro1 上生成节点间通信时用到的认证密钥文件:
1 corosync-keygen
5. 将 corosync.conf 和 authkey 复制至 coro2 上:
1 scp -p corosync.conf authkey coro2:/etc/corosync/
三、安装 crmsh 并启动 corosync
1. 安装 crmsh,需要提前下好 rpm 包:
1 yum -y install crmsh-2.1-1.6.x86_64.rpm
2. 启动 corosync(在 coro1 上执行):
1 service corosync start
3. 查看 corosync 引擎是否正常启动:
1 grep -e "Corosync Cluster Engine" -e "configuration file" /var/log/cluster/corosync.log
4. 查看初始化成员节点通知是否正常发出:
1 grep TOTEM /var/log/cluster/corosync.log
5. 检查启动过程中是否有错误产生。下面的错误信息表示 packmaker 不久之后将不再作为 corosync 的插件运行,因此,建议使用 cman 作为集群基础架构服务,此处可安全忽略:
1 grep ERROR: /var/log/cluster/corosync.log
6. 查看 pacemaker 是否正常启动:
1 grep pcmk_startup /var/log/cluster/corosync.log
7. 如果上面命令执行均没有问题,接着可以在 coro1 上执行如下命令启动 coro2 上的 corosync:
1 ssh coro2 'service corosync start'
8. 如果安装了 crmsh,可使用如下命令查看集群节点的启动状态。从下面的信息可以看出两个节点都已经正常启动,并且集群已经处于正常工作状态:
1 crm status
四、编译安装 drbd 并配置
drbd 共有两部分组成:内核模块和用户空间的管理工具。其中 drbd 内核模块代码已经整合进 Linux 内核 2.6.33 以后的版本中,因此,如果您的内核版本高于此版本的话,你只需要安装管理工具即可;否则,您需要同时安装内核模块和管理工具两个软件包,并且此两者的版本号一定要保持对应。
1. 安装用户空间工具:
| 1 tar xf drbd-8.4.4.tar.gz | |
| 2 cd drbd-8.4.4 | |
| 3 ./configure --prefix=/usr/local/drbd --with-km | |
| 4 make KDIR=/usr/src/kernels/2.6.32-504.30.3.el6.x86_64 // 换成自己的内核版本 | |
| 5 make install | |
| 6 mkdir -pv /usr/local/drbd/var/run/drbd | |
| 7 cp /usr/local/drbd/etc/rc.d/init.d/drbd /etc/rc.d/init.d | |
| 8 chkconfig --add drbd | |
| 9 chkconfig drbd off // 一会作为 corosync 的资源,所以不要开机自动启动 |
2. 安装 drbd 模块:
| 1 cd drbd | |
| 2 make clean | |
| 3 make KDIR=/usr/src/kernels/2.6.32-504.30.3.el6.x86_64 // 换成自己的内核版本 | |
| 4 cp drbd.ko /lib/modules/`uname -r`/kernel/lib | |
| 5 depmod |
3. 给主机分区,大小为 5G。这里不再给出具体步骤,两台主机的 /dev/sda7 为一会要使用的分区:
4. 配置 drbd(在 coro1 上操作):
drbd 的主配置文件为 /etc/drbd.conf;为了管理的便捷性,目前通常会将些配置文件分成多个部分,且都保存至 /etc/drbd.d/ 目录中,主配置文件中仅使用 ”include” 指令将这些配置文件片断整合起来。通常 /etc/drbd.d 目录中的配置文件为 global_common.conf 和所有以.res 结尾的文件。其中 global_common.conf 中主要定义 global 段和 common 段,而每一个.res 的文件用于定义一个资源。
| 1 cd /usr/local/drbd/etc/drbd.d/ | |
| 2 vim global_common.conf | |
| 3 -------------------------------------- | |
| 4 global { 5 usage-count no; | |
| 6 # minor-count dialog-refresh disable-ip-verification | |
| 7 } | |
| 8 | |
| 9 common {10 protocol C; | |
| 11 | |
| 12 handlers {13 # These are EXAMPLE handlers only. | |
| 14 # They may have severe implications, | |
| 15 # like hard resetting the node under certain circumstances. | |
| 16 # Be careful when chosing your poison. | |
| 17 | |
| 18 # pri-on-incon-degr "/usr/lib/drbd/notify-pri-on-incon-degr.sh; /usr/lib/drbd/notify-emergency-reboot.sh; echo b > /p | |
| 19 roc/sysrq-trigger ; reboot -f"; | |
| 20 # pri-lost-after-sb "/usr/lib/drbd/notify-pri-lost-after-sb.sh; /usr/lib/drbd/notify-emergency-reboot.sh; echo b > /p | |
| 21 roc/sysrq-trigger ; reboot -f"; | |
| 22 # local-io-error "/usr/lib/drbd/notify-io-error.sh; /usr/lib/drbd/notify-emergency-shutdown.sh; echo o > /proc/sysrq- | |
| 23 trigger ; halt -f"; | |
| 24 # fence-peer "/usr/lib/drbd/crm-fence-peer.sh"; | |
| 25 # split-brain "/usr/lib/drbd/notify-split-brain.sh root"; | |
| 26 # out-of-sync "/usr/lib/drbd/notify-out-of-sync.sh root"; | |
| 27 # before-resync-target "/usr/lib/drbd/snapshot-resync-target-lvm.sh -p 15 -- -c 16k"; | |
| 28 # after-resync-target /usr/lib/drbd/unsnapshot-resync-target-lvm.sh; | |
| 29 } | |
| 30 | |
| 31 startup {32 # wfc-timeout degr-wfc-timeout outdated-wfc-timeout wait-after-sb | |
| 33 } | |
| 34 | |
| 35 options {36 # cpu-mask on-no-data-accessible | |
| 37 } | |
| 38 | |
| 39 disk {40 #on-io-error detach; | |
| 41 # size max-bio-bvecs on-io-error fencing disk-barrier disk-flushes | |
| 42 # disk-drain md-flushes resync-rate resync-after al-extents | |
| 43 # c-plan-ahead c-delay-target c-fill-target c-max-rate | |
| 44 # c-min-rate disk-timeout | |
| 45 } | |
| 46 net {47 #cram-hmac-alg "sha1"; | |
| 48 #shared-secret "mydrbd"; | |
| 49 # protocol timeout max-epoch-size max-buffers unplug-watermark | |
| 50 # connect-int ping-int sndbuf-size rcvbuf-size ko-count | |
| 51 # allow-two-primaries cram-hmac-alg shared-secret after-sb-0pri | |
| 52 # after-sb-1pri after-sb-2pri always-asbp rr-conflict | |
| 53 # ping-timeout data-integrity-alg tcp-cork on-congestion | |
| 54 # congestion-fill congestion-extents csums-alg verify-alg | |
| 55 # use-rle | |
| 56 } | |
| 57 } |
5. 定义一个资源,web 是资源名,可以自己改:
| 1 vim /usr/local/drbd/etc/drbd.d/web.res | |
| 2 -------------------------------------- | |
| 3 resource web { 4 on coro1 { 5 device /dev/drbd0; | |
| 6 disk /dev/sda7; | |
| 7 address 192.168.19.55:7789; | |
| 8 meta-disk internal; | |
| 9 } | |
| 10 on coro2 {11 device /dev/drbd0; | |
| 12 disk /dev/sda7; | |
| 13 address 192.168.19.98:7789; | |
| 14 meta-disk internal; | |
| 15 } | |
| 16 } |
6. 以上文件在两个节点上必须相同,因此,可以基于 ssh 将刚才配置的文件全部同步至 coro2 节点:
1 scp /usr/local/drbd/etc/drbd.d/* coro2:/usr/local/drbd/etc/drbd.d/
7. 在两个节点上初始化已定义的资源并启动服务:
| 1 drbdadm create-md web | |
| 2 service drbd start |
8. 查看启动状态,从下面的信息中可以看出此时两个节点均处于 Secondary 状态:
1 cat /proc/drbd
9. 我们接下来需要将其中一个节点设置为 Primary,在要设置为 Primary 的节点上执行如下命令,这里在 coro1 上操作:
| 1 drbdadm primary --force web | |
| 2 cat /proc/drbd |
而后再次查看状态,可以发现数据同步过程已经开始。等数据同步完成以后再次查看状态,可以发现主次位置显示是不一样的。斜线前面的代表当前主机,后面的代表对方主机。
在 coro1 上查看:
在 coro2 上查看:
10. 创建文件系统并挂载:
文件系统的挂载只能在 Primary 节点进行,因此,也只有在设置了主节点后才能对 drbd 设备进行格式化,这里在 coro1 上进行操作。
| 1 mke2fs -t ext4 -L DRBD /dev/drbd0 | |
| 2 mkdir /mydata // 创建挂载点 | |
| 3 mount /dev/drbd0 /mydata/ | |
| 4 mkdir /mydata/www // 创建网页目录 | |
| 5 mkdir /mydata/data // 创建数据库目录 |
11. 切换 Primary 和 Secondary 节点:
对主 Primary/Secondary 模型的 drbd 服务来讲,在某个时刻只能有一个节点为 Primary,因此要切换两个节点的角色,只能在先将原有的 Primary 节点设置为 Secondary 后,才能原来的 Secondary 节点设置为 Primary。
在 coro1 上:
| 1 umount /mydata/ | |
| 2 drbdadm secondary web // 变为 secondary 节点 |
在 coro2 上:
| 1 drbdadm primary web // 变为 primary 节点 | |
| 2 cat /proc/drbd | |
| 3 mkdir /mydata // 创建挂载点 | |
| 4 mount /dev/drbd0 /mydata/ | |
| 5 ls /mydata/ |
可以看到,coro2 已经成为了 Primary,之前在 coro1 上创建的目录也能够访问到。测试完成后,再次将 coro1 变为 Primary 并挂载。
更多详情见请继续阅读下一页的精彩内容 :http://www.linuxidc.com/Linux/2015-07/120576p2.htm
七、使用 crmsh 为 corosync 添加资源
1. 创建 drbd 配置文件的软连接(两台机器均操作):
| 1 ln -sv /usr/local/drbd/etc/drbd.conf /etc/drbd.conf | |
| 2 ln -sv /usr/local/drbd/etc/drbd.d /etc/drbd.d |
2. 修改 php-fpm 启动脚本为如下内容,如不修改,则 corosync 无法识别(两台机器均操作):
| 1 #!/bin/sh | |
| 2 #======================================================================================= | |
| 3 # php-fpm - this script start and stop the php-fpm daemon | |
| 4 # | |
| 5 # chkconfig 35 on | |
| 6 # description: php-fpm is a FastCGI web server. | |
| 7 # processname: php-fpm | |
| 8 # config: /usr/local/php/etc/php-fpm.conf | |
| 9 # pidfile: /var/run/php-fpm.pid | |
| 10 #======================================================================================= | |
| 11 PATH=/usr/local/sbin:/usr/local/bin:/sbin:/bin:/usr/sbin:/usr/bin | |
| 12 | |
| 13 BINFILE="/usr/local/php/sbin/php-fpm" | |
| 14 CFGFILE="/usr/local/php/etc/php-fpm.conf" | |
| 15 PIDFILE="/var/run/php-fpm.pid" | |
| 16 LOCKFILE="/var/lock/php-fpm.lock" | |
| 17 | |
| 18 RETVAL=0 | |
| 19 | |
| 20 start() { 21 [[-x $BINFILE]] || exit 5 | |
| 22 [[-f $CFGFILE]] || exit 6 | |
| 23 | |
| 24 if [[`ps aux | grep php-fpm: | grep -v grep | wc -l` -gt 0 ]]; then | |
| 25 echo "The php-fpm is already running." | |
| 26 return 1 | |
| 27 fi | |
| 28 | |
| 29 $BINFILE -t >/dev/null 2>&1 | |
| 30 | |
| 31 if [[$? -ne 0 ]]; then | |
| 32 echo "The php-fpm configure has error." | |
| 33 return 1 | |
| 34 fi | |
| 35 | |
| 36 echo -n "Starting php-fpm......" | |
| 37 $BINFILE -y $CFGFILE -g ${PIDFILE} | |
| 38 RETVAL=$? | |
| 39 echo | |
| 40 [[$RETVAL -eq 0 ]] && touch $LOCKFILE | |
| 41 | |
| 42 return $RETVAL | |
| 43 } | |
| 44 | |
| 45 stop() { 46 if [[`ps aux | grep php-fpm: | grep -v grep | wc -l` -eq 0 ]]; then | |
| 47 echo "The php-fpm is not running." | |
| 48 return 1 | |
| 49 fi | |
| 50 | |
| 51 echo -n "Shutting down php-fpm......" | |
| 52 | |
| 53 if [[-f $PIDFILE]]; then | |
| 54 kill -QUIT `cat ${PIDFILE}` | |
| 55 else | |
| 56 kill -QUIT `ps aux | grep php-fpm | awk '/master/{print $2}'` | |
| 57 fi | |
| 58 | |
| 59 RETVAL=$? | |
| 60 echo | |
| 61 [[$RETVAL -eq 0 ]] && rm -f $LOCKFILE $PIDFILE | |
| 62 | |
| 63 return $RETVAL | |
| 64 } | |
| 65 | |
| 66 restart() { 67 stop | |
| 68 sleep 1 | |
| 69 | |
| 70 while true | |
| 71 do | |
| 72 if [[`ps aux | grep php-fpm: | grep -v grep | wc -l` -eq 0 ]]; then | |
| 73 start | |
| 74 break | |
| 75 fi | |
| 76 sleep 1 | |
| 77 done | |
| 78 | |
| 79 RETVAL=$? | |
| 80 echo | |
| 81 | |
| 82 return $RETVAL | |
| 83 } | |
| 84 | |
| 85 reload() { 86 if [[`ps aux | grep php-fpm: | grep -v grep | wc -l` -eq 0 ]]; then | |
| 87 echo "The php-fpm is not running." | |
| 88 return 1 | |
| 89 fi | |
| 90 | |
| 91 echo -n $"Reloading php-fpm......" | |
| 92 | |
| 93 if [[-f $PIDFILE]]; then | |
| 94 kill -USR2 `cat ${PIDFILE}` | |
| 95 else | |
| 96 kill -USR2 `ps aux | grep php-fpm | awk '/master/{print $2}'` | |
| 97 fi | |
| 98 | |
| 99 RETVAL=$? | |
| 100 echo | |
| 101 | |
| 102 return $RETVAL | |
| 103 } | |
| 104 | |
| 105 case "$1" in | |
| 106 start) | |
| 107 start | |
| 108 ;; | |
| 109 | |
| 110 stop) | |
| 111 stop | |
| 112 ;; | |
| 113 | |
| 114 restart) | |
| 115 restart | |
| 116 ;; | |
| 117 | |
| 118 reload) | |
| 119 reload | |
| 120 ;; | |
| 121 | |
| 122 *) | |
| 123 echo "Usage: service php-fpm {start|stop|restart|reload}" | |
| 124 RETVAL=1 | |
| 125 esac | |
| 126 | |
| 127 exit $RETVAL |
下面运行 crm 命令,进入 crm 命令行模式,非特殊注明情况下操作均在此模式下进行,在一台机器上操作即可。

3. 关闭 corosync 的 stonith 检测和仲裁:
| 1 configure // 进入配置菜单 | |
| 2 property stonith-enabled=false // 关闭 stonith 设备 | |
| 3 property no-quorum-policy=ignore // 关闭仲裁设备 | |
| 4 verify // 语法检测 | |
| 5 commit // 提交 |
4. 添加资源(configure 菜单下):
| 1 primitive mydrbd ocf:drbd params drbd_resource=web op monitor role=Master interval=20s timeout=30s op monitor role=Slave interval=30s timeout=20s op start timeout=240s op stop timeout=240s // 定义 drbd 资源 | |
| 2 primitive myfile Filesystem params device="/dev/drbd0" directory="/mydata" fstype="ext4" op monitor interval=30s timeout=60s op start timeout=60s op stop timeout=60s // 定义文件系统资源 | |
| 3 primitive myip IPaddr params ip=192.168.19.150 op monitor interval=30s timeout=60s // 定义 VIP 资源 | |
| 4 primitive mynginx lsb:nginx op monitor interval=30s timeout=20s // 定义 nginx 资源 | |
| 5 primitive mysql lsb:mysqld op monitor interval=30s timeout=60s // 定义 mysqld 资源 | |
| 6 primitive myphp lsb:php-fpm // 定义 php-fpm 资源 | |
| 7 group myserver myfile myip mynginx myphp mysql // 定义资源组 | |
| 8 verify // 语法检测,如没问题,先不要提交 |
5. 添加各种约束:
| 1 ms ms_mydrbd mydrbd meta master-max=1 master-node-max=1 clone-max=2 clone-node-max=1 notify=True //drbd 主从资源配置 | |
| 2 colocation myfile_with_mydrbd_master inf: myfile ms_mydrbd:Master // 定义排列约束,myfile 要和 drbd 的 Master 节点在一起 | |
| 3 colocation mysql_with_myfile inf: mysql myfile //mysql 要和 myfile 在一起 | |
| 4 order myfile_after_ms_mydrbd_master Mandatory: ms_mydrbd:promote myfile:start // 定义顺序约束,drbd 主节点被提升,myfile 才能启动 | |
| 5 order myip_after_myfile Mandatory: myfile myip | |
| 6 order mynginx_after_myip Mandatory: myip mynginx | |
| 7 verify | |
| 8 commit |
6. 提交之后,可以看到,所有资源已经运行在 coro2,打开 http://192.168.19.150 进行操作也没问题:

7. 下面操作让 coro2 成为备用节点。可以看到,资源全部转移到 coro1 上了,打开 http://192.168.19.150 进行各种操作仍然 OK:
| 1 cd .. | |
| 2 node standby coro2 //coro2 成为备用 | |
| ----------------------------- 等待 5 秒 | |
| 3 node online coro2 // 重新上线 | |
| 4 status // 查看状态 |

至此,实验全部结束。因为时间原因,很多细节有待完善,欢迎大家提供宝贵意见,谢谢!
本文永久更新链接地址 :http://www.linuxidc.com/Linux/2015-07/120576.htm


