共计 1316 个字符,预计需要花费 4 分钟才能阅读完成。
已经研究过 bind 的缓存 dns 服务器,今天研究下了 dnsmasq 的 dns 缓存,发现 dnsmasq 的配置上要简单得多,比 bind 上复杂的配置要让新手好上手些,毕竟是本地用太麻烦以后不好维护,好了。看操作吧。
系统:CentOS 5.4
ip:192.168.1.166
需要的软件:dnsmasq
1. 安装 dnsmasq(centos 可以直接用 yum 安装, 或者直接在光盘里找)
yum -y install Dnsmasq
2. 配置
cp /etc/dnsmasq.conf /etc/dnsmasq.conf.bak
vi /etc/dnsmasq.conf
dnsmasq.conf 里的内容:
# 找到
#resolv-file=
# 改为
resolv-file=/etc/resolv.dnsmasq.conf
保存退出后
cp /etc/resolv.conf /etc/resolv.dnsmasq.conf
vi /etc/resolv.conf
只保留一条记录:
nameserver 127.0.0.1
再修改 resolv.dnsmasq.conf
vi /etc/resolv.dnsmasq.conf
添加
nameserver 8.8.8.8
当然你也可以添加 opendns 的地址, 这个看个人习惯.
3. 启动
chkconfig dnsmasq on;service dnsmasq start
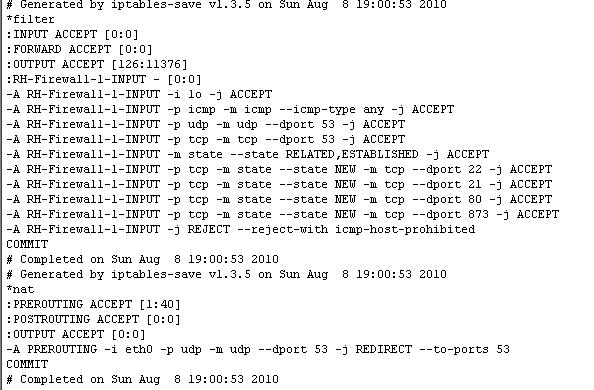
4. 修改 iptables 配置
iptables -t nat -A PREROUTING -i eth0 -p upd –dport 53 -j REDIRECT –to-port 53
上面这句是转发 eth0 接口的域名解析, 然后再把 53 端口开启, 不然内网的域名解析都会发不出去.
iptables -A RH-Firewall-1-INPUT -p udp -m udp –dport 53 -j ACCEPT
iptables -A RH-Firewall-1-INPUT -p tcp -m tcp –dport 53 -j ACCEPT
service iptables save;service iptables restart

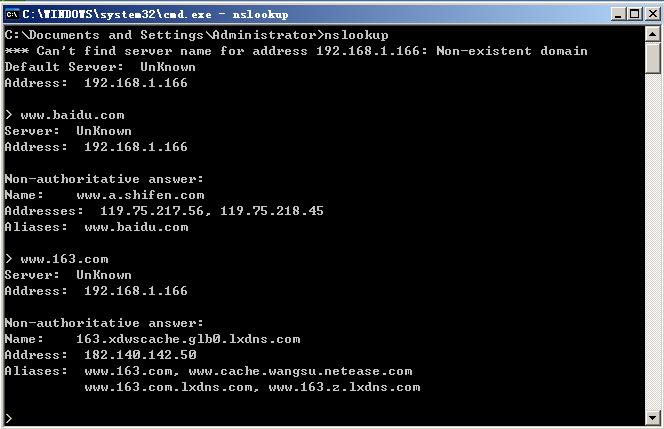
5. 验证
好了可以找台 Windows 电脑, 在 dns 服务器地址里加上 192.168.1.166, 删除其他的 dns 这样避免解析不准确性.

ps: 最后大家可以去试试双网卡搭建 dnsmasq, 其中一个 ip 是内网, 另外一个 ip 是公网的做法.
DNSmasq 的详细介绍:请点这里
DNSmasq 的下载地址:请点这里
相关阅读:
Ubuntu 10.10 下 DNSmasq 和 Named 似有冲突 http://www.linuxidc.com/Linux/2010-12/30338.htm
Ubuntu 8.10 下使用 DNSmasq 提供 DNS 和 DHCP 服务 http://www.linuxidc.com/Linux/2008-12/17589.htm
用 DNSmasq 搭建小型的内网 DNS http://www.linuxidc.com/Linux/2013-04/82073.htm
Ubuntu Server 12.04 下 Cobbler + DNSmasq +tftpd-hpa 的安装配置 http://www.linuxidc.com/Linux/2013-11/92573.htm


