共计 1368 个字符,预计需要花费 4 分钟才能阅读完成。
一、说明
环境:CentOS 6.5
版本:maven 3.3.1 nexus 2.11.2
二、安装步骤
2.1 下载
apache-maven-3.3.1-bin.tar
nexus-2.11.2-06-bundle.tar
2.2 maven 的安装步骤
2.2.1 解压 Maven 安装包
1. 将下载好的 apache-maven-3.0.5-bin.tar.gz 包,用 FTP 工具传至服务器上。
2. 解压安装包
解压命令:

移至 /usr/local 下:
![]()
2.2.2 配置环境变量
1. 编辑 /etc/profile, 在末尾添加如下:
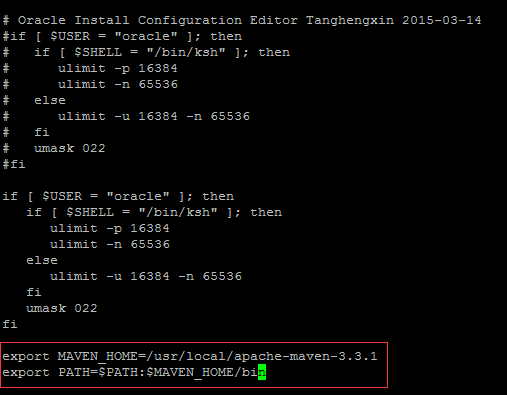
保存退出,让系统重新执行下 /etc/profile, 命令:
source /etc/profile
查验是否安装成功:

2.3 Sonatype Nexus 私服安装步骤
1. 将下载好的 nexus-2.5.1-bundle.tar.gz 包,用 FTP 工具传至服务器上。
2. 解压安装包
![]()
移至 /usr/local 下
cp nexus-2.11.2-06 /usr/local
查看:ls -n:
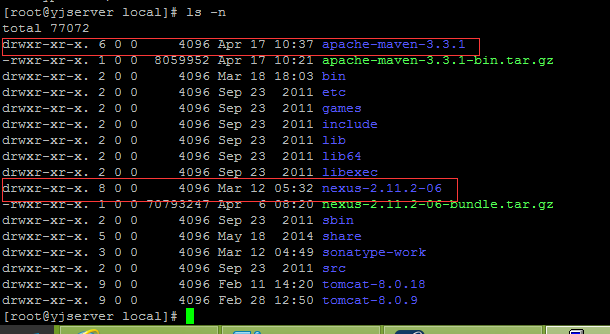
nexus 装在 /usr/local 目录下。
可以编辑 $NEXUS_HOME/conf/nexus.properties 自定设置参数,包括端口号等。
根据您的系统平台,可以启动 nexus, 启动命令:
2. 设置 nexus 为 Linux 系统的服务,并开机自动启动
1. 复制 $NEXUS_HOME/bin/jsw/linux-x86-64/nexus 到 /etc/init.d/nexus
2. 授于 nexus 脚本有可执行的权限:
chmod 755 /etc/init.d/nexus
3. 修改 nexus 文件,配置以下参数:
a) 修改 NEXUS_HOME 绝对路径,如:NEXUS_HOME=”/usr/local/nexus”
b) 设置 RUN_AS_USER=nexus,或都其它的用户,前提是创建了此用户。
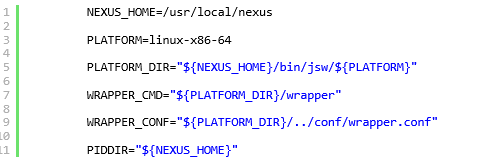
4. Red Hat, Fedora, CentOS 增加 nexus 服务:
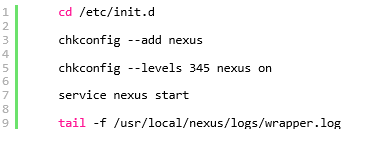
Ubuntu and Debian 增加 nexus 服务
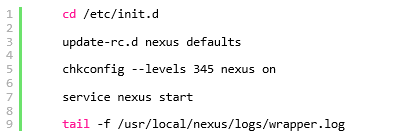
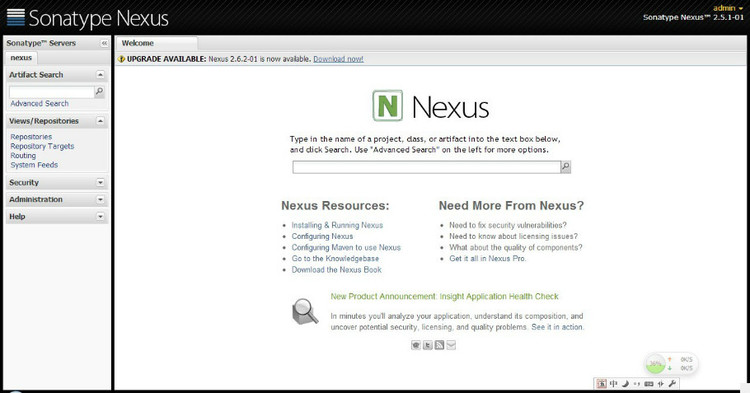
配置完成后,您可以访问: http://localhost:8081/nexus(localhost 为你的服务器地址), 进入系统进行设置
默认管理账号:admin 密码:admin123
Maven 权威指南_中文完整版清晰 PDF http://www.linuxidc.com/Linux/2014-06/103690.htm
Maven 3.1.0 发布,项目构建工具 http://www.linuxidc.com/Linux/2013-07/87403.htm
Linux 安装 Maven http://www.linuxidc.com/Linux/2013-05/84489.htm
Maven3.0 配置和简单使用 http://www.linuxidc.com/Linux/2013-04/82939.htm
Ubuntu 下搭建 sun-jdk 和 Maven2 http://www.linuxidc.com/Linux/2012-12/76531.htm
Maven 使用入门 http://www.linuxidc.com/Linux/2012-11/74354.htm
本文永久更新链接地址:http://www.linuxidc.com/Linux/2015-12/126482.htm


