共计 6525 个字符,预计需要花费 17 分钟才能阅读完成。
Nginx (读”engine x”) 是一款免费、开源的高性能 HTTP 服务。Nginx 稳定、丰富的功能集、配置简单、资源消耗低。本教程介绍了如何通过 PHP7 支持(通过 PHP-FPM)和 MySQL5.7 支持(LEMP= LINUX + nginx(发音为“engine x”)+ MySQL+ PHP)在 Ubuntu 16.04 服务器上安装 Nginx 服务器。
1 初步说明
在本教程中,我使用的 IP 地址 192.168.1.100,主机名 server1.example.com。这些设置可能与你的不同,所以你不得不在适当情况下更换他们。
我运行的所有步骤在本教程中使用 root 权限,所以一定要确保你以 root 身份登录:
2 安装 MySQL 5.7
安装 MySQL 运行命令:
apt-get -y install mysql-server mysql-client
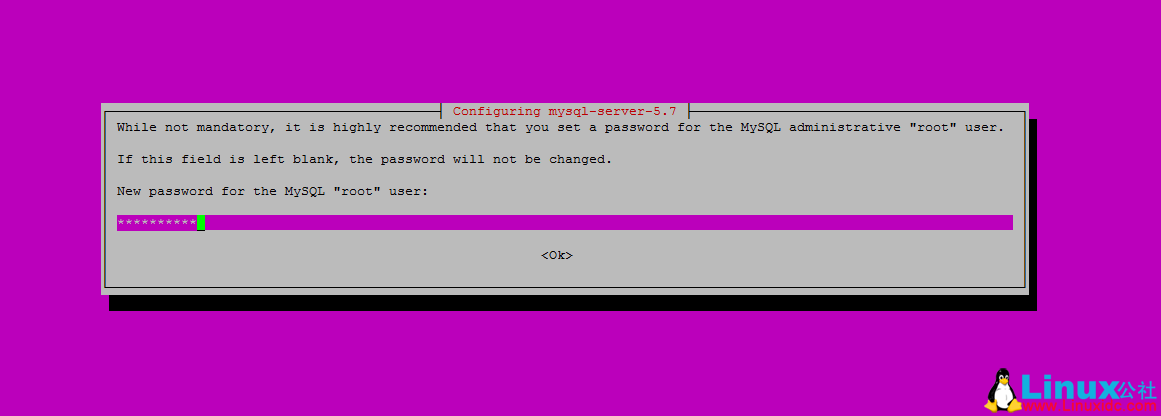
你会被要求提供 MySQL 的 root 用户密码:
New password for the MySQL“root”user: <– yourrootsqlpassword
Repeat password for the MySQL“root”user: <– yourrootsqlpassword

为了确保数据库服务器,并删除匿名用户和测试数据库,运行 mysql_secure_installation 命令。
mysql_secure_installation
你会问 这些问题:
root@server1:~# mysql_secure_installation
保护 MySQL 服务器部署。
Enter password for user root: <– Enter the MySQL root password
VALIDATE PASSWORD PLUGIN can be used to test passwords
and improve security. It checks the strength of password
and allows the users to set only those passwords which are
secure enough. Would you like to setup VALIDATE PASSWORD plugin?
Press y|Y for Yes, any other key for No: <– Press y if you want this function or press Enter otherwise.
Using existing password for root.
Change the password for root ? ((Press y|Y for Yes, any other key for No) : <– Press enter
… skipping.
By default, a MySQL installation has an anonymous user,
allowing anyone to log into MySQL without having to have
a user account created for them. This is intended only for
testing, and to make the installation go a bit smoother.
You should remove them before moving into a production
environment.
Remove anonymous users? (Press y|Y for Yes, any other key for No) : <– y
Success.
Normally, root should only be allowed to connect from
‘localhost’. This ensures that someone cannot guess at
the root password from the network.
Disallow root login remotely? (Press y|Y for Yes, any other key for No) : <– y
Success.
By default, MySQL comes with a database named‘test’that
anyone can access. This is also intended only for testing,
and should be removed before moving into a production
environment.
Remove test database and access to it? (Press y|Y for Yes, any other key for No) : <– y
– Dropping test database…
Success.
– Removing privileges on test database…
Success.
Reloading the privilege tables will ensure that all changes
made so far will take effect immediately.
Reload privilege tables now? (Press y|Y for Yes, any other key for No) : <– y
Success.
All done!
MySQL is secured now.
3 安装 Nginx
在你已经安装了 Apache2 的话,那么使用这些命令先删除再安装 nginx:
service apache2 stop
update-rc.d -f apache2 remove
apt-get remove apache2
Ubuntu16.04 有 Nginx 安装包,我们可以安装。
apt-get -y install nginx
Start nginx afterwards:
service nginx start
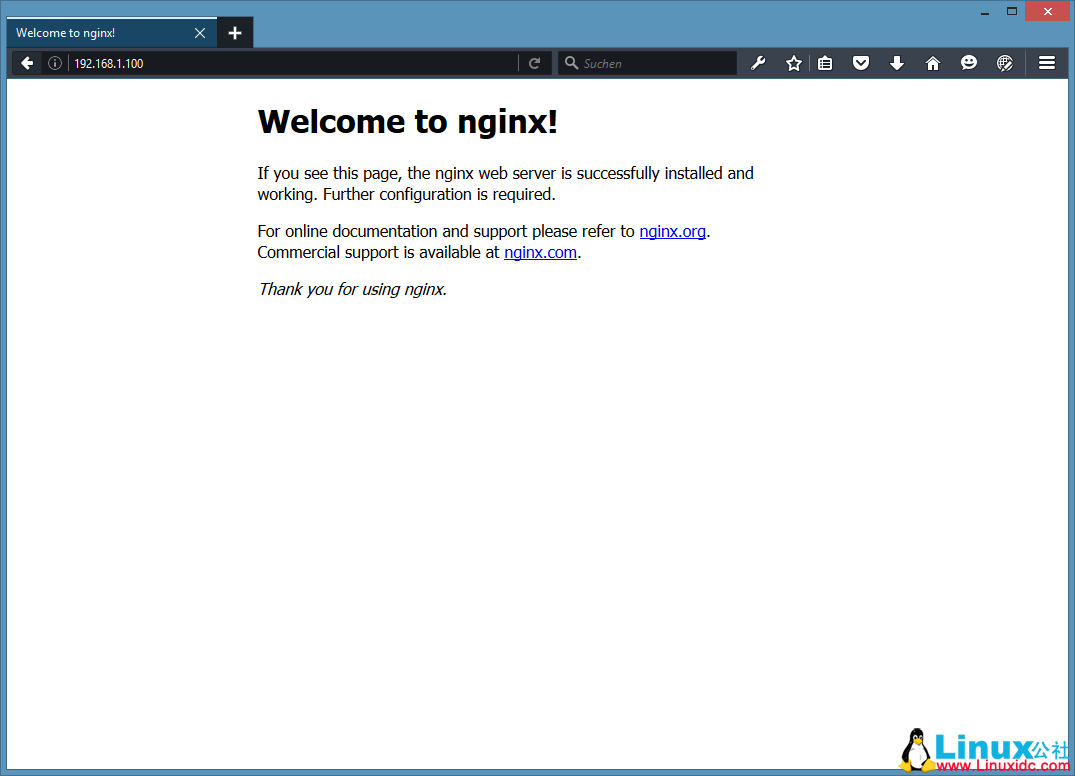
输入您的 Web 服务器的 IP 地址或主机名到浏览器(例如 http://192.168.1.100),你应该看到如下页面:

在 Ubuntu16.04 的默认 nginx 的文档根目录为 /var/www/html
4 安装 PHP 7
我们可以通过使 nginx 的 PHP 工作 PHP-FPM(PHP-FPM(FastCGI 进程管理器)是为任何规模的网站,尤其是繁忙的网站有用的一些附加功能的替代 PHP 的 FastCGI 实现),我们安装如下:
apt-get -y install php7.0-fpm
5 配置 nginx
打开配置文件 /etc/nginx/nginx.conf:
nano /etc/nginx/nginx.conf
配置是很容易理解 (你可以点击官方教程: http://wiki.nginx.org/NginxFullExample 或:http://wiki.nginx.org/NginxFullExample2)
首先(这是可选)调整 keepalive_timeout 到一个合理的值:
| [...] | |
| keepalive_timeout 2; | |
| [...] |
虚拟主机服务器 {} 容器定义。默认的虚拟主机是在文件中定义的 /etc/nginx/sites-available/default – 让我们来修改它,如下所示:
nano /etc/nginx/sites-available/default
| [...] | |
| server { | |
| listen 80 default_server; | |
| listen [::]:80 default_server; | |
| # SSL configuration | |
| # | |
| # listen 443 ssl default_server; | |
| # listen [::]:443 ssl default_server; | |
| # | |
| # Note: You should disable gzip for SSL traffic. | |
| # See: https://bugs.debian.org/773332 | |
| # | |
| # Read up on ssl_ciphers to ensure a secure configuration. | |
| # See: https://bugs.debian.org/765782 | |
| # | |
| # Self signed certs generated by the ssl-cert package | |
| # Don't use them in a production server! | |
| # | |
| # include snippets/snakeoil.conf; | |
| root /var/www/html; | |
| # Add index.php to the list if you are using PHP | |
| index index.html index.htm index.nginx-debian.html; | |
| server_name _; | |
| location / { | |
| # First attempt to serve request as file, then | |
| # as directory, then fall back to displaying a 404. | |
| try_files $uri $uri/ =404; | |
| } | |
| # pass the PHP scripts to FastCGI server listening on 127.0.0.1:9000 | |
| # | |
| location ~ \.php$ { | |
| include snippets/fastcgi-php.conf; | |
| # With php7.0-cgi alone: | |
| # fastcgi_pass 127.0.0.1:9000; | |
| # With php7.0-fpm: | |
| fastcgi_pass unix:/run/php/php7.0-fpm.sock; | |
| } | |
| # deny access to .htaccess files, if Apache's document root | |
| # concurs with nginx's one | |
| # | |
| location ~ /\.ht {deny all;} | |
| } | |
| [...] |
server_name _; 使这是一个默认捕捉所有虚拟主机(当然,你可以同时喜欢这里 www.example.com 指定主机名)。
根目录 /var/www/html; 意味着文档根目录/var/www/html.
PHP 的重要组成部分位置 ~ \.php$ {} stanza. 取消注释它来启用它。
现在保存文件并重新加载 nginx:
service nginx reload
下一步打开 /etc/php/7.0/fpm/php.ini…
nano /etc/php/7.0/fpm/php.ini
设置 cgi.fix_pathinfo=0:
| [...] | |
| ; cgi.fix_pathinfo provides *real* PATH_INFO/PATH_TRANSLATED support for CGI. PHP's | |
| ; previous behaviour was to set PATH_TRANSLATED to SCRIPT_FILENAME, and to not grok | |
| ; what PATH_INFO is. For more information on PATH_INFO, see the cgi specs. Setting | |
| ; this to 1 will cause PHP CGI to fix its paths to conform to the spec. A setting | |
| ; of zero causes PHP to behave as before. Default is 1. You should fix your scripts | |
| ; to use SCRIPT_FILENAME rather than PATH_TRANSLATED. | |
| ; http://php.net/cgi.fix-pathinfo | |
| cgi.fix_pathinfo=0 | |
| [...] |
重新加载 PHP-FPM:
service php7.0-fpm reload
建立探针文件 /var/www/html:
nano /var/www/html/info.php
| phpinfo(); | |
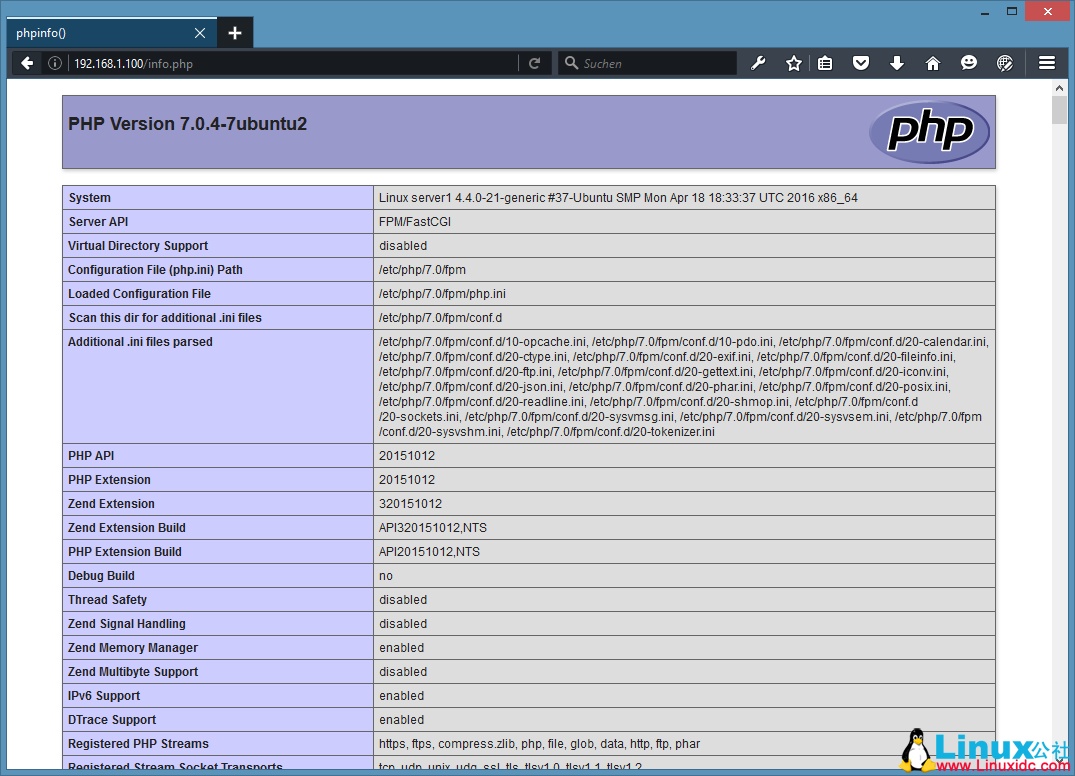
浏览器访问 (e.g. http://192.168.1.100/info.php):

6 让 MySQL 获得 PHP 7 支持
先搜索一下 PHP 支持的模块:
apt-cache search php7.0
使用下面的命令安装:
apt-get -y install php7.0-mysql php7.0-curl php7.0-gd php7.0-intl php-pear php-imagick php7.0-imap php7.0-mcrypt php-memcache php7.0-pspell php7.0-recode php7.0-sqlite3 php7.0-tidy php7.0-xmlrpc php7.0-xsl php7.0-mbstring php-gettext
APCu 是随 PHP7 PHP Opcache 模块的扩展,它增加了一些兼容性功能的支持 APC 缓存(例如 WordPress 的插件缓存)软件。
APCu 可以安装如下:
apt-get -y install php-apcu
重新加载 PHP-FPM:
service php7.0-fpm reload
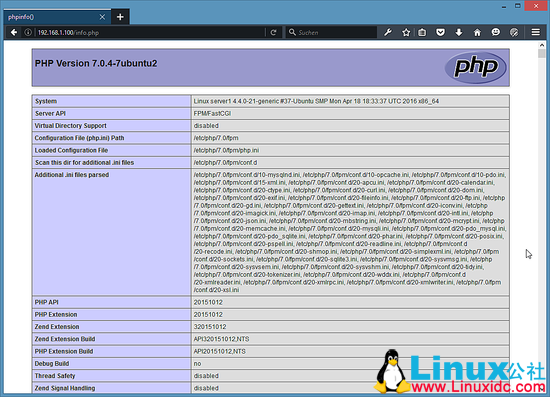
刷新 http://192.168.1.100/info.php 浏览器看看模块安装情况:

7 让 PHP-FPM 使用 TCP 连接
默认情况下 PHP-FPM 监听 /var/run/php/php7.0-fpm.sock. 另外,也可以使 PHP-FPM 试用 TCP 连接,打开文件 /etc/php/7.0/fpm/pool.d/www.conf…
nano /etc/php/7.0/fpm/pool.d/www.conf
修改如下:
| [...] | |
| ;listen = /var/run/php5-fpm.sock | |
| listen = 127.0.0.1:9000 | |
| [...] |
这将使 PHP-FPM 端口 9000 侦听的 IP127.0.0.1(本地主机)。请确保您使用的端口,是不是在你的系统上使用。
然后重新加载 PHP-FPM:
php7.0-fpm reload
接下来通过你的 nginx 的配置和所有的虚拟主机,并更改 fastcgi_pass UNIX 行:/var/run/php/php7.0-fpm.sock; tofastcgi_pass127.0.0.1:9000;, 如下:
nano /etc/nginx/sites-available/default
| [...] | |
| location ~ \.php$ { | |
| include snippets/fastcgi-php.conf; | |
| # With php7.0-cgi alone: | |
| fastcgi_pass 127.0.0.1:9000; | |
| # With php7.0-fpm: | |
| # fastcgi_pass unix:/run/php/php7.0-fpm.sock; | |
| } | |
| [...] |
最后,重新加载 nginx:
service nginx reload
OK,Nginx 的 LEMP 服务器安装完毕。
CentOS 5.6+Nginx 1.0+PHP 5.3.6+MySQL 5.5.11 构建 LEMP(X64)平台 http://www.linuxidc.com/Linux/2011-07/38107.htm
Linux 环境下 Nginx 搭建高性能 WEB 服务器 LEMP http://www.linuxidc.com/Linux/2009-11/22465.htm
LAMP 架构协同应用的实例——phpMyAdmin http://www.linuxidc.com/Linux/2013-07/87645.htm
LAMP 应用之 phpMyAdmin、Wordpress http://www.linuxidc.com/Linux/2013-04/82757.htm
phpMyAdmin 老出现登陆超时解决方法 http://www.linuxidc.com/Linux/2012-09/70715.htm
Ubuntu 安装 phpMyAdmin 与 Adminer http://www.linuxidc.com/Linux/2012-08/69419.htm
在 LAMP 基础上实现 SSL 功能并安装 phpMyAdmin http://www.linuxidc.com/Linux/2012-07/66905.htm
Ubuntu 14.04 配置 LAMP+phpMyAdmin PHP(5.5.9)开发环境 http://www.linuxidc.com/Linux/2014-10/107924.htm
更多 Ubuntu 相关信息见Ubuntu 专题页面 http://www.linuxidc.com/topicnews.aspx?tid=2
本文永久更新链接地址:http://www.linuxidc.com/Linux/2016-05/131154.htm


