共计 4709 个字符,预计需要花费 12 分钟才能阅读完成。
作为服务器端实现:
smb:service message block ----progress:smbd port:445/tcp
netbios: 本地名称解析 --------progress:nmbd port:137/udp 138/udp 139/tcp
安装:
[root@sherry /]# yum install samba -y
启动:
[root@sherry /]# /etc/init.d/smb start
Starting SMB services: [OK]
[root@sherry /]# /etc/init.d/nmb start
Starting NMB services: [OK]
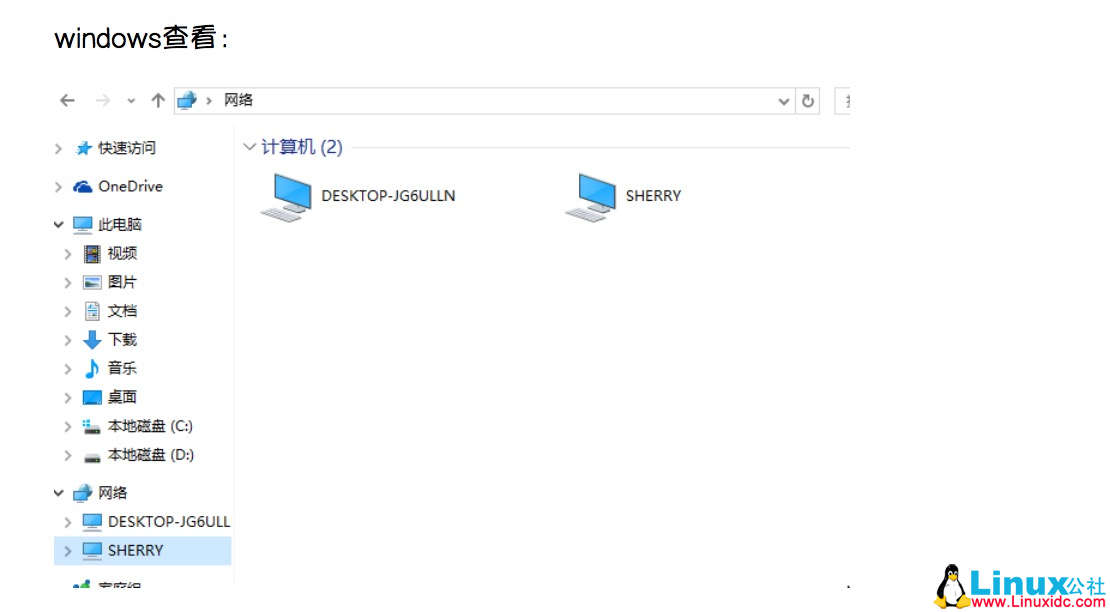
Windows 查看:

配置文件:
[root@sherry /]# cd /etc/samba/
[root@sherry samba]# ls
lmhosts smb.conf smbusers
Samba 的用户:
1. 系统用户
2. 密码是独立的,非为 /etc/shadow 中的密码
设置密码 smbpasswd -a username
[root@sherry ~]# smbpasswd -help
When run by root:
smbpasswd [options] [username]
otherwise:
smbpasswd [options]
options:
-L local mode (must be first option)
-h print this usage message
-s use stdin for password prompt
-c smb.conf file Use the given path to the smb.conf file
-D LEVEL debug level
-r MACHINE remote machine
-U USER remote username
extra options when run by root or in local mode:
-a add user
-d disable user
-e enable user
-i interdomain trust account
-m machine trust account
-n set no password
-W use stdin ldap admin password
-w PASSWORD ldap admin password
-x delete user
-R ORDER name resolve order
设置用户密码:(尽量于操作系统不一致)
[root@sherry ~]# smbpasswd -a samba
New SMB password:
Retype new SMB password:
Added user samba.
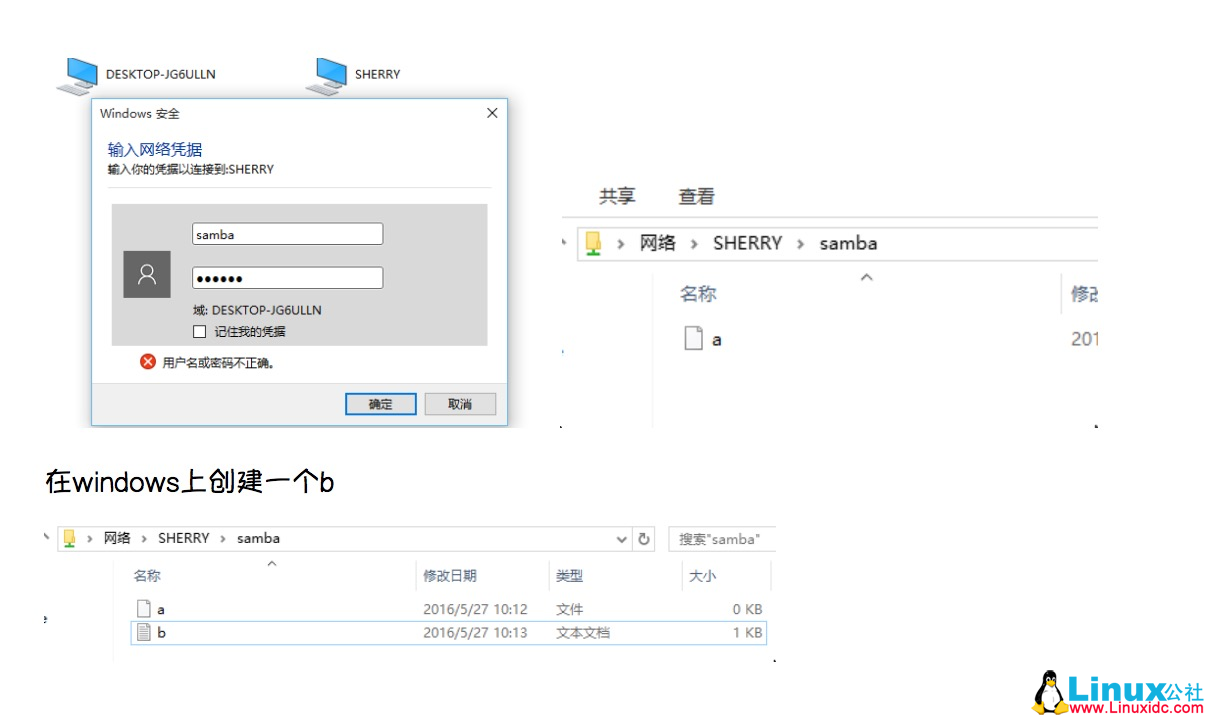
[root@sherry home]# cd samba/
[root@sherry samba]# ls
[root@sherry samba]# touch a

[root@sherry samba]# ll
total 4
-rw-r–r– 1 root root 0 May 27 10:12 a
-rwxr–r– 1 samba sherry 3 May 27 10:13 b.txt
以上默认访问家目录
配置文件解释:
[root@sherry samba]# cp smb.conf{,.bak}
[root@sherry samba]# vim smb.conf
[global]
workgroup = WORKGROUP
server string = Samba Server Version %v
netbios name = sherry #windows 上显示的主机名称 会转为大写
; interfaces = lo eth0 192.168.12.2/24 192.168.13.2/24 # 监听接口 ip 网卡 网络
; hosts allow = 127. 192.168.12. 192.168.13. #监听主机
log file = /var/log/samba/log.%m #日志 %m 变量替换 用户名
max log size = 50 #每个日志 50kb 超过则滚动日志
security = user #user 根据用户 share 匿名 server 账号密码集中管理 后两项 deprecated
passdb backend = tdbsam #密码保存方式
load printers = yes #打印机
cups options = raw #通用 raw 模式
[homes]
comment = Home Directories
browseable = no
writable = no #家目录不让写
; valid users = %S
; valid users = MYDOMAIN\%S
# 定义一个共享目录
[node1]
comment=shared node1
path=/sambashared/node1 #登入用户对此目录要有操作权限
writable = yes #所有用户进程写权限
; write list = samba ,user2 #进程能写白名单 与上述不要一起开启 用 @groupname +groupname 设置组
; browseable = no #不在白名单中的用户对此目录是否能够显示
; guest ok = yes #不在白名单中的用户是否能够访问
; read only=yes #只读
; writable=no# 是否能写 与 read only 有一个即可
配置文件定义一个共享目录:
[node1]
comment=shared node1
path=/sambashared/node1
writable = yes
write list = samba
测试配置文件语法,并显示最终配置:
[root@sherry node1]# testparm
Load smb config files from /etc/samba/smb.conf
rlimit_max: increasing rlimit_max (1024) to minimum Windows limit (16384)
Processing section “[homes]”
Processing section “[printers]”
Processing section “[node1]”
Loaded services file OK.
Server role: ROLE_STANDALONE
Press enter to see a dump of your service definitions
[global]
server string = Samba Server Version %v
log file = /var/log/samba/log.%m
max log size = 50
client signing = required
idmap config * : backend = tdb
cups options = raw
[homes]
comment = Home Directories
browseable = No
[printers]
comment = All Printers
path = /var/spool/samba
printable = Yes
print ok = Yes
browseable = No
[node1]
comment = shared node1
path = /sambashared/node1
write list = samba
read only = No
linux client:
[root@marvin node1]# yum -y install samba-client
登入
[root@marvin node1]# smbclient //sherry/node1 -U samba
Enter samba’s password:
Domain=[WORKGROUP] OS=[Unix] Server=[Samba 3.6.23-35.el6_8]
smb: \> put anaconda-ks.cfg
putting file anaconda-ks.cfg as \anaconda-ks.cfg (249.4 kb/s) (average 249.4 kb/s)
smb: \> get a
getting file \a of size 0 as a (0.0 KiloBytes/sec) (average 0.0 KiloBytes/sec)
服务器:
[root@sherry node1]# ll
total 4
-rw-r–r– 1 root root 0 May 27 11:33 a
-rwxr–r– 1 samba sherry 1277 May 27 11:38 anaconda-ks.cfg
客户端 挂载到本地:
[root@marvin samba]# yum install cifs-utils -y
[root@marvin samba]# mount -t cifs //sherry/node1 /mnt/samba/node1/ -o username=samba # username=samba,passwd=222222
Password:
[root@marvin node1]# df -h
Filesystem Size Used Avail Use% Mounted on
…….
//sherry/node1 1004M 18M 936M 2% /mnt/samba/node1
over
———————————— 分割线 ————————————
如何在 Ubuntu 14.04 中使用 Samba 共享文件 http://www.linuxidc.com/Linux/2014-07/104894.htm
VMWare 虚拟机 Ubuntu 双网卡 访问 samba 速度 翻倍 http://www.linuxidc.com/Linux/2013-06/85445.htm
Samba 文件共享服务器加入 Windows Server 2003 域 http://www.linuxidc.com/Linux/2013-06/86391.htm
Samba 安装配置 http://www.linuxidc.com/Linux/2013-06/86101.htm
CentOS 6.2 下 Samba 服务的配置 http://www.linuxidc.com/Linux/2013-01/78390.htm
Samba 服务器安装和配置 http://www.linuxidc.com/Linux/2014-12/110459.htm
Win7+VMware+Fedora18 Samba 服务器的搭建图解 http://www.linuxidc.com/Linux/2013-01/78234.htm
———————————— 分割线 ————————————
Samba 的详细介绍 :请点这里
Samba 的下载地址 :请点这里
本文永久更新链接地址 :http://www.linuxidc.com/Linux/2016-06/131937.htm


