共计 16499 个字符,预计需要花费 42 分钟才能阅读完成。
前言
Linux+Apache+Mysql/MariaDB+Perl/PHP/Python 一组常用来搭建动态网站或者服务器的开源软件,本身都是各自独立的程序,但是因为常被放在一起使用,拥有了越来越高的兼容度,共同组成了一个强大的 Web 应用程序平台。随着开源潮流的蓬勃发展,开放源代码的 LAMP 已经与 J2EE 和.Net 商业软件形成三足鼎立之势,并且该软件开发的项目在软件方面的投资成本较低,因此受到整个 IT 界的关注。从网站的流量上来说,70% 以上的访问流量是 LAMP 来提供的,LAMP 是最强大的网站解决方案.
环境
- 系统
- Red Hat Enterprise Linux Server release 6.4
- 软件
- httpd-2.4.20 + mysql-5.7.12 + php-5.5.36
- 编译环境
- - 前提你系统必须具备编译安装的环境,如不具备先进行编译环境的安装
编译安装 Apache 前预准备
首先编译安装 Apache 之前我们要先解决依赖关系 http-2.4.20 安装前解决依赖关系先安装 apr、apr-util 和 pcre,安装这 apr 和 apr-util 软件包有两种方式
第一、升级本机 RPM 包
第二、进行源码编译安装,此处我们通用源码编译安装
安装 Apache 前的依赖包的安装
- 编译安装 apr(apr-1.5.2.tar.gz)
下载地址:http://mirrors.cnnic.cn/apache//apr/apr-1.5.2.tar.gz
| [] | |
| [] | |
| [] | |
| [] |
- 编译安装 apr-util(apr-util-1.5.4.tar.gz)
下载地址:http://mirrors.cnnic.cn/apache//apr/apr-util-1.5.4.tar.gz
| [] | |
| [] | |
| [] |
- 编译安装 pcre (pcre-8.38.tar.gz) ## 此处你也可以进行本地 RPM 包的安装
下载地址:https://sourceforge.net/projects/pcre/files/pcre/8.38/pcre-8.38.tar.gz/download
| [] | |
| [] | |
| [] | |
| [] |
编译安装 Apache
下载地址:http://mirrors.cnnic.cn/apache//httpd/httpd-2.4.20.tar.gz
| [root@server1 src]# tar zxvf httpd-2.4.20.tar.gz | |
| [root@server1 src]# cd httpd-2.4.20 | |
| [root@server1 httpd-2.4.20]# ./configure \ | |
| --prefix=/usr/local/apache --sysconfdir=/etc/httpd \ | |
| --enable-so --enable-ssl --enable-cgi --enable-rewrite \ | |
| --with-zlib --with-pcre=/usr/local/pcre \ | |
| --with-apr=/usr/local/apr \ | |
| --with-apr-util=/usr/local/apr-util \ | |
| --enable-mods-shared=most --enable-mpms-shared=all \ | |
| --with-mpm=event | |
| [root@server1 httpd-2.4.20]# make && make install |
| 选项解释:--prefix=/usr/local/apache | |
| --sysconfdir=/etc/httpd | |
| --enable-so --enable-ssl | |
| --enable-cgi --enable-rewrite | |
| --with-zlib --with-pcre | |
| --with-apr=/usr/local/apr | |
| --with-apr-util=/usr/local/apr-util | |
| --enable-modules=most | |
| --enable-mpms-shared=most | |
| --with-mpm=event |
- 启动 Apache 服务并验证
| [] | |
| [] |
- 修改 apache 的配置文件并设置 PidFile 路径(默认在 /usr/local/apache/logs/httpd.pid)
| [] | |
| [] | |
| PidFile "/var/run/httpd.pid" | |
| [] |
- 编写服务脚本 /etc/init.d/httpd, 让其可以使用 service 起停,并可以加到服务列表中
| [root@server1 ~]# vim /etc/init.d/httpd #添加以下内容 | |
| #!/bin/bash | |
| # | |
| # httpd Startup script for the Apache HTTP Server | |
| # | |
| # chkconfig: - 85 15 | |
| # description: Apache is a World Wide Web server. It is used to serve \ | |
| # HTML files and CGI. | |
| # processname: httpd | |
| # config: /etc/httpd/conf/httpd.conf | |
| # config: /etc/sysconfig/httpd | |
| # pidfile: /var/run/httpd.pid | |
| # Source function library. | |
| . /etc/rc.d/init.d/functions | |
| if [-f /etc/sysconfig/httpd ]; then | |
| . /etc/sysconfig/httpd | |
| fi | |
| # Start httpd in the C locale by default. | |
| HTTPD_LANG=${HTTPD_LANG-"C"} | |
| # This will prevent initlog from swallowing up a pass-phrase prompt if | |
| # mod_ssl needs a pass-phrase from the user. | |
| INITLOG_ARGS="" | |
| # Set HTTPD=/usr/sbin/httpd.worker in /etc/sysconfig/httpd to use a server | |
| # with the thread-based "worker" MPM; BE WARNED that some modules may not | |
| # work correctly with a thread-based MPM; notably PHP will refuse to start. | |
| # Path to the apachectl script, server binary, and short-form for messages. | |
| apachectl=/usr/local/apache/bin/apachectl | |
| httpd=${HTTPD-/usr/local/apache/bin/httpd} | |
| prog=httpd | |
| pidfile=${PIDFILE-/var/run/httpd.pid} | |
| lockfile=${LOCKFILE-/var/lock/subsys/httpd} | |
| RETVAL=0 | |
| start() {echo -n $"Starting $prog:" | |
| LANG=$HTTPD_LANG daemon --pidfile=${pidfile} $httpd $OPTIONS | |
| RETVAL=$? | |
| echo | |
| [$RETVAL = 0 ] && touch ${lockfile} | |
| return $RETVAL | |
| } | |
| stop() {echo -n $"Stopping $prog:" | |
| killproc -p ${pidfile} -d 10 $httpd | |
| RETVAL=$? | |
| echo | |
| [$RETVAL = 0 ] && rm -f ${lockfile} ${pidfile} | |
| } | |
| reload() {echo -n $"Reloading $prog:" | |
| if ! LANG=$HTTPD_LANG $httpd $OPTIONS -t >&/dev/null; then | |
| RETVAL=$? | |
| echo $"not reloading due to configuration syntax error" | |
| failure $"not reloading $httpd due to configuration syntax error" | |
| else | |
| killproc -p ${pidfile} $httpd -HUP | |
| RETVAL=$? | |
| fi | |
| echo | |
| } | |
| # See how we were called. | |
| case "$1" in | |
| start) | |
| start | |
| ;; | |
| stop) | |
| stop | |
| ;; | |
| status) | |
| status -p ${pidfile} $httpd | |
| RETVAL=$? | |
| ;; | |
| restart) | |
| stop | |
| start | |
| ;; | |
| condrestart) | |
| if [-f ${pidfile} ] ; then | |
| stop | |
| start | |
| fi | |
| ;; | |
| reload) | |
| reload | |
| ;; | |
| graceful|help|configtest|fullstatus) | |
| $apachectl $@ | |
| RETVAL=$? | |
| ;; | |
| *) | |
| echo $"Usage: $prog {start|stop|restart|condrestart|reload|status|fullstatus|graceful|help|configtest}" | |
| exit 1 | |
| esac | |
| exit $RETVAL |
<1> 给脚本添加执行权限
| [] | |
| [] | |
| Starting httpd: [OK] | |
| [] | |
| httpd (pid 3365) is running... |
<2> 将 httpd 服务加到服务列表中,并设置在 235 级别开机启动
| [root@server1 ~]# chkconfig --add httpd | |
| [root@server1 ~]# chkconfig httpd --level 235 on | |
| [root@server1 ~]# chkconfig --list httpd | |
| httpd 0:off 1:off 2:on 3:on 4:off 5:on 6:off |
- 将 /usr/local/apache/bin 加入到 PATH 路径中去,让其中的命令可以进行全局执行
| [root@server1 ~]# vim /etc/profile.d/apache.sh # 脚本的名字必须要以.sh 命名 | |
| export PATH=$PATH:/usr/local/apache/bin |
编译安装 MySQL 前预准备
安装前预准备,创建用户和组,在 Mysql5.5 以后版本中编译工具变成了 cmake,编译前确认系统已安装 cmake 编译工具。
- 建立 mysql 组和用户,并将 mysql 用户添加到 mysql 组
| [] | |
| [] |
- 编译安装 cmake 工具(cmake-3.5.2.tar.gz)
下载地址:https://cmake.org/files/v3.5/cmake-3.5.2.tar.gz –no-check-certificate
| [root@server1 src]# tar zxvf cmake-3.5.2.tar.gz | |
| [root@server1 src]# cd cmake-3.5.2 | |
| [root@server1 cmake-3.5.2]# ./bootstrap --prefix=/usr/local/cmake | |
| [root@server1 cmake-3.5.2]# gmake & gmake install #默认安装到 /usr/local/bin/cmake | |
| [root@server1 ~]# vim /etc/profile.d/cmake.sh # 将 /usr/local/bin 加到 PATH 中 | |
| export PATH=$PATH:/usr/local/cmake/bin |
- 创建 mysql 数据文件存放的目录
| [] | |
| [] | |
| [] | |
| [] | |
| [] | |
| [] | |
| [] | |
| [] | |
| /dev/myvg/mysql_data /mydata ext3 defaults 0 0 | |
| [] | |
| [] | |
| [] |
编译安装 MySQL
下载地址:wget http://dev.mysql.com/get/Downloads/MySQL-5.7/mysql-5.7.12.tar.gz
| [root@server1 src]# tar zxvf mysql-5.7.12.tar.gz | |
| [root@server1 mysql-5.7.12]#cmake . \ | |
| -DCMAKE_INSTALL_PREFIX=/usr/local/mysql \ | |
| -DMYSQL_DATADIR=/mysql_date/mydata \ | |
| -DDOWNLOAD_BOOST=1 \ | |
| -DWITH_BOOST=../boost_1_59_0 \ | |
| -DSYSCONFDIR=/etc \ | |
| -DMYSQL_USER=mysql \ | |
| -DWITH_MYISAM_STORAGE_ENGINE=1 \ | |
| -DWITH_INNOBASE_STORAGE_ENGINE=1 \ | |
| -DWITH_ARCHIVE_STORAGE_ENGINE=1 \ | |
| -DWITH_MEMORY_STORAGE_ENGINE=1 \ | |
| -DWITH_READLINE=1 \ MySQL的 readline library | |
| -DMYSQL_UNIX_ADDR=/var/run/mysql/mysql.sock \ | |
| -DMYSQL_TCP_PORT=3306 \ | |
| -DENABLED_LOCAL_INFILE=1 \ | |
| -DENABLE_DOWNLOADS=1 \ | |
| -DWITH_PARTITION_STORAGE_ENGINE=1 \ | |
| -DEXTRA_CHARSETS=all \ | |
| -DDEFAULT_CHARSET=utf8 \ | |
| -DDEFAULT_COLLATION=utf8_general_ci \ | |
| -DWITH_DEBUG=0 \ | |
| -DMYSQL_MAINTAINER_MODE=0 \ | |
| -DWITH_SSL:STRING=bundled \ | |
| -DWITH_ZLIB:STRING=bundled | |
| [root@server1 mysql-5.7.12]# make && make install |
| 参数解释:-DCMAKE_INSTALL_PREFIX=/usr/local/mysql # MySQL 安装的根目录 | |
| -DMYSQL_DATADIR=/mysql_date/mydata # MySQL 数据库文件存放目录 | |
| -DDOWNLOAD_BOOST=1 # 从 MySQL 5.7.5 开始 Boost 库是必需的 | |
| -DWITH_BOOST=../boost_1_59_0 # boost 库安装目录 | |
| -DSYSCONFDIR=/etc # MySQL 配置文件所在目录 | |
| -DMYSQL_USER=mysql # MySQL 用户名 | |
| -DWITH_MYISAM_STORAGE_ENGINE=1 # MySQL 的数据库引擎 | |
| -DWITH_INNOBASE_STORAGE_ENGINE=1 # MySQL 的数据库引擎 | |
| -DWITH_ARCHIVE_STORAGE_ENGINE=1 # MySQL 的数据库引擎 | |
| -DWITH_MEMORY_STORAGE_ENGINE=1 # MySQL 的数据库引擎 | |
| -DWITH_READLINE=1 # MySQL 的 readline library | |
| -DMYSQL_UNIX_ADDR=/var/run/mysql/mysql.sock # MySQL 的通讯目录 | |
| -DMYSQL_TCP_PORT=3306 # MySQL 的监听端口 | |
| -DENABLED_LOCAL_INFILE=1 # 启用加载本地数据 | |
| -DENABLE_DOWNLOADS=1 # MySQL 编译时允许自主下载相关文件 | |
| -DWITH_PARTITION_STORAGE_ENGINE=1 | |
| -DEXTRA_CHARSETS=all # 使 MySQL 支持所有的扩展字符 | |
| -DDEFAULT_CHARSET=utf8 # 设置 MySQL 的默认字符集为 utf8 | |
| -DDEFAULT_COLLATION=utf8_general_ci # 设置 MySQL 的默认字符校对 | |
| -DWITH_DEBUG=0 # 禁用调试模式 | |
| -DMYSQL_MAINTAINER_MODE=0 | |
| -DWITH_SSL:STRING=bundled # 设置 MySQL 通讯时支持 ssl 协议 | |
| -DWITH_ZLIB:STRING=bundled # 允许 MySQL 使用 zlib library |
- 更改 mysql 安装目录的属主属组并添加 mysql 环境变量
| [root@server1 mysql]# chown -R mysql.mysql . | |
| [root@server1 mysql]# vim /etc/profile.d/mysql.sh | |
| export PATH=$PATH:/usr/local/mysql/bin |
- 加入服务列表并设置为开机自启
| [root@server1 ~]# cd /usr/local/mysql/support-files/ | |
| [root@server1 support-files]# cp mysql.server /etc/init.d/mysqld | |
| [root@server1 support-files]# chmod +x /etc/init.d/mysqld # 添加一个执行权限 | |
| [root@server1 support-files]# chkconfig mysqld on | |
| [root@server1 support-files]# chkconfig mysqld --level 2345 on | |
| [root@server1 support-files]# chkconfig --list mysqld | |
| [root@server1 support-files]# chkconfig --list mysqld | |
| mysqld 0:off 1:off 2:on 3:on 4:on 5:on 6:off |
- 修改 mysql 的配置文件,以下内容为自选
| [root@server1 ~]# vim /etc/my.cnf | |
| [client] | |
| port = 3306 | |
| socket = /tmp/mysql.sock | |
| default-character-set = utf8mb4 | |
| [mysqld] | |
| port = 3306 | |
| socket = /tmp/mysql.sock | |
| basedir = /usr/local/mysql | |
| datadir = /data/mysql | |
| pid-file = /data/mysql/mysql.pid | |
| user = mysql | |
| bind-address = 0.0.0.0 | |
| server-id = 1 | |
| init-connect = 'SET NAMES utf8mb4' | |
| character-set-server = utf8mb4 | |
| skip-name-resolve | |
| skip-networking | |
| back_log = 300 | |
| max_connections = 1000 | |
| max_connect_errors = 6000 | |
| open_files_limit = 65535 | |
| table_open_cache = 128 | |
| max_allowed_packet = 4M | |
| binlog_cache_size = 1M | |
| max_heap_table_size = 8M | |
| tmp_table_size = 16M | |
| read_buffer_size = 2M | |
| read_rnd_buffer_size = 8M | |
| sort_buffer_size = 8M | |
| join_buffer_size = 8M | |
| key_buffer_size = 4M | |
| thread_cache_size = 8 | |
| query_cache_type = 1 | |
| query_cache_size = 8M | |
| query_cache_limit = 2M | |
| ft_min_word_len = 4 | |
| log_bin = mysql-bin | |
| binlog_format = mixed | |
| expire_logs_days = 30 | |
| log_error = /data/mysql/mysql-error.log | |
| slow_query_log = 1 | |
| long_query_time = 1 | |
| slow_query_log_file = /data/mysql/mysql-slow.log | |
| performance_schema = 0 | |
| explicit_defaults_for_timestamp | |
| lower_case_table_names = 1 | |
| skip-external-locking | |
| default_storage_engine = InnoDB | |
| default-storage-engine = MyISAM | |
| innodb_file_per_table = 1 | |
| innodb_open_files = 500 | |
| innodb_buffer_pool_size = 64M | |
| innodb_write_io_threads = 4 | |
| innodb_read_io_threads = 4 | |
| innodb_thread_concurrency = 0 | |
| innodb_purge_threads = 1 | |
| innodb_flush_log_at_trx_commit = 2 | |
| innodb_log_buffer_size = 2M | |
| innodb_log_file_size = 32M | |
| innodb_log_files_in_group = 3 | |
| innodb_max_dirty_pages_pct = 90 | |
| innodb_lock_wait_timeout = 120 | |
| bulk_insert_buffer_size = 8M | |
| myisam_sort_buffer_size = 8M | |
| myisam_max_sort_file_size = 10G | |
| myisam_repair_threads = 1 | |
| interactive_timeout = 28800 | |
| wait_timeout = 28800 | |
| [mysqldump] | |
| quick | |
| max_allowed_packet = 16M | |
| [myisamchk] | |
| key_buffer_size = 8M | |
| sort_buffer_size = 8M | |
| read_buffer = 4M | |
| write_buffer = 4M |
-
初始化 MySQL 自身的数据库
- ##“-–initialize”会生成一个随机密码(~/.mysql_secret),而”–initialize-insecure”不会生成密码 ##user 表示指定用户 ##basedir 表示 mysql 的安装路径,# datadir 表示数据库文件存放路径
[root@server1 ~]# mysqld --initialize-insecure --user=mysql --basedir=/usr/local/mysql --datadir=/mysql_date/mydata/
- 启动 MySQL 数据库
[root@server1 ~]# mysqld_safe –user=mysql –datadir=/mysql_date/mydata/ ## datadir 指定数据目录
[root@server1 ~]# service mysqld start
Starting MySQL [OK]
- 查看 MySQL 服务的进程和端口
| [root@server1 ~]# ps -ef | grep mysqld | |
| root 31618 1 0 16:22 pts/1 00:00:00 /bin/sh /usr/local/mysql/bin/mysqld_safe --datadir=/mysql_date/mydata --pid-file=/mysql_date/mydata/server1.pid | |
| mysql 32370 31618 0 16:22 pts/1 00:00:00 /usr/local/mysql/bin/mysqld --basedir=/usr/local/mysql --datadir=/mysql_date/mydata --plugin-dir=/usr/local/mysql/lib/plugin --user=mysql --log-error=/mysql_date/mydata/mysql-error.log --open-files-limit=65535 --pid-file=/mysql_date/mydata/server1.pid --socket=/tmp/mysql.sock --port=3306 | |
| root 34026 29191 1 16:59 pts/1 00:00:00 grep mysqld | |
| [root@server1 ~]# netstat -an | grep 3306 | |
| tcp 0 0 0.0.0.0:3306 0.0.0.0:* LISTEN |
- 初始化 MySQL 数据库的 root 用户密码
| [root@typecodes mysql]# mysql_secure_installation | |
| ............ 省略前面的过程............ | |
| Press y|Y for Yes, any other key for No: y # 需要修改密码,所以输入 y | |
| There are three levels of password validation policy: | |
| LOW Length >= 8 # 只需要长度大于或等于 8】 | |
| MEDIUM Length >= 8, numeric, mixed case, and special characters # 还需要包含数字、大小写和类似于 @#% 等特殊字符 | |
| STRONG Length >= 8, numeric, mixed case, special characters and dictionary file # 还需要包含字典文件 | |
| ............ 省略剩下的过程............ |
- 将 MySQL 数据库的动态链接库共享至系统链接库
| [root@server1 ~]# vim /etc/ld.so.conf.d/mysql.conf | |
| /usr/local/mysql/lib [root@server1 ~]# ldconfig -v # 让系统重新读取库文件 |
- 测试登陆 MySQL 数据库
| [root@server1 ~]# mysql -u root -p | |
| Enter password: # 输入之前设置的密码 | |
| Welcome to the MySQL monitor. Commands end with ; or \g. | |
| Your MySQL connection id is 4 | |
| Server version: 5.7.12-log Source distribution | |
| Copyright (c) 2000, 2016, Oracle and/or its affiliates. All rights reserved. | |
| Oracle is a registered trademark of Oracle Corporation and/or its | |
| affiliates. Other names may be trademarks of their respective | |
| owners. | |
| Type 'help;' or '\h' for help. Type '\c' to clear the current input statement. | |
| mysql> |
编译安装 PHP 前预准备
- 如果想让编译的 php 支持 mcrypt 扩展,还需要下载的 php 扩展包(mcrypt-2.6.8.tar.gz、libmcrypt-2.5.8.tar.gz、mhash-0.9.9.9.tar.gz)
下载地址:
http://downloads.sourceforge.net/mcrypt/mcrypt-2.6.8.tar.gz
http://downloads.sourceforge.net/mcrypt/libmcrypt-2.5.8.tar.gz
http://downloads.sourceforge.net/mhash/mhash-0.9.9.9.tar.gz
安装顺序(libmcrypt –> mhash –> mcrypt)
- 编译安装 libmcrypt(libmcrypt-2.5.8.tar.gz)
| [root@server1 src]# tar zxvf libmcrypt-2.5.8.tar.gz | |
| [root@server1 src]# cd libmcrypt-2.5.8 | |
| [root@server1 libmcrypt-2.5.8]# ./configure --prefix=/usr/local/libmcrypt | |
| [root@server1 libmcrypt-2.5.8]# make && make install | |
| [root@server1 libmcrypt-2.5.8]# vim /etc/ld.so.conf.d/libmcrypt.conf # 此选项为将 libmcrypt 的库文件能让系统找到,不然后面编译安装 mcrypt 会报错 | |
| /usr/local/libmcrypt/lib | |
| [root@server1 libmcrypt-2.5.8]# ldconfig -v # 重新加载库文件 |
- 编译安装 mhash(mhash-0.9.9.9.tar.gz)
| [root@server1 src]# tar -zxvf mhash-0.9.9.9.tar.gz | |
| [root@server1 src]# cd mhash-0.9.9.9 | |
| [root@server1 mhash-0.9.9.9]# ./configure | |
| [root@server1 mhash-0.9.9.9]# make && make install | |
| [root@server1 mhash-0.9.9.9]# vim /etc/ld.so.conf.d/mhash.conf # 做添加 mhash 的库文件让系统找到,不然后面编译安装 mcrypt 会报错 | |
| /usr/local/mhash/lib | |
| [root@server1 mhash-0.9.9.9]# ldconfig -v # 重新加载库文件 |
- 编译安装 mcrypy(mcrypt-2.6.8.tar.gz)
| [] | |
| [] | |
| [] | |
| [] |
编译安装 PHP
下载地址:http://cn2.php.net/get/php-5.5.36.tar.bz2/from/this/mirror
| [root@server1 src]# tar -zxvf php-5.5.36.tar.gz | |
| [root@server1 php-5.5.36]#./configure | |
| --prefix=/usr/local/php \ | |
| --with-mysql=mysqlnd --with-openssl \ | |
| --with-mysqli=mysqlnd \ | |
| --enable-mbstring --with-freetype-dir \ | |
| --with-jpeg-dir --with-png-dir \ | |
| --with-zlib --with-libxml-dir=/usr \ | |
| --enable-xml --enable-sockets \ | |
| --with-apxs2=/usr/local/apache/bin/apxs \ | |
| --with-mcrypt --with-config-file-path=/etc \ | |
| --with-config-file-scan-dir=/etc/php.d \ | |
| --with-bz2 --enable-maintainer-zts | |
| [root@server1 php-5.5.36]# make && make install |
| 参数解释;--prefix=/usr/local/php # 指定 php 安装的路径 | |
| --with-mysql=mysqlnd --with-openssl # 指定 mysql 的安装目录 #支持 ssl 功能 | |
| --with-mysqli=mysqlnd # 可以让 mysql 与 php 结合的接口 | |
| --enable-mbstring --with-freetype-dir # 指定可以支持中文非一个字节能表示语言 # 加载 freetype 的头文件,可以支持不同字体 | |
| --with-jpeg-dir --with-png-dir # 支持 jpep 格式图片 #支持 pnp 格式图片 | |
| --with-zlib --with-libxml-dir=/usr # 支持压缩库 # 指定 xml 的库路径 | |
| --enable-xml --enable-sockets # 支持扩展标记语言 # 支持套接字的通信功能 | |
| --with-mcrypt --with-config-file-path=/etc # 支持额外的加密功能的库 # 指定 php 配置文件的路径(/etc/php.ini) | |
| --with-config-file-scan-dir=/etc/php.d # 支持 php 文件的附件配置文件(/etc/php.d/*.ini) | |
| --with-bz2 --enable-maintainer-zts # 支持 bz2 的压缩库 # 此选项是否安装取决于你的 Apache 工作的 mpm 模式, |
说明:
1、这里为了支持 apache 的 worker 或 event 这两个 MPM,编译时使用了–enable-maintainer-zts 选项。【prefork 不需要加载】【event 或 work
mpm 工作模式必须要加此选项】验证 Apache mpm 工作模式命令:httpd -M
2、如果使用 PHP5.3 以上版本,为了链接 MySQL 数据库,可以指定 mysqlnd,这样在本机就不需要先安装 MySQL 或 MySQL 开发包了。mysqlnd 从 php5.3 开始可用,可以编译时绑定到它(而不用和具体的 MySQL 客户端库绑定形成依赖),但从 PHP 5.4 开始它就是默认设置了。./configure –with-mysql=mysqlnd –with-pdo-mysql=mysqlnd
–with-mysqli=mysqlnd
- 为 php 提供配置文件:
[root@server1 php-5.5.36]# cp php.ini-production /etc/php.ini
- 编辑 apache 配置文件 httpd.conf,以 apache 支持 php
| [] | |
| <1> 添加如下二行 | |
| AddType application/x-httpd-php .php | |
| AddType application/x-httpd-php-source .phps | |
| <2> 定位至 DirectoryIndex index.html | |
| 修改为:DirectoryIndex index.php index.html |
- 重启 apache 服务
| [root@server1 ~]# service httpd restart | |
| Stopping httpd: [OK ] | |
| Starting httpd: [OK ] | |
| [root@server1 ~]# netstat -an | grep :80 # apache 已启动,并监听 80 端口 | |
| tcp 0 0 :::80 :::* LISTEN |
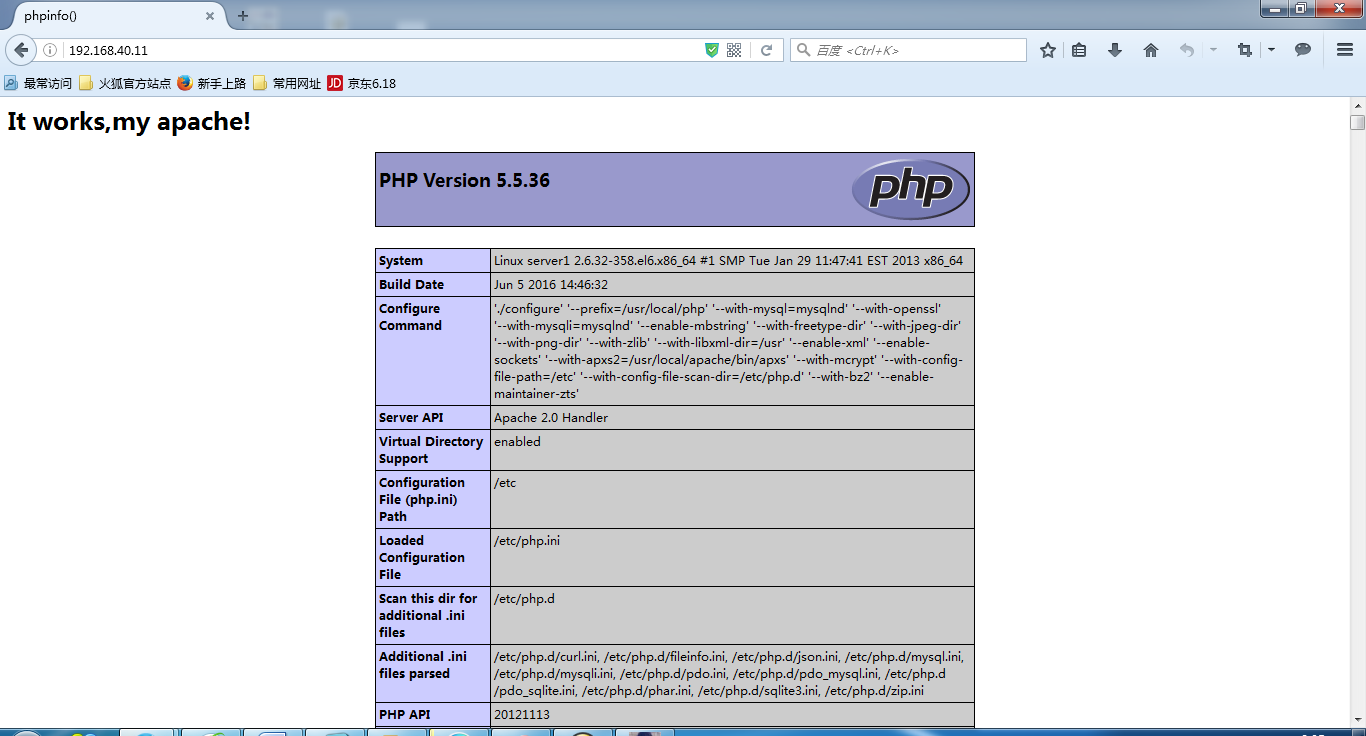
- 编辑 Apache 的网页测试是否支持 php、
| [root@server1 ~]# cd /usr/local/apache/htdocs/ | |
| [root@server1 htdocs]# vim index.php | |
| phpinfo(); | |
打开浏览器进行 web 测试访问

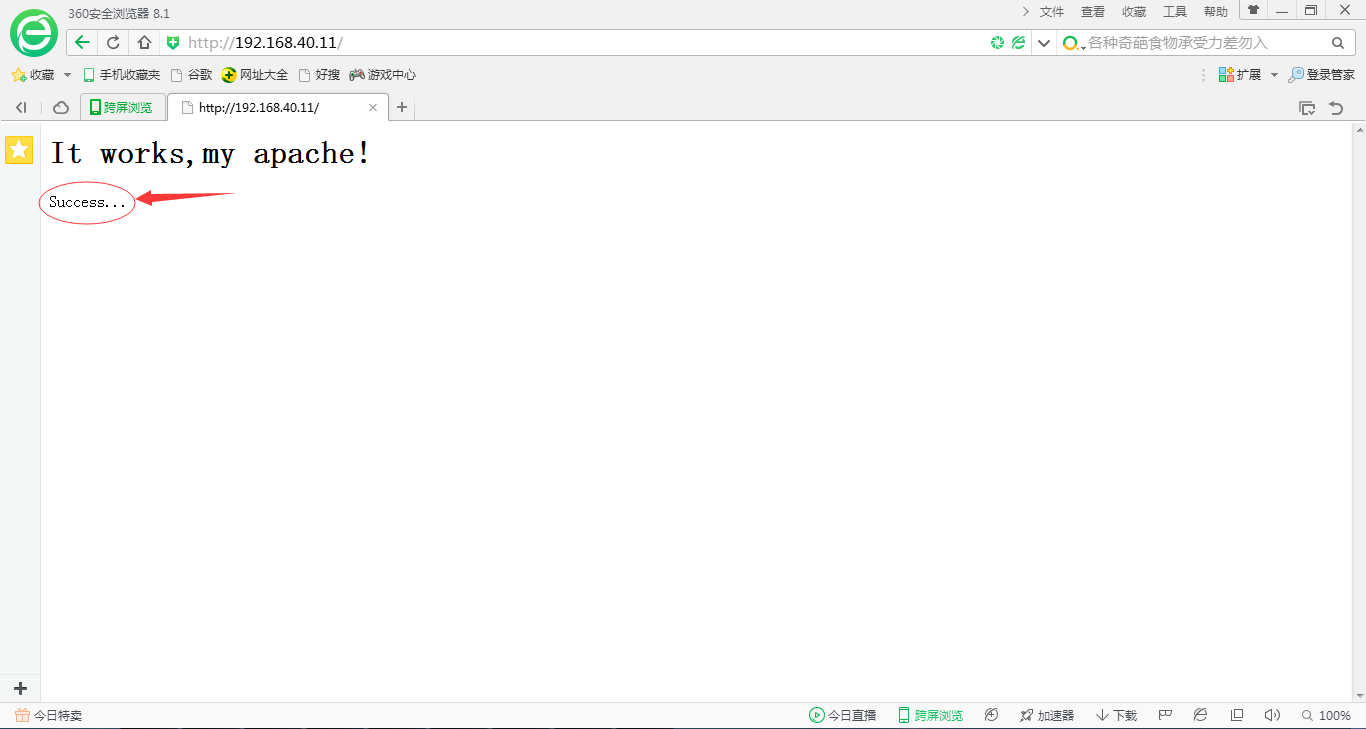
- 编辑 Apache 的网页测试 php 是否可以连接 MySQL、
| [root@server1 htdocs]# vim index.php | |
| $conn=mysql_connect('localhost','root','xuxingzhuang'); | |
| if ($conn) | |
| echo "Success..."; | |
| else | |
| echo "Failure..."; | |
打开浏览器进行 web 测试访问

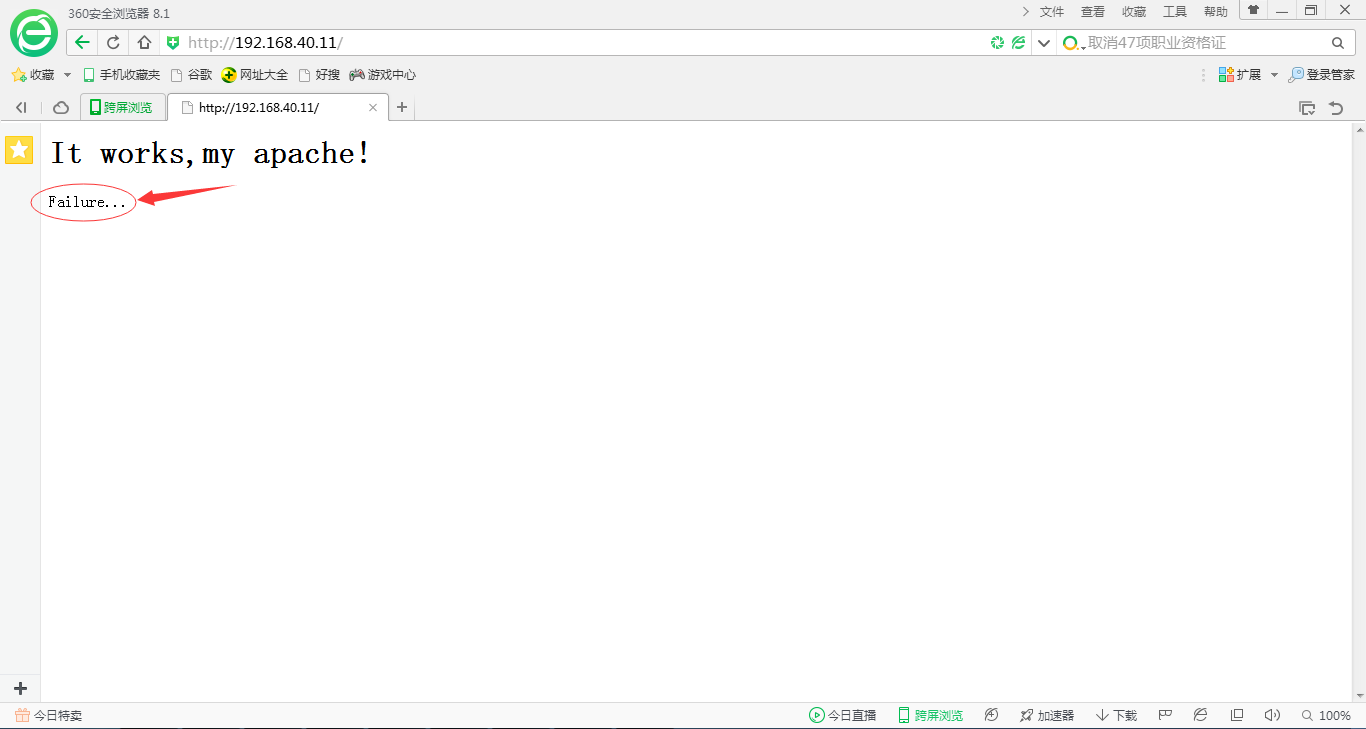
- 关闭 MySQL 服务再来测试
| [] | |
| Shutting down MySQL. [OK] | |
| [] | |
| MySQL is not running [FAILED] | |
| [] |
打开浏览器进行 web 测试访问

到此为止我们基于源码安装的 LAMP 就搭建好了,在搭建环境的期间出现了好多问题,经过各种的 google 和前车之鉴,最终还是搭建好了,博客以后还会继续更新。
下面关于 LAMP 相关 的内容你可能也喜欢:
LAMP 平台安装 Xcache 和 Memcached 加速网站运行 http://www.linuxidc.com/Linux/2015-06/118835.htm
CentOS 7 下搭建 LAMP 平台环境 http://www.linuxidc.com/Linux/2015-06/118818.htm
CentOS 6.5 系统安装配置 LAMP(Apache+PHP5+MySQL)服务器环境 http://www.linuxidc.com/Linux/2014-12/111030.htm
Ubuntu 14.04 配置 LAMP+phpMyAdmin PHP(5.5.9)开发环境 http://www.linuxidc.com/Linux/2014-10/107924.htm
Ubuntu 14.10 下安装 LAMP 服务图文详解 http://www.linuxidc.com/Linux/2014-12/110082.htm
LAMP 结合 NFS 构建小型博客站点 http://www.linuxidc.com/Linux/2015-08/121029.htm
CentOS7 下安装部署 LAMP 环境 http://www.linuxidc.com/Linux/2016-04/130653.htm
本文永久更新链接地址:http://www.linuxidc.com/Linux/2016-06/132389.htm


