共计 11972 个字符,预计需要花费 30 分钟才能阅读完成。
当前互联网主流 Web 服务器说明
1、IIS 微软的 web 服务器
2、apache 中小 web 服务器主流,web 服务器中的老大哥
3、nginx 新兴的 web 服务器主流
4、tomcat 中小企业动态服务器,互联网 java 容器主流
5、resin 大型企业动态服务器,互联网 java 容器主流
apache 的特点及应用场合
特点:功能强大,配置简单,速度快,应用广泛,性能稳定可靠,并可做代理服务器和负载均衡
应用场合:
1、使用 apache 来运行静态 html 网页,图片,处理静态小文件能力不及 nginx
2、使用 apache 结合 php 引擎来运行 php 程序,lamp 由此成为经典组合
3、使用 apache 结合 tomcat 及 resin 运行 jsp java 等程序,成为中小企业的首选
4、使用 apache 做代理及负载均衡
本次环境所用到的软件版本如下(操作系统 CentOS6.7)
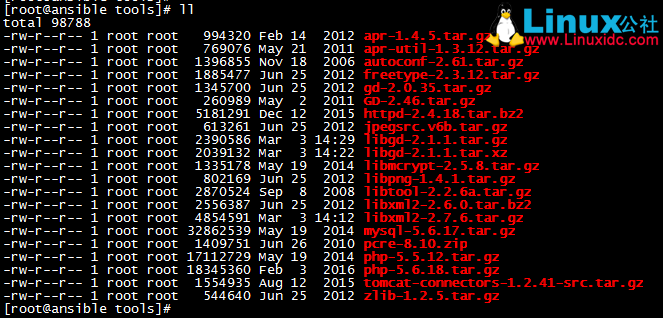
1、基础环境准备
[root@ansible tools]# tar xf apr-1.4.5.tar.gz
[root@ansible tools]# cd apr-1.4.5
[root@ansible apr-1.4.5]# ./configure –prefix=/usr/local/apr
[root@ansible apr-1.4.5]# make && make install

[root@ansible tools]# tar xf apr-util-1.3.12.tar.gz
[root@ansible tools]# cd apr-util-1.3.12
[root@ansible apr-util-1.3.12]# ./configure –prefix=/usr/local/apr-util –with-apr=/usr/local/apr/bin/apr-1-config
[root@ansible apr-util-1.3.12]# make && make install

[root@ansible pcre-8.10]# unzip pcre-8.10.zip
[root@ansible tools]# cd pcre-8.10
[root@ansible pcre-8.10]# ./configure –prefix=/usr/local/pcre
[root@ansible pcre-8.10]# make && make install

[root@ansible tools]# tar xf libxml2-2.7.6.tar.gz
[root@ansible tools]# cd libxml2-2.7.6
[root@ansible libxml2-2.7.6]# vim configure 将下面那行注释掉
# $RM “$cfgfile”
[root@ansible libxml2-2.7.6]# ./configure –prefix=/usr/local/libxml2 –without-zlib
[root@ansible libxml2-2.7.6]# make && make install
[root@ansible tools]# tar xf libmcrypt-2.5.8.tar.gz
[root@ansible tools]# cd libmcrypt-2.5.8
[root@ansible libmcrypt-2.5.8]# ./configure –prefix=/usr/local/libmcrypt
[root@ansible libmcrypt-2.5.8]# make && make install
[root@ansible tools]# tar xf zlib-1.2.5.tar.gz
[root@ansible tools]# cd zlib-1.2.5
[root@ansible zlib-1.2.5]# ./configure
[root@ansible zlib-1.2.5]# make && make install
[root@ansible tools]# tar xf libpng-1.4.1.tar.gz
[root@ansible tools]# cd libpng-1.4.1
[root@ansible libpng-1.4.1]# ./configure –prefix=/usr/local/libpng
[root@ansible libpng-1.4.1]# make && make install
[root@ansible tools]# mkdir /usr/local/jpeg6
[root@ansible tools]# mkdir /usr/local/jpeg6/bin
[root@ansible tools]# mkdir /usr/local/jpeg6/lib
[root@ansible tools]# mkdir /usr/local/jpeg6/include
[root@ansible tools]# mkdir -p /usr/local/jpeg6/man/man1
[root@ansible tools]# tar xf jpegsrc.v6b.tar.gz
[root@ansible tools]# cd jpeg-6b/
[root@ansible jpeg-6b]# ./configure –prefix=/usr/local/jpeg6/ –enable-shared –enable-static
[root@ansible jpeg-6b]# make && make 报错
./libtool –mode=compile gcc -O2 -I. -c ./jcapimin.c
make: ./libtool: Command not found
make: *** [jcapimin.lo] Error 127
解决方法
[root@ansible tools]# tar xf libtool-2.2.6a.tar.gz
[root@ansible tools]# cd libtool-2.2.6
[root@ansible libtool-2.2.6]# ./configure
[root@ansible libtool-2.2.6]# make && make install
[root@ansible libtool-2.2.6]# cd ../jpeg-6b/
[root@ansible jpeg-6b]# cp /usr/share/libtool/config/config.sub .
[root@ansible jpeg-6b]# cp /usr/share/libtool/config/config.guess .
[root@ansible jpeg-6b]# ./configure –prefix=/usr/local/jpeg6/ –enable-shared –enable-static
[root@ansible jpeg-6b]# make && make
[root@ansible tools]# tar xf freetype-2.3.12.tar.gz
[root@ansible tools]# cd freetype-2.3.12
[root@ansible freetype-2.3.12]# ./configure –prefix=/usr/local/freetype
[root@ansible freetype-2.3.12]# make && make install
[root@ansible tools]# tar xf autoconf-2.61.tar.gz
[root@ansible tools]# cd autoconf-2.61
[root@ansible autoconf-2.61]# ./configure
[root@ansible autoconf-2.61]# make && make install
[root@ansible tools]# tar xf libgd-2.1.1.tar.
libgd-2.1.1.tar.gz libgd-2.1.1.tar.xz
[root@ansible tools]# tar xf libgd-2.1.1.tar.gz
[root@ansible tools]# cd libgd-2.1.1
[root@ansible libgd-2.1.1]# ./configure \
> –prefix=/usr/local/gd2/ \
> –enable-m4_pattern_allow \
> –with-zlib=/usr/local/zlib/ \
> –with-jpeg=/usr/local/jpeg6/ \
> –with-png=/usr/local/libpng/ \
> –with-freetype=/usr/local/freetype/
[root@ansible libgd-2.1.1]# make && make install
2、安装编译 apache
[root@ansible tools]# useradd -s /sbin/nologin -M www
[root@ansible tools]# tar xf httpd-2.4.18.tar.bz2
[root@ansible tools]# cd httpd-2.4.18
[root@ansible httpd-2.4.18]# ./configure –prefix=/usr/local/apache2 –enable-mods-shared=all –enable-so –enable-proxy-ajp –enable-rewrite –with-apr=/usr/local/apr –with-apr-util=/usr/local/apr-util/ –with-pcre=/usr/local/pcre/
[root@ansible httpd-2.4.18]# make && make install
3、安装编译 mysql
[root@ansible mysql-5.6.17]# useradd -s /sbin/nologin -M mysql
[root@ansible mysql-5.6.17]# yum install cmake -y
[root@ansible tools]# tar xf mysql-5.6.17.tar.gz
[root@ansible tools]# cd mysql-5.6.17
[root@ansible mysql-5.6.17]# cmake \
-DCMAKE_INSTALL_PREFIX=/usr/local/mysql \
-DMYSQL_DATADIR=/usr/local/mysql/data \
-DSYSCONFDIR=/etc \
-DWITH_MYISAM_STORAGE_ENGINE=1 \
-DWITH_INNOBASE_STORAGE_ENGINE=1 \
-DWITH_MEMORY_STORAGE_ENGINE=1 \
-DWITH_READLINE=1 \
-DMYSQL_UNIX_ADDR=/var/lib/mysql/mysql.sock \
-DMYSQL_TCP_PORT=3306 \
-DENABLED_LOCAL_INFILE=1 \
-DWITH_PARTITION_STORAGE_ENGINE=1 \
-DEXTRA_CHARSETS=all \
-DDEFAULT_CHARSET=utf8 \
-DDEFAULT_COLLATION=utf8_general_ci
[root@ansible mysql-5.6.17]# make && make install
[root@ansible mysql-5.6.17]# chown -R mysql.mysql /usr/local/mysql/
[root@ansible scripts]# pwd
/tools/mysql-5.6.17/scripts
[root@ansible scripts]# chmod +x mysql_install_db
[root@ansible scripts]# ./mysql_install_db –basedir=/usr/local/mysql –datadir=/usr/local/mysql/data –user=mysql
Installing MySQL system tables…2016-08-19 13:13:18 0 [Warning] TIMESTAMP with implicit DEFAULT value is deprecated. Please use –explicit_defaults_for_timestamp server option (see documentation for more details).
2016-08-19 13:13:18 64062 [Note] InnoDB: Using atomics to ref count buffer pool pages
2016-08-19 13:13:18 64062 [Note] InnoDB: The InnoDB memory heap is disabled
2016-08-19 13:13:18 64062 [Note] InnoDB: Mutexes and rw_locks use GCC atomic builtins
2016-08-19 13:13:18 64062 [Note] InnoDB: Compressed tables use zlib 1.2.3
2016-08-19 13:13:18 64062 [Note] InnoDB: Not using CPU crc32 instructions
2016-08-19 13:13:18 64062 [Note] InnoDB: Initializing buffer pool, size = 128.0M
2016-08-19 13:13:18 64062 [Note] InnoDB: Completed initialization of buffer pool
2016-08-19 13:13:18 64062 [Note] InnoDB: The first specified data file ./ibdata1 did not exist: a new database to be created!
2016-08-19 13:13:18 64062 [Note] InnoDB: Setting file ./ibdata1 size to 12 MB
2016-08-19 13:13:18 64062 [Note] InnoDB: Database physically writes the file full: wait…
2016-08-19 13:13:19 64062 [Note] InnoDB: Setting log file ./ib_logfile101 size to 48 MB
2016-08-19 13:13:21 64062 [Note] InnoDB: Setting log file ./ib_logfile1 size to 48 MB
2016-08-19 13:13:23 64062 [Note] InnoDB: Renaming log file ./ib_logfile101 to ./ib_logfile0
2016-08-19 13:13:23 64062 [Warning] InnoDB: New log files created, LSN=45781
2016-08-19 13:13:23 64062 [Note] InnoDB: Doublewrite buffer not found: creating new
2016-08-19 13:13:23 64062 [Note] InnoDB: Doublewrite buffer created
2016-08-19 13:13:23 64062 [Note] InnoDB: 128 rollback segment(s) are active.
2016-08-19 13:13:23 64062 [Warning] InnoDB: Creating foreign key constraint system tables.
2016-08-19 13:13:23 64062 [Note] InnoDB: Foreign key constraint system tables created
2016-08-19 13:13:23 64062 [Note] InnoDB: Creating tablespace and datafile system tables.
2016-08-19 13:13:23 64062 [Note] InnoDB: Tablespace and datafile system tables created.
2016-08-19 13:13:23 64062 [Note] InnoDB: Waiting for purge to start
2016-08-19 13:13:23 64062 [Note] InnoDB: 5.6.17 started; log sequence number 0
2016-08-19 13:13:24 64062 [Note] Binlog end
2016-08-19 13:13:24 64062 [Note] InnoDB: FTS optimize thread exiting.
2016-08-19 13:13:24 64062 [Note] InnoDB: Starting shutdown…
2016-08-19 13:13:24 64062 [Note] InnoDB: Shutdown completed; log sequence number 1625977
OK
Filling help tables…2016-08-19 13:13:24 0 [Warning] TIMESTAMP with implicit DEFAULT value is deprecated. Please use –explicit_defaults_for_timestamp server option (see documentation for more details).
2016-08-19 13:13:24 64085 [Note] InnoDB: Using atomics to ref count buffer pool pages
2016-08-19 13:13:24 64085 [Note] InnoDB: The InnoDB memory heap is disabled
2016-08-19 13:13:24 64085 [Note] InnoDB: Mutexes and rw_locks use GCC atomic builtins
2016-08-19 13:13:24 64085 [Note] InnoDB: Compressed tables use zlib 1.2.3
2016-08-19 13:13:24 64085 [Note] InnoDB: Not using CPU crc32 instructions
2016-08-19 13:13:24 64085 [Note] InnoDB: Initializing buffer pool, size = 128.0M
2016-08-19 13:13:24 64085 [Note] InnoDB: Completed initialization of buffer pool
2016-08-19 13:13:24 64085 [Note] InnoDB: Highest supported file format is Barracuda.
2016-08-19 13:13:24 64085 [Note] InnoDB: 128 rollback segment(s) are active.
2016-08-19 13:13:25 64085 [Note] InnoDB: Waiting for purge to start
2016-08-19 13:13:25 64085 [Note] InnoDB: 5.6.17 started; log sequence number 1625977
2016-08-19 13:13:25 64085 [Note] Binlog end
2016-08-19 13:13:25 64085 [Note] InnoDB: FTS optimize thread exiting.
2016-08-19 13:13:25 64085 [Note] InnoDB: Starting shutdown…
2016-08-19 13:13:26 64085 [Note] InnoDB: Shutdown completed; log sequence number 1625987
OK
To start mysqld at boot time you have to copy
support-files/mysql.server to the right place for your system
PLEASE REMEMBER TO SET A PASSWORD FOR THE MySQL root USER !
To do so, start the server, then issue the following commands:
/usr/local/mysql/bin/mysqladmin -u root password ‘new-password’
/usr/local/mysql/bin/mysqladmin -u root -h ansible password ‘new-password’
Alternatively you can run:
/usr/local/mysql/bin/mysql_secure_installation
which will also give you the option of removing the test
databases and anonymous user created by default. This is
strongly recommended for production servers.
See the manual for more instructions.
You can start the MySQL daemon with:
cd . ; /usr/local/mysql/bin/mysqld_safe &
You can test the MySQL daemon with mysql-test-run.pl
cd mysql-test ; perl mysql-test-run.pl
Please report any problems at http://bugs.mysql.com/
The latest information about MySQL is available on the web at
http://www.mysql.com
Support MySQL by buying support/licenses at http://shop.mysql.com
New default config file was created as /usr/local/mysql/my.cnf and
will be used by default by the server when you start it.
You may edit this file to change server settings
注:在启动 MySQL 服务时,会按照一定次序搜索 my.cnf,先在 /etc 目录下找,找不到则会搜索 ”$basedir/my.cnf”,
在本例中就是 /usr/local/mysql/my.cnf,这是新版 MySQL 的配置文件的默认位置!
[root@ansible httpd-2.4.18]# cp /usr/local/mysql/support-files/mysql.server /etc/init.d/mysqld
[root@ansible httpd-2.4.18]# chmod +x /etc/init.d/mysqld
[root@ansible httpd-2.4.18]# /etc/init.d/mysqld start
Starting MySQL……. SUCCESS!
4、编译安装 php
[root@ansible php-5.6.18]# yum install libXpm-devel -y
[root@ansible tools]# tar xf php-5.6.18.tar.gz
[root@ansible tools]# cd php-5.6.18
[root@ansible php-5.6.18]# ./configure \
–prefix=/usr/local/php \
–with-config-file-path=/usr/local/php/etc \
–with-apxs2=/usr/local/apache2/bin/apxs \
–with-mysql=/usr/local/mysql/ \
–with-libxml-dir=/usr/local/libxml2/ \
–with-png-dir=/usr/local/libpng/ \
–with-jpeg-dir=/usr/local/jpeg6/ \
–with-freetype-dir=/usr/local/freetype/ \
–with-gd=/usr/local/gd2/ \
–with-zlib-dir=/usr/local/zlib/ \
–with-mcrypt=/usr/local/libmcrypt/ \
–with-mysqli=/usr/local/mysql/bin/mysql_config \
–with-xpm-dir=/usr/lib64/ \
–enable-soap \
–enable-mbstring=all \
–enable-sockets
[root@ansible php-5.6.18]# make && make install
5、apache 配置
[root@ansible php-5.6.18]# vim /usr/local/apache2/conf/httpd.conf
ServerName localhost
DirectoryIndex index.php index.html
AddType
application/x-httpd-php .php .phtml
AddType application/x-httpd-php-source .phps
Include conf/extra/httpd-vhosts.conf
LoadModule php5_module modules/libphp5.so
User www
Group www
[root@ansible php-5.6.18]# vim /usr/local/apache2/conf/extra/httpd-vhosts.conf
# Virtual Hosts
<VirtualHost *:80>
ServerAdmin 1335120568@qq.com
DocumentRoot “/usr/local/apache2/htdocs/www”
ServerName www.martin1.com
ServerAlias martin1.com
ErrorLog “logs/www-error_log”
CustomLog “logs/www-access_log” common
</VirtualHost>
<VirtualHost *:80>
ServerAdmin 1335120568@qq.com
DocumentRoot “/usr/local/apache2/htdocs/blog”
ServerName blog.martin1.com
ErrorLog “logs/blog-error_log”
CustomLog “logs/blog-access_log” common
</VirtualHost>
[root@ansible php-5.6.18]# mkdir -p /usr/local/apache2/htdocs/{www,blog}
[root@ansible php-5.6.18]# vim /usr/local/apache2/htdocs/www/index.php
<?php
phpinfo();
?>
[root@ansible php-5.6.18]# /usr/local/apache2/bin/apachectl restart
[root@ansible php-5.6.18]# lsof -i :80
COMMAND PID USER FD TYPE DEVICE SIZE/OFF NODE NAME
httpd 8307 root 4u IPv6 295815 0t0 TCP *:http (LISTEN)
httpd 8309 www 4u IPv6 295815 0t0 TCP *:http (LISTEN)
httpd 8310 www 4u IPv6 295815 0t0 TCP *:http (LISTEN)
httpd 8312 www 4u IPv6 295815 0t0 TCP *:http (LISTEN)
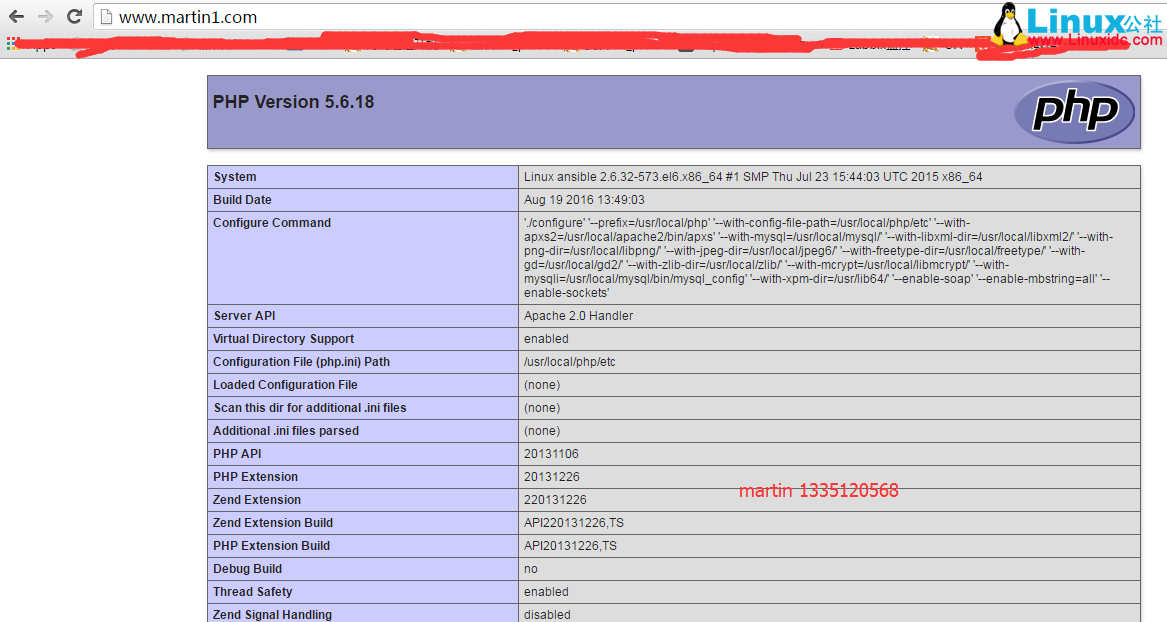
6、访问测试(如果出现 php 页面,则说明整合成功)
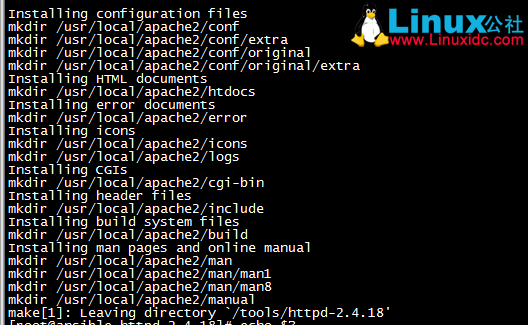
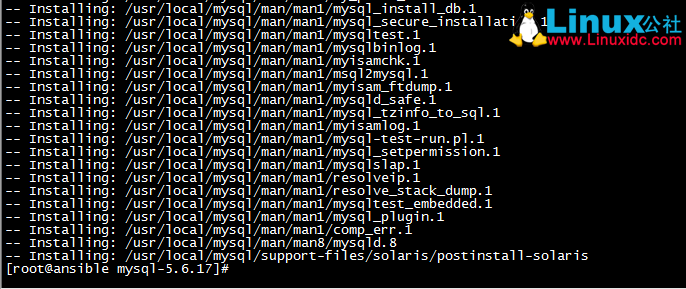
再简单截图之前编译安装的过程
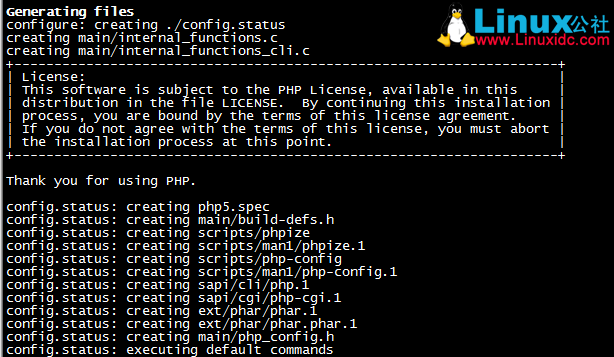
最后说下如果要在 lamp 环境下安装编译 zabbix 按照如下操作即可
./configure–prefix=/usr/local/zabbix-server –enable-server –with-mysql–with-net-snmp –with-libcurl –with-libxml2
cp -a/home/oldboy/tools/zabbix-3.0.3/frontends/php/* /usr/local/apache2/htdocs/www/
本文永久更新链接地址:http://www.linuxidc.com/Linux/2016-08/134670.htm


