共计 3682 个字符,预计需要花费 10 分钟才能阅读完成。
CentOS7 基于虚拟用户的 vsftpd
一、安装及配置文件介绍
1、使用 yum 的方式即可实现。
yum -y install vsftpd
2、用户认证配置文件
/etc/pam.d/vsftpd
3、主配置文件
/etc/vsftpd/vsftpd.conf
4、共享目录的位置:/var/ftp/
二、vsftpd 常用配置
1、匿名用户的常用配置
annoymous_enable=YES #是否启用匿名用户
anno_upload_enable=YES #是否允许匿名用户上传权限
anno_mkdir_write_enable=YES #是否允许匿名用户可创建目录及其文件
anno_other_write_ebable=YES #匿名用户是否除了写权限是否拥有删除和修改的权限
anno_world_readable_only=YES #匿名用户是否拥有只读权限
no_anno_password=YES #匿名用户是否跳过密码检测
anno_umask=077 #匿名用户创建文件的掩码权限
2、系统用户的配置
local_enable=YES #是否启用本地用户
write_enable=YES #本地用户是否可写
local_mask=022 #本地用户的掩码信息
3、禁锢所有 ftp 用户在其家目录下
chroot_local_user=YES
4、禁锢文件中指定的 ftp 本地用户在其家目录下
chroot_list_enable=YES
chroot_list_file=/etc/vsftpd/chroot_list
5、改变上传文件的属主
chown_uploads=YES
chown_username=whoever
6、是否启用控制用户登录的列表信息
userlist_enable=YES
userlist_deny=YES|NO
此配置文件默认为:/etc/vsftpd/user_list
三、基于虚拟用户的 vsftpd
实验环境:
平台:CentOS7, 编译安装 vsftpd
模块:pam_mysql 模块
依赖关系:mariadb-devel,pam-devel
开发包:pam_mysql-0.7RC1.tar.gz
实验步骤:
1、vsftpd 依赖于 pam 完成认证,pam 存储支持的认证方式,vsftpd 都可调用,本文使用 mysql 数据库来存储虚拟账号信息。
2、编译安装 pam_mysql-07RC01.tar.gz
yum -y install mariadb-devel yum -y install pam-devel
./configure –with-pam=/usr –with-mysql=/usr –with-pam-mods-dir=/usr/lib64/security
make install
3、创建数据库授权用户及其表和向表中插入数据
create database vsftpd
grant all on vsftpd.* to ‘vsftpd’@’localhost’ identified by ‘pass’
create table vsftpd.users (uid smallint unsigned not null auto_increment unique key,name varchar(39) not null,password char(48) not null)
insert into users (name,password) values(‘tom’,password(‘pass’)), (‘lucy’,password(‘pass’)), (‘jerry’,password(‘pass’)),
4、创建共享目录及其系统账号
mkdir -pv /ftproot/{pub,upload}
useradd -d /ftproot vuser 或则 useradd -s /sbin/nologin -M -d /ftproot/ vuser
setfacl -m u:vuser:rwx /ftproot/pub
setfacl -m u:vuer:rwx /ftproot/upload
5、创建认证 pam 配置文件:/etc/pam.d/vsftpd.mysql
vi /etc/pam.d/vsftpd.mysql
auth required pam_mysql.so host=127.0.0.1 user=vsftpd passwd=mageedu db=vsftpd table=users usercolumn=name passwdcolumn=password crypt=2
account required pam_mysql.so host=127.0.0.1 user=vsftpd passwd=mageedu db=vsftpd table=users usercolumn=name passwdcolumn=password crypt=2
6、指定虚拟用户及其指定 pam.server
pam_service_name=vsftpd.mysql
guest_enable=YES
guest_username=vuser
user_config_dir=/etc/vsftpd/vuser_conf
7、配置每个虚拟不同的用户权限
mkdir /etc/vsftpd/vusers_conf
touch username
权限配置
anno_upload_enable=YES
anno_mkdir_write_enable=YES
anno_other_write_enabel=YES
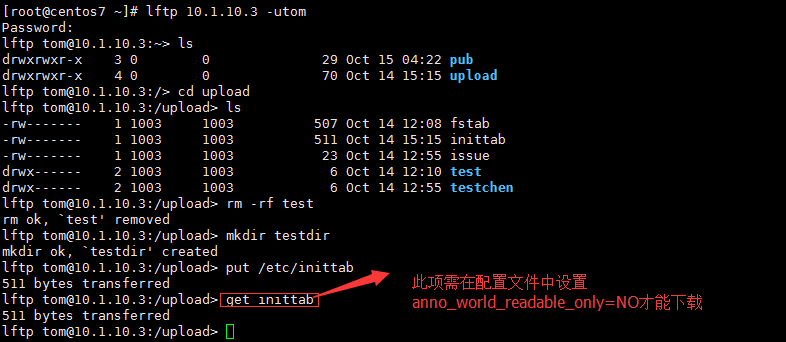
8、测试
[root@centos7 ~]# lftp 10.1.10.3 -utom
1234567891011121314151617181920 Password:
lftp tom@10.1.10.3:~> ls
drwxrwxr-x 3 0 0 29 Oct 15 04:22 pub
drwxrwxr-x 4 0 0 70 Oct 14 15:15 upload
lftp tom@10.1.10.3:/> cd upload
lftp tom@10.1.10.3:/upload> ls
-rw——- 1 1003 1003 507 Oct 14 12:08 fstab
-rw——- 1 1003 1003 511 Oct 14 15:15 inittab
-rw——- 1 1003 1003 23 Oct 14 12:55 issue
drwx—— 2 1003 1003 6 Oct 14 12:10 test
drwx—— 2 1003 1003 6 Oct 14 12:55 testchen
lftp tom@10.1.10.3:/upload> rm -rf test
rm ok, `test’ removed
lftp tom@10.1.10.3:/upload> mkdir testdir
mkdir ok, `testdir’ created
lftp tom@10.1.10.3:/upload> put /etc/inittab
511 bytes transferred
lftp tom@10.1.10.3:/upload> get inittab
511 bytes transferred
lftp tom@10.1.10.3:/upload>
图示:

FTP 协议详解与 vsftpd 在 Linux 上的安装配置 http://www.linuxidc.com/Linux/2016-09/134831.htm
玩转 vsftpd 服务器的四大高级配置:http://www.linuxidc.com/Linux/2013-09/90565.htm
vsFTPd 配置教程:http://www.linuxidc.com/Linux/2013-09/90562.htm
Ubuntu 实用简单的 FTP 架设 http://www.linuxidc.com/Linux/2012-02/55346.htm
Ubuntu 上架设 FTP 服务器和 Apache 服务器 http://www.linuxidc.com/Linux/2011-04/35295.htm
Ubuntu 13.04 安装 LAMP\vsftpd\Webmin\phpMyAdmin 服务及设置 http://www.linuxidc.com/Linux/2013-06/86250.htm
RHEL6 平台下 SeLinux 和 vsftpd 的匿名上传的简单案例 http://www.linuxidc.com/Linux/2013-04/82300.htm
Linux 系统 vsftpd 源码安装 http://www.linuxidc.com/Linux/2013-03/81475.htm
openSUSE 13.2/13.1 下安装配置 FTP 服务器 vsftpd http://www.linuxidc.com/Linux/2014-12/110070.htm
本文永久更新链接地址:http://www.linuxidc.com/Linux/2016-11/137150.htm


