共计 2662 个字符,预计需要花费 7 分钟才能阅读完成。
介绍一下怎样利用 docker-gitlab 来搭建 git 代码仓库。
操作:
1:下载搭建 gitlab 的相关镜像:(这里使用 postgresql 数据库)
# docker pull buj7itru.mirror.aliyuncs.com/sameersbn/gitlab:latest
# docker pull buj7itru.mirror.aliyuncs.com/sameersbn/postgresql:9.5-3
# docker pull buj7itru.mirror.aliyuncs.com/sameersbn/redis:latest
2:创建数据存储目录:
# mkdir -p /opt/data/docker_gitlab/{gitlab,postgresql,redis}
3:创建 docker-compose 文件,配置内容如下:
# more docker-compose.yml
version: ‘2’
services:
redis:
restart: always
image: sameersbn/redis:latest
command:
– –loglevel warning
volumes:
– /opt/data/docker_gitlab/redis:/var/lib/redis:Z
postgresql:
restart: always
image: sameersbn/postgresql:9.5-3
volumes:
– /opt/data/docker_gitlab/postgresql:/var/lib/postgresql:Z
environment:
– DB_USER=gitlab
– DB_PASS=password
– DB_NAME=gitlabhq_production
– DB_EXTENSION=pg_trgm
gitlab:
restart: always
image: sameersbn/gitlab:8.13.5
depends_on:
– redis
– postgresql
ports:
– “10080:80”
– “10022:22”
volumes:
– /opt/data/docker_gitlab//gitlab:/home/git/data:Z
environment:
– DEBUG=false
– DB_ADAPTER=postgresql
– DB_HOST=postgresql
– DB_PORT=5432
– DB_USER=gitlab
– DB_PASS=password
– DB_NAME=gitlabhq_production
– REDIS_HOST=redis
– REDIS_PORT=6379
– TZ=Asia/Shanghai
– GITLAB_HTTPS=false
– SSL_SELF_SIGNED=false
– GITLAB_HOST=localhost
– GITLAB_PORT=10080
– GITLAB_SSH_PORT=10022
– GITLAB_RELATIVE_URL_ROOT=
– GITLAB_SECRETS_DB_KEY_BASE=long-and-random-alphanumeric-string
– GITLAB_SECRETS_SECRET_KEY_BASE=long-and-random-alphanumeric-string
– GITLAB_SECRETS_OTP_KEY_BASE=long-and-random-alphanumeric-string
– GITLAB_ROOT_PASSWORD=
– GITLAB_ROOT_EMAIL=
– GITLAB_NOTIFY_ON_BROKEN_BUILDS=true
– GITLAB_NOTIFY_PUSHER=false
– GITLAB_EMAIL=notifications@example.com
– GITLAB_EMAIL_REPLY_TO=noreply@example.com
– GITLAB_INCOMING_EMAIL_ADDRESS=reply@example.com
– GITLAB_BACKUP_SCHEDULE=daily
– GITLAB_BACKUP_TIME=01:00
4:利用 docker-compose 创建 docker 服务:
# docker-compose up -d
Creating root_postgresql_1
Creating root_redis_1
Creating root_gitlab_1
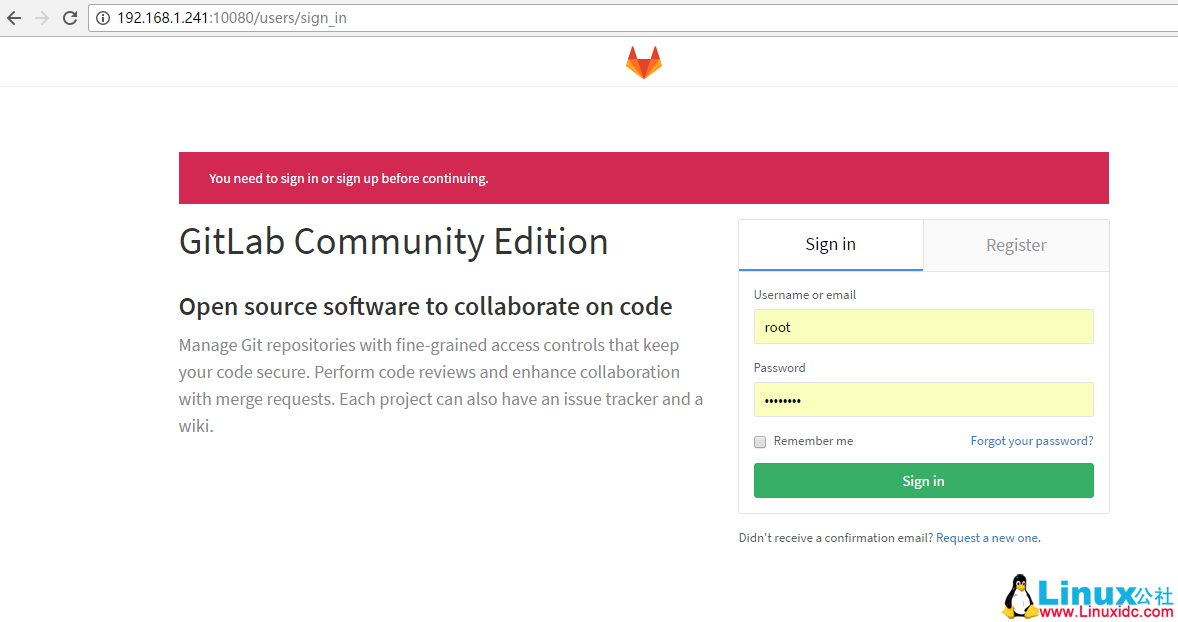
5:由于在 compose 文件中,我映射了 10080 端口,我们可以利用这个端口登录,页面会提示你修改密码,之后以 root 用户与你修改后的密码登录系统即可:

更多 GitLab 相关教程见以下内容:
Ubuntu 14.04 下安装 GitLab 指南 http://www.linuxidc.com/Linux/2015-12/126876.htm
如何在 Ubuntu Server 14.04 下安装 Gitlab 中文版 http://www.linuxidc.com/Linux/2015-12/126875.htm
CentOS 源码安装 GitLab 汉化版 http://www.linuxidc.com/Linux/2015-10/124648.htm
在 Ubuntu 12.04 上安装 GitLab http://www.linuxidc.com/Linux/2012-12/75249.htm
GitLab 5.3 升级注意事项 http://www.linuxidc.com/Linux/2013-06/86473.htm
在 CentOS 上部署 GitLab (自托管的 Git 项目仓库) http://www.linuxidc.com/Linux/2013-06/85754.htm
在 RHEL6/CentOS6/ScientificLinux6 上安装 GitLab 6.0.2 http://www.linuxidc.com/Linux/2014-03/97831.htm
CentOS 6.5 安装 GitLab 教程及相关问题解决 http://www.linuxidc.com/Linux/2014-05/101526.htm
升级 GitLab 到 8.2.0 http://www.linuxidc.com/Linux/2015-12/126220.htm
GitLab 的详细介绍:请点这里
GitLab 的下载地址:请点这里
本文永久更新链接地址:http://www.linuxidc.com/Linux/2017-02/140213.htm


