共计 6450 个字符,预计需要花费 17 分钟才能阅读完成。
案例:目前很多人喜欢 Nginx+tomcat 动静分离,或者反代后端 tomcat 集群,不过很多人也喜欢用 Resin。
本人花了些功夫总结了 Resin 和 tomcat 区别:
特性 \ 容器 | resin | tomcat |
公司 | CAUCHO | Apache |
是否收费 | 不完全免费(pro 版本收费) | 完全免费 |
Eclipse 下调试开发 | 适中 | 复杂 |
性能 | 轻量级,pro 版本支持负载均衡,以及缓存功能 | 轻量级(NIO 模式性能高些), 支持负载均衡 |
多实例 | 略麻烦 | 比较简单 |
集群部署 | 支持 | 支持 |
是否支持 php | 新版本支持(但很少用) | 默认不支持(可配置) |
用户喜好 | 略少 | 略多 |
常用组合 | Nginx+Resin or+ 其它 | Nginx+tomcat+or 其它 |
报错机制 | 简单 | 复杂 |
标准 | 开发 | 行为喜好 | 两者在标准支持,开发使用,用户喜好有很大关系 | |
常用 JavaEE 容器有很多:Tomcat、Resin、JBoss、Glassfish,注意 weblogic 属于应用服务器。
1、安装配置 Resin:
1.1)jdk 目录创建:
[root@resin ~]# tar zxvfjdk-7u75-linux-x64.tar.gz
[root@resin ~]# mkdir/usr/local/jdk1.7
[root@resin ~]# mvjdk1.7.0_75/* /usr/local/jdk1.7/
[root@resin ~]# cat/etc/profile.d/jdk.sh
export JAVA_HOME=/usr/local/jdk1.7/
exportCLASSPATH=.:$JAVA_HOME/lib/dt.jar:$JAVA_HOME/lib/tools.jar
exportPATH=$PATH:$JAVA_HOME/bin
export JAVA_HOMECLASSPATH PATH
[root@resin ~]#
1.2)Resin 安装配置:
[root@resin ~]# yum install ntpdate -y
[root@resin~]# ntpdate time.windows.com 安装 resin
[root@resin~]# tar xf resin-4.0.50.tar.gz -C /usr/local/
[root@resin~]# cd /usr/local
[root@resin~]# #./configure –prefix=/usr/local/resin
[root@resin~]# #make
[root@resin ~]# #make install
[root@resin local]# ln -s resin-4.0.50 resin
[root@resin local]#cat / etc/profile.d/resin.sh
exportRESIN_HOME=/usr/local/resin
[root@resin local]#
[root@resin local]#cp /usr/local/resin/bin/resin.sh /etc/init.d/resin
[root@resin local]#chmod +x /etc/init.d/resin
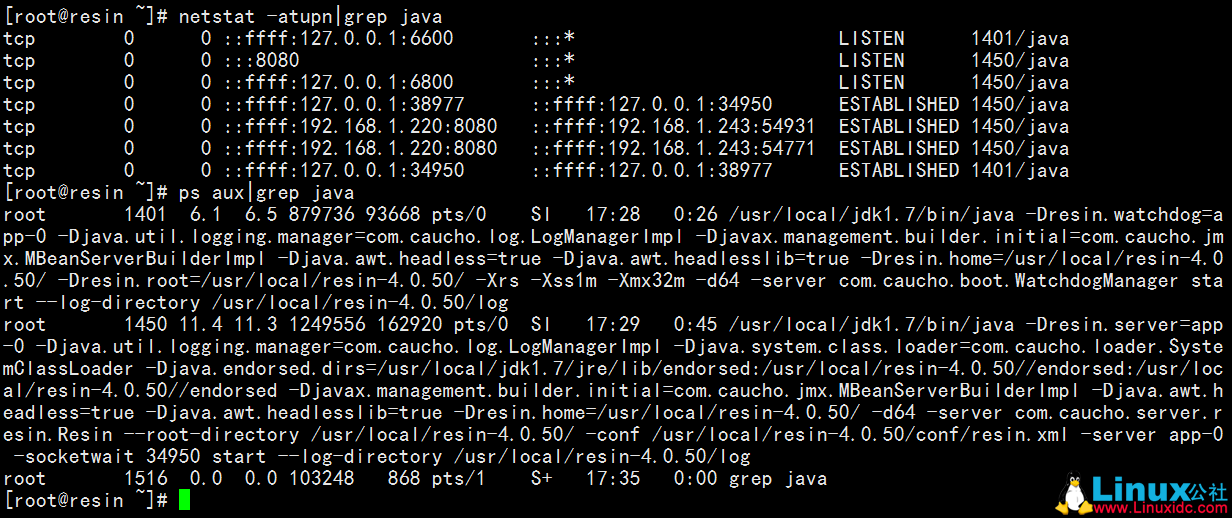
[root@resin local]#/etc/init.d/resin start

1.3)首页访问:

1.4)配置多个项目:
[root@resin ~]# cd /usr/local/resin/conf
[root@resin conf]# vim resin.xml
# 配置多个项目:
<clusterid=”app1″>
<!– define the servers in the cluster –>
<server-multiid-prefix=”app1″address-list=”${app1_servers}”port=”6800″/> // 端口 1
<!– the default host, matching any host name –>
<hostid=””root-directory=”.”>
<web-appid=”/”root-directory=”/usr/local/resin/webapps/app1″/> // 项目 1
</host>
</cluster>
<clusterid=”app2″>
<!– define the servers in the cluster –>
<server-multiid-prefix=”app2″address-list=”${app2_servers}”port=”6801″/> // 端口 2
<!– the default host, matching any host name –>
<hostid=””root-directory=”.”>
<web-appid=”/”root-directory=”/usr/local/resin/webapps/app2″/> // 项目 2
</host>
</cluster>
1.4.1)定义端口:
# app-tier Triad servers: app-0 app-1 app-2
app1_servers : 127.0.0.1:6800
app2_servers : 127.0.0.1:6801
app1.http : 8080
app2.http : 8081
1.5)JDBC 配置:
<database>
<jndi-name>jdbc/test</jndi-name>
<driver type=”com.microsoft.jdbc.sqlserver.SQLServerDriver”>
<url>jdbc:microsoft:sqlserver://localhost:3306;databasename=Northwind</url> // 后端数据库
<user>sa</user>
<password>password</password> // 密码
</driver>
<prepared-statement-cache-size>8</prepared-statement-cache-size>
<max-connections>20</max-connections>
<max-idle-time>30s</max-idle-time>
</database>
注意:jdbc 文件可自己定义,需要导入相应的驱动包。
2、安装配置 Nginx:
useradd nginx -M -s /sbin/nologin
tar xf nginx-1.9.2.tar.gz
cd nginx-1.9.2
./configure –user=nginx –group=nginx –prefix=/usr/local/nginx –with-http_stub_status_module–with-http_ssl_module –with-http_realip_module –with-http_flv_module –with-http_mp4_module –with-http_gzip_static_module&&make &&make install
2.1)nginx.conf 配置负载均衡:
user nginx;
worker_processes 8;
#worker_cpu_affinity 00000001 00000010 00000100 00001000 00010000 00100000 01000000 10000000;
error_log logs/error.log info;
pid /var/run/nginx.pid;
events {
use epoll;
worker_connections 1024;
}
http {
include mime.types;
default_type application/octet-stream;
charset UTF-8;
server_names_hash_bucket_size 128;
client_header_buffer_size 32k;
large_client_header_buffers 4 32k;
client_max_body_size 8m;
#limit_conn_zone $binary_remote_addr zone=one:32k;
#limit_conn_zone $binary_remote_addr zone=permitip:10m;
error_page 404 = http://www.linuxidc.net/404.html;
#error_page 404 = /40x.html;
#location = /40x.html{
#root html;
#}
#error_page 500 502 503 504 /50x.html;
#location = /50x.html {
#root html;
#}
open_file_cache max=102400 inactive=20s;
sendfile on;
#autoindex on;
tcp_nopush on;
tcp_nodelay on;
keepalive_timeout 60;
gzip on;
gzip_min_length 1k;
gzip_buffers 4 16k;
gzip_http_version 1.0;
gzip_comp_level 2;
#gzip_types text/plain application/x-javascript text/css application/xml;
gzip_vary on;
fastcgi_connect_timeout 300;
fastcgi_send_timeout 300;
fastcgi_read_timeout 300;
fastcgi_buffer_size 64k;
fastcgi_buffers 4 64k;
fastcgi_busy_buffers_size 128k;
fastcgi_temp_file_write_size 128k;
# 如果要启用负载均衡
#upstream www.xxx.com {
#zone myapp1 64k;
#server 192.168.1.220:80 weight=1 max_fails=2 fail_timeout=30s slow_start=30s;
#server 192.168.1.221:80 weight=1 max_fails=2 fail_timeout=30s;
#}
#upstream www.xxx.org {
#zone myapp1 64k;
#server 192.168.1.220:80 weight=1 max_fails=2 fail_timeout=30s slow_start=30s;
#server 192.168.1.221:80 weight=1 max_fails=2 fail_timeout=30s;
#}
log_format access ‘$remote_addr – $remote_user [$time_local] $request $status $body_bytes_sent $http_referer $http_user_agent $http_x_forwarded_for’;
#access_log logs/access.log access;
include vhost/*.conf;
}
2.2)renzhiyuan.conf 配置动静分离:
server {
listen 80;
server_name
#路径根据 Resin 定义路径配置,这里根据默认
root /usr/local/resin/webapps/ROOT;
index index.html index.php index.jsp index.html;
#location ~ \.php$ {
# root html;
# fastcgi_pass 127.0.0.1:9000;
# fastcgi_index index.php;
# include fastcgi.conf;
# }
location ~ .(jsp|jspx|do)?$ {
proxy_set_header Host $host;
proxy_pass http://127.0.0.1:8080;
proxy_redirect off;
proxy_set_header X-Real-IP $remote_addr;
proxy_set_header X-Forwarded-For $proxy_add_x_forwarded_for;
proxy_set_header Host $host;
client_max_body_size 10m;
client_body_buffer_size 128k;
proxy_connect_timeout 90;
proxy_send_timeout 90;
proxy_read_timeout 90;
proxy_buffer_size 4k;
proxy_buffers 4 32k;
proxy_busy_buffers_size 64k;
proxy_temp_file_write_size 64k;
}
location ~ .*\.(htm|html|gif|jpg|jpeg|png|bmp|swf|ioc|rar|zip|txt|flv|mid|doc|ppt|pdf|xls|mp3|wma)$ {
expires 30d;
}
location ~ .*\.(js|css)?$ {
expires 12h;
}
}
下面关于 Nginx 的文章您也可能喜欢,不妨参考下:
CentOS 7.2 下编译安装 PHP7.0.10+MySQL5.7.14+Nginx1.10.1 http://www.linuxidc.com/Linux/2016-09/134804.htm
搭建基于 Linux6.3+Nginx1.2+PHP5+MySQL5.5 的 Web 服务器全过程 http://www.linuxidc.com/Linux/2013-09/89692.htm
CentOS 6.3 下 Nginx 性能调优 http://www.linuxidc.com/Linux/2013-09/89656.htm
Nginx 高级应用 – 负载均衡与 rewrite 规则 http://www.linuxidc.com/Linux/2017-02/140476.htm
CentOS 6.4 安装配置 Nginx+Pcre+php-fpm http://www.linuxidc.com/Linux/2013-08/88984.htm
Nginx 安装配置使用详细笔记 http://www.linuxidc.com/Linux/2014-07/104499.htm
Nginx 日志过滤 使用 ngx_log_if 不记录特定日志 http://www.linuxidc.com/Linux/2014-07/104686.htm
Nginx 的 500,502,504 错误解决方法 http://www.linuxidc.com/Linux/2015-03/115507.htm
CentOS 7 编译安装 Nginx1.10.2 脚本启动失败解决思路 http://www.linuxidc.com/Linux/2017-01/139794.htm
Nginx 简单实现网站的负载均衡 http://www.linuxidc.com/Linux/2017-02/140351.htm
Nginx 实现集群的负载均衡配置过程详解 http://www.linuxidc.com/Linux/2017-02/140549.htm
Nginx 的详细介绍:请点这里
Nginx 的下载地址:请点这里
本文永久更新链接地址:http://www.linuxidc.com/Linux/2017-02/140771.htm


