共计 2042 个字符,预计需要花费 6 分钟才能阅读完成。
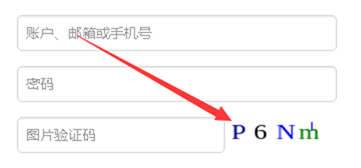
本文介绍.Net Core 下用第三方 ZKWeb.System.Drawing 实现验证码功能。
Windows8.1 64bit
Ubuntu Server16.04 LTS 64bit
Fedora24 64bit
CentOS7.2 64bit
可以实现以下功能:
Open jpg, bmp, ico, png
Save jpg, bmp, ico, png
Resize image
Draw graphics with brush and pen
Open font and drawstring
以上是官方给的资料。
No.1 项目引入 ZKWeb.System.Drawing
NuGet 引入包,不会的自己 Google。
No.2 简单的验证码生成
int codeH = 30;
int fontSize = 16; Random rnd= new Random();
//颜色列表,用于验证码、噪线、噪点
Color[] color = {Color.Black, Color.Red, Color.Blue, Color.Green, Color.Orange, Color.Brown, Color.Brown, Color.DarkBlue};
// 字体列表,用于验证码
string[] font = { “Times New Roman“ };
// 验证码的字符集,去掉了一些容易混淆的字符
//写入 Session、验证码加密
//WebHelper.WriteSession(“session_verifycode”, Md5Helper.MD5(chkCode.ToLower(), 16));
// 创建画布
Bitmap bmp = new Bitmap(codeW, codeH);
Graphics g= Graphics.FromImage(bmp);
g.Clear(Color.White);
// 画噪线
for (int i = 0; i < 1; i++)
{
int x1 = rnd.Next(codeW);
int y1 = rnd.Next(codeH);
int x2 = rnd.Next(codeW);
int y2 = rnd.Next(codeH);
Color clr= color[rnd.Next(color.Length)];
g.DrawLine(new Pen(clr), x1, y1, x2, y2);
}
// 画验证码字符串
for (int i = 0; i < chkCode.Length; i++)
{
string fnt = font[rnd.Next(font.Length)];
Font ft= new Font(fnt, fontSize);
Color clr= color[rnd.Next(color.Length)];
g.DrawString(chkCode[i].ToString(), ft,new SolidBrush(clr), (float)i * 18, (float)0);
}
// 将验证码图片写入内存流,并将其以 “image/Png” 格式输出
MemoryStream ms = new MemoryStream();
try
{
bmp.Save(ms, ImageFormat.Png);
return ms.ToArray();
}
catch (Exception)
{
return null;
}
finally
{
g.Dispose();
bmp.Dispose();
}
No.3 发布部署运行
直接上图,不会的看这里 http://www.linuxidc.com/Linux/2017-02/140957.htm

注意:验证码 Windows 下生成无压力,我用的 Ubuntu 14,需要安装 gdi 包,运行日志中会有提示。
安装方法:
Ubuntu 16.04:
| apt-get install libgdiplus | |
| cd /usr/lib | |
| ln -s libgdiplus.so gdiplus.dll |
Fedora 23:
| dnf install libgdiplus | |
| cd /usr/lib64/ | |
| ln -s libgdiplus.so.0 gdiplus.dll |
CentOS 7:
yum install freetype-devel fontconfig libXft-devel
yum install libjpeg-turbo-devel libpng-devel giflib-devel libtiff-devel libexif-devel
yum install glib2-devel cairo-devel
git clone https://github.com/mono/libgdiplus
cd libgdiplus
./autogen.sh
make
make install
cd/usr/lib64/
ln -s /usr/local/lib/libgdiplus.so gdiplus.dll
本文永久更新链接地址:http://www.linuxidc.com/Linux/2017-02/140958.htm


