共计 9053 个字符,预计需要花费 23 分钟才能阅读完成。
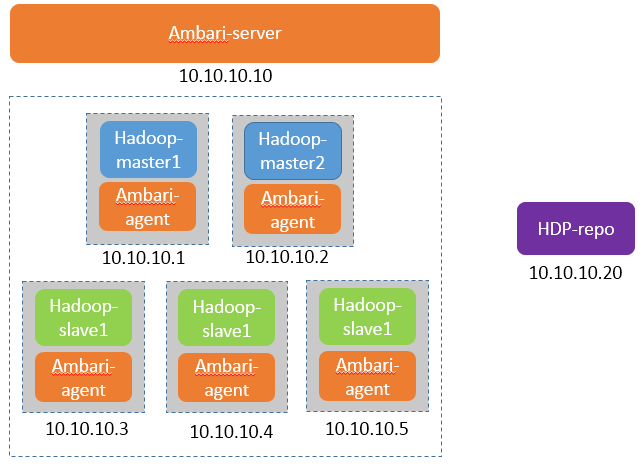
规划
OS:CentOS 6.5
Ambari-yumrepo 10.10.10.20 公网
Ambari-server 10.10.10.10 内网
Hadoop-master1 10.10.10.1 内网
hadoop-master2 10.10.10.2 内网
hadoop-slave1 10.10.10.3 内网
hadoop-slave2 10.10.10.4 内网
hadoop-slave3 10.10.10.5 内网
准备工作
(1)修改主机名
Ambari-server、master1、master2、slave1、slave2、slave3
$ hostname XXX && echo XXX >/etc/hostname$ cat >> /etc/hosts << EOF 10.10.10.1 master1 10.10.10.2 master2 10.10.10.3 slave1 10.10.10.4 slave2 10.10.10.5 slave3 10.10.10.10 ambari-server 10.10.10.20 ambari-yumrepo EOF(2)关闭 selinux 和防火墙
Ambari-server、master1、master2、slave1、slave2、slave3
$ setenforce 0 $ service iptables stop $ chkconfig iptables off(3)主从节点 ssh 互信
slave1、slave2、slave3
$ echo sshd:10.64.8.1 10.64.8.2 >>/etc/hosts.allowmaster1、master2
$ ssh-keygen -t rsa $ ssh-copy-id -i ~/.ssh/id_rsa.pub root@slave1 $ ssh-copy-id -i ~/.ssh/id_rsa.pub root@slave2 $ ssh-copy-id -i ~/.ssh/id_rsa.pub root@slave3(4)安装 jdk
Ambari-server、master1、master2、slave1、slave2、slave3
$ wget http://download.Oracle.com/otn-pub/Java/jdk/8u111-b14/jdk-8u111-linux-x64.rpm $ rpm -ivh jdk-8u111-linux-x64.rpm (5)格式化硬盘
Ambari-server、master1、master2、slave1、slave2、slave3
$ yes|mkfs.ext4 /dev/sdb$ mkdir /data$ mount /dev/sdb /data$ echo "mount /dev/sdb /data" >>/etc/rc.local (6) 系统参数调优
Ambari-server、master1、master2、slave1、slave2、slave3
$ cat >>/etc/sysctl.conf <<EOF net.ipv4.tcp_fin_timeout = 30 net.ipv4.tcp_keepalive_time = 1200 net.ipv4.tcp_syncookies = 1 net.ipv4.tcp_tw_reuse = 1 net.ipv4.tcp_tw_recycle = 1 net.ipv4.ip_local_port_range = 1024 65000 net.ipv4.tcp_max_syn_baklog = 8192 net.ipv4.tcp_max_tw_bukets = 5000 EOF文件打开数
$ cat >> /etc/security/limits.conf <<EOF * soft nofile 65535* hard nofile 65535 EOF重启
二:搭建内网 yum 源
注意:因为考虑到 hadoop 集群的机器可能是内网机器,没有公网访问权限,那么选择搭建一个内网的 yum 源,这个 yum 源的机器需要有公网权限。如果你的机器都可以出公网,也可以跳过这一步。
(1)添加 yum 源
Ambari-yumrepo
$ cd /opt$ wget http://public-repo-1.hortonworks.com/ambari/centos6/1.x/updates/1.4.1.25/ambari.repo $ cp ambari.repo /etc/yum.repos.d/
(2)同步 yum 源的包
Ambari-yumrepo
$ reposync -r HDP-UTILS-1.1.0.16 $ reposync -r Updates-ambari-1.4.1.25 $ reposync -r ambari-1.x会在当前目录生成三个目录。
(3)发布 yum 源
Ambari-yumrepo
需要一个 web 服务器来发布,已经安装了 nginx, 将上面下载包的三个目录移动到 nginx 发布目录下。
$ yum install nginx $ mkdir /usr/share/nginx/html/ambari$ cp -R ambari-1.x /usr/share/nginx/html/ambari/$ cp -R HDP-UTILS-1.1.0.16 /usr/share/nginx/html/ambari/$ cp -R Updates-ambari-1.4.1.25 /usr/share/nginx/html/ambari/
(4)创建 repo
Ambari-yumrepo
安装 createrepo 命令
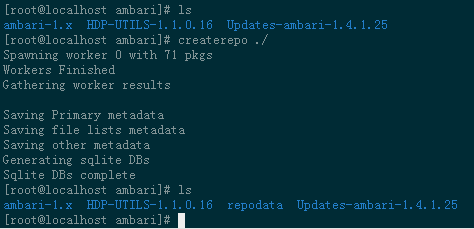
$ yum install createrepo $ cd /usr/share/nginx/html/ambari/$ createrepo ./
(5)添加 HDP 源
Ambari-yumrepo
$ vim /etc/yum.repos.d/HDP.repo [HDP-2.0.6] name=HDP baseurl=http://public-repo-1.hortonworks.com/HDP/centos6/2.x/updates/2.0.6.0 enabled=1 gpgcheck=0
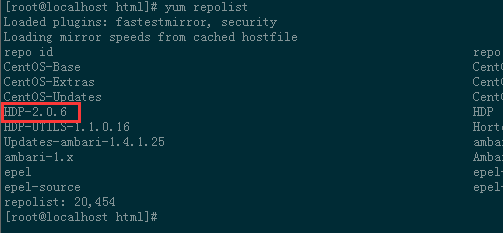
$ mkdir /usr/share/nginx/html/hdp$ cd /usr/share/nginx/html/hdp 同步网络源的包,1G 左右。$ reposync -r HDP-2.0.6 $ createrepo ./
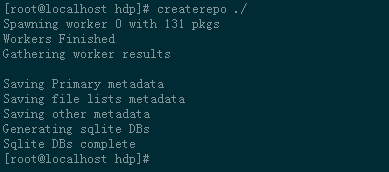
这样就本地 yum 源就 OK 了!
(6)配置 yum.repo 配置文件,放在 web 目录下。
Ambari-yumrepo
注意:这个 ambari.repo 配置是给其他机器来使用的,不是本机的配置。
$ mkdir /usr/share/nginx/html/hadoop$ cd /usr/share/nginx/html/hadoop$ vim ambari.repo [ambari-1.x] name=Ambari 1.x baseurl=http://10.10.10.20/ambari/gpgcheck=0 enabled=1 [HDP-UTILS-1.1.0.16] name=Hortonworks Data Platform Utils Version - HDP-UTILS-1.1.0.16 baseurl=http://10.10.10.20/ambari/gpgcheck=0 enabled=1 [Updates-ambari-1.4.1.25] name=ambari-1.4.1.25 - Updates baseurl=http://10.64.10.20/ambari/gpgcheck= enabled=1$ vim hdp.repo [HDP-2.0.6] name=HDP baseurl=http://10.10.10.20/hdppath=/ enabled=1 gpgcheck=0 更多详情见请继续阅读下一页的精彩内容 :http://www.linuxidc.com/Linux/2017-03/142136p2.htm
三:安装 Ambari
(1)添加 yum 源
Ambari-server、master1、master2、slave1、slave2、slave3
$ cd /etc/yum.repos.d/ $ wget http://10.10.10.20/Hadoop/ambari.repo # 上面搭建的内网 yum 源 $ wget http://10.10.10.20/hadoop/hdp.repo # 上面搭建的内网 yum 源 (2)ambari 主机 ssh 信任 hadoop 各机器
master1、master2、slave1、slave2、slave3
$ echo sshd:10.10.10.10 >>/etc/hosts.allowAmbari-server
$ ssh-keygen -t rsa $ ssh-copy-id -i ~/.ssh/id_rsa.pub root@master1 $ ssh-copy-id -i ~/.ssh/id_rsa.pub root@master2 $ ssh-copy-id -i ~/.ssh/id_rsa.pub root@slave1 $ ssh-copy-id -i ~/.ssh/id_rsa.pub root@slave2 $ ssh-copy-id -i ~/.ssh/id_rsa.pub root@slave3(3)安装 ambari
Ambari-server
$ yum -y install ambari-server
(4)初始化 ambari
Ambari-server
下载需要的 jdk 文件(必须用这个文件)
$ wget http://public-repo-1.hortonworks.com/ARTIFACTS/jdk-6u31-linux-x64.bin $ mv jdk-6u31-linux-x64.bin /var/lib/ambari-server/resources/ $ ambari-server setup # 初始化配置 
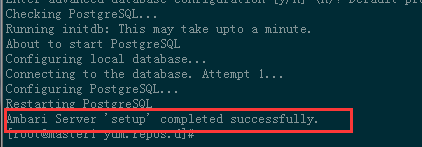
(5)启动 ambari
Ambari-server
$ ambari-server start

(6)给 ambari 配置本地的 hadoop 源
Ambari-server
$ cd /var/lib/ambari-server/resources/stacks/HDPLocal/2.0.6/repos/$ vim repoinfo.xml 将 CentOS6 的 <baseurl>http://public-repo-1.hortonworks.com/HDP/centos6/2.x/updates/2.0.6.0</baseurl> 替换成 <baseurl>http://10.10.10.20/hdp/centos6/2.x/updates/2.0.6.0</baseurl>(7)进入 ambari
访问:http://10.10.10.10:8080 进入 ambari,user:admin,passwd:admin

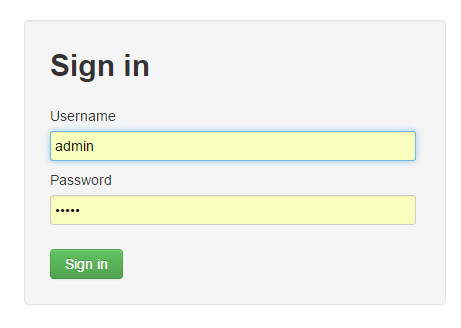
输入集群名

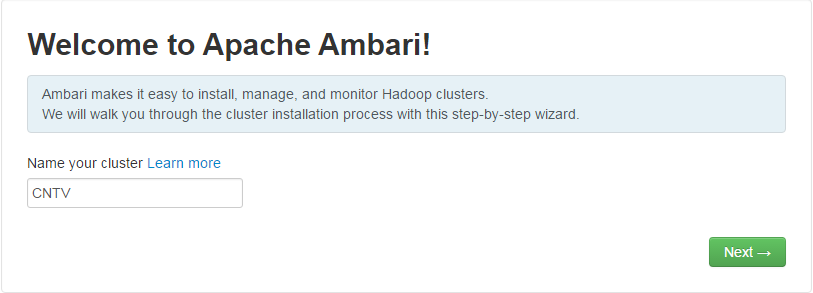
选择 stack 版本


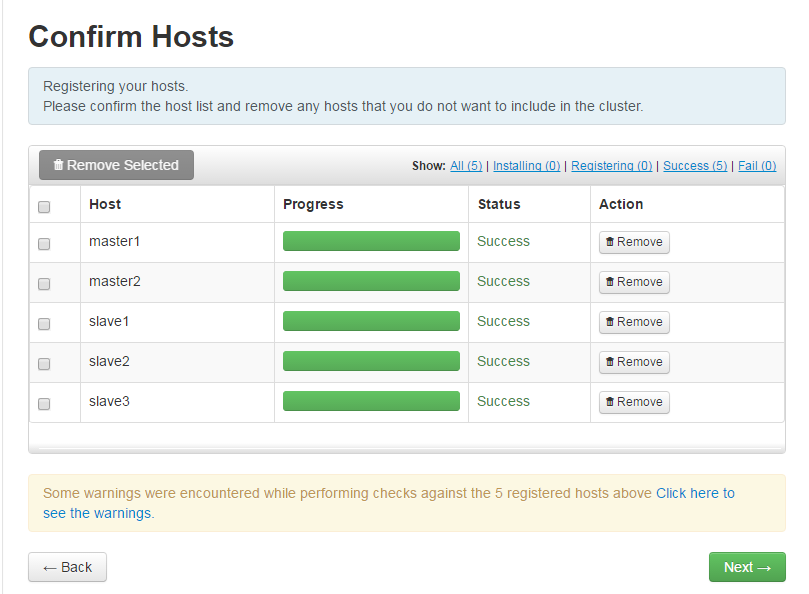
Target Hosts 输入 hadoop 机器的列表, 需要添加 ambari-server 这台机器的 /root/.ssh/id_rsa 文件。
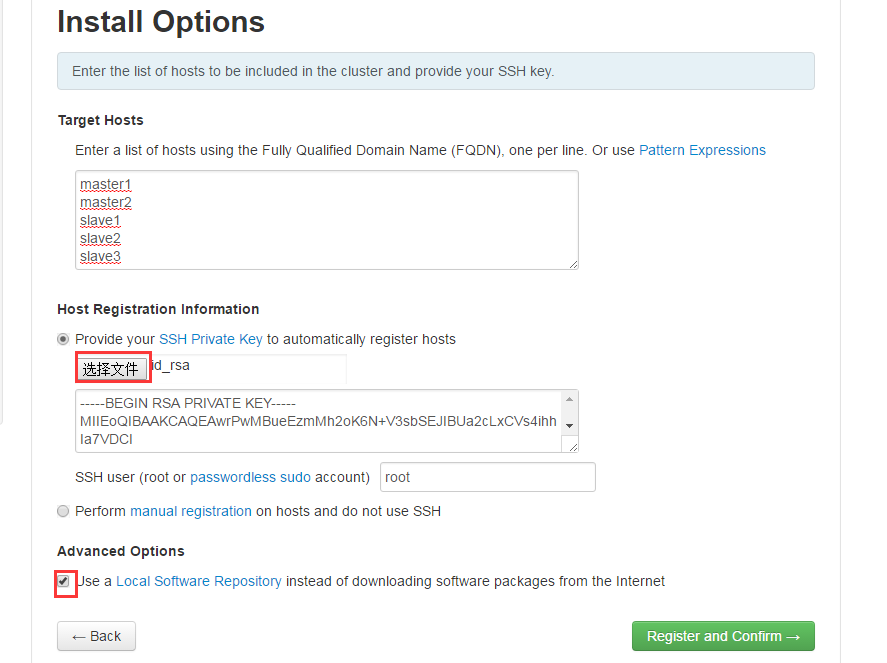
会自动安装 ambari-agent

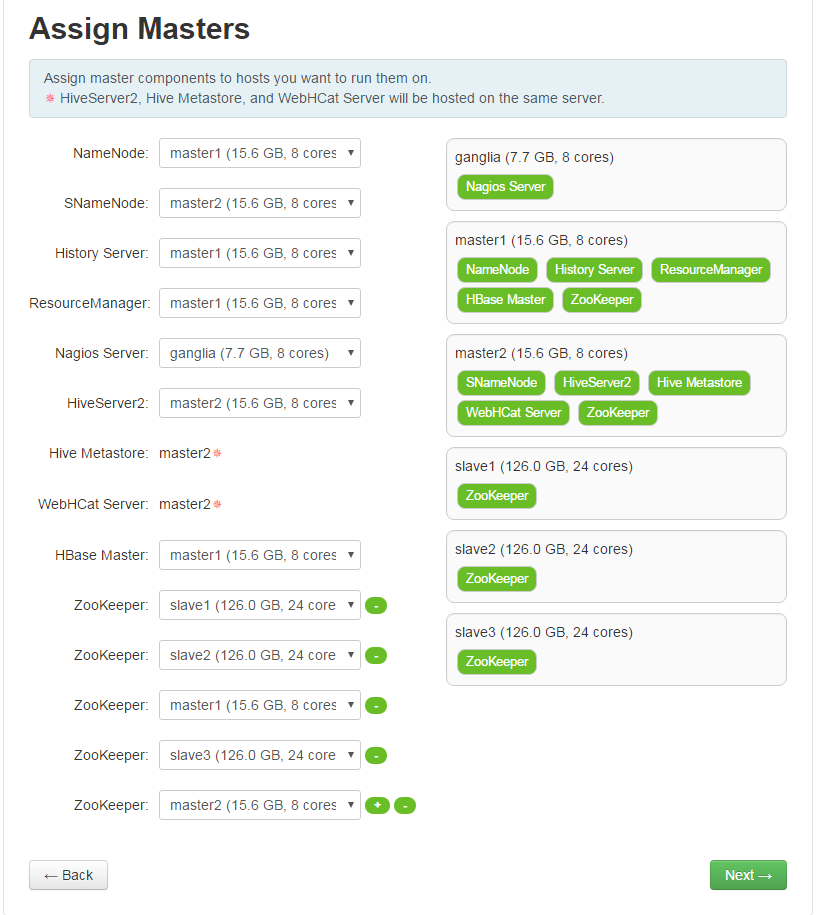
选择那个服务安装在哪个机器上。

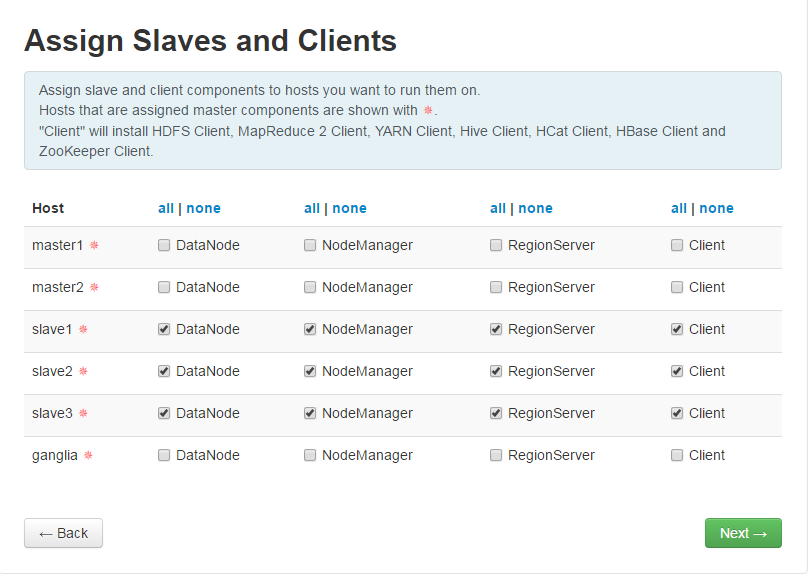
配置客户端和 slaves

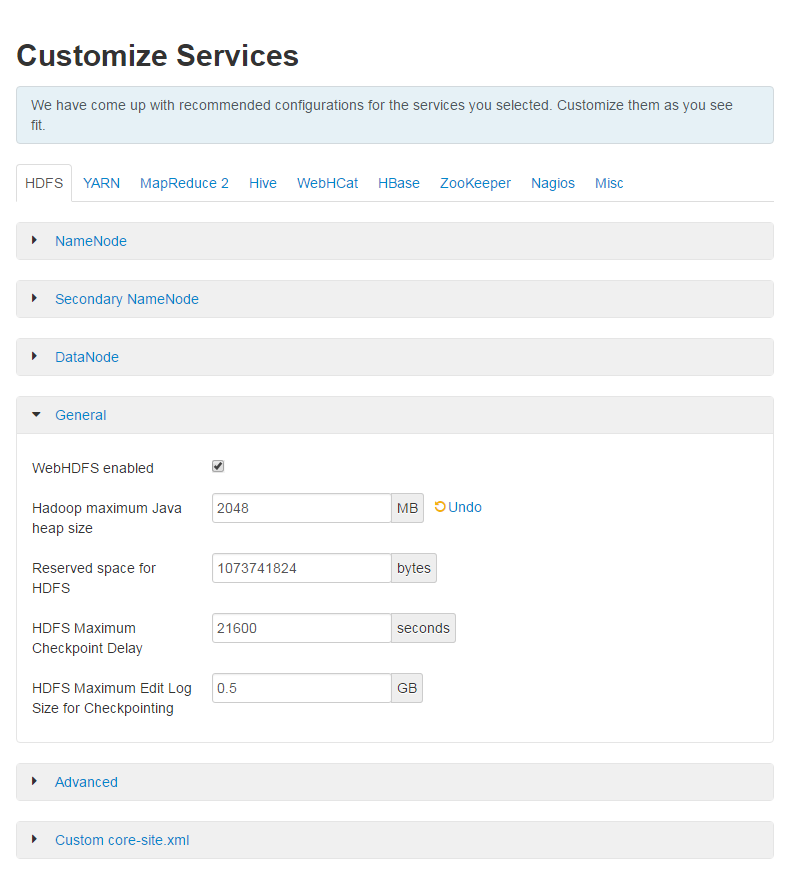
配置各个系统
开始安装

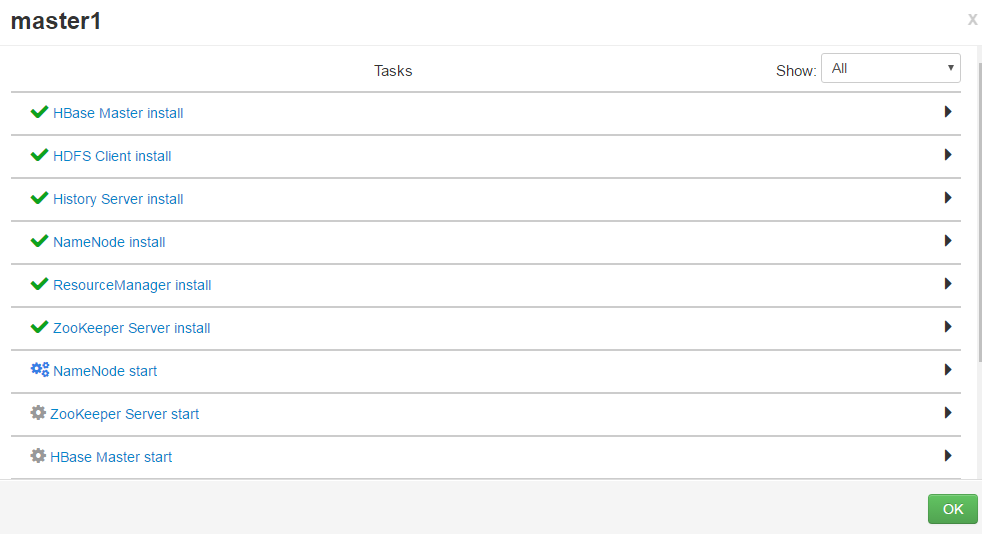
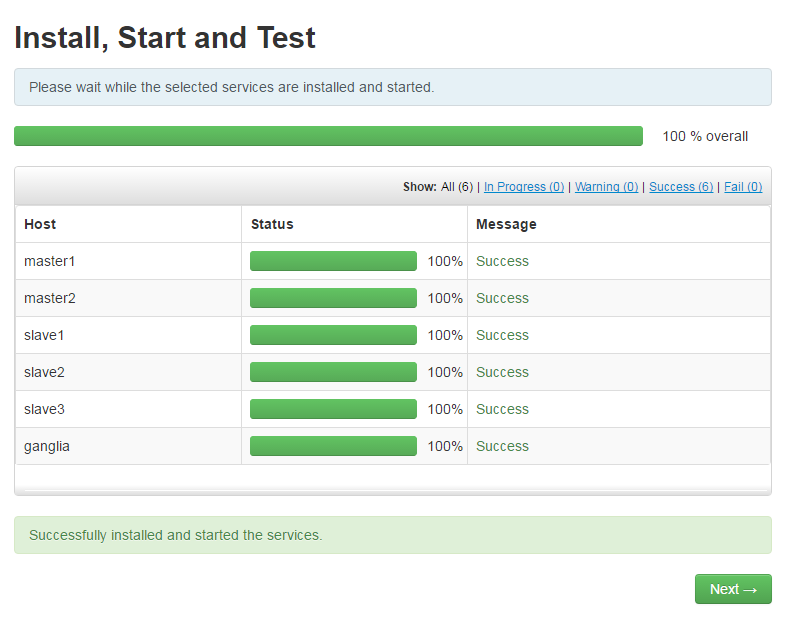
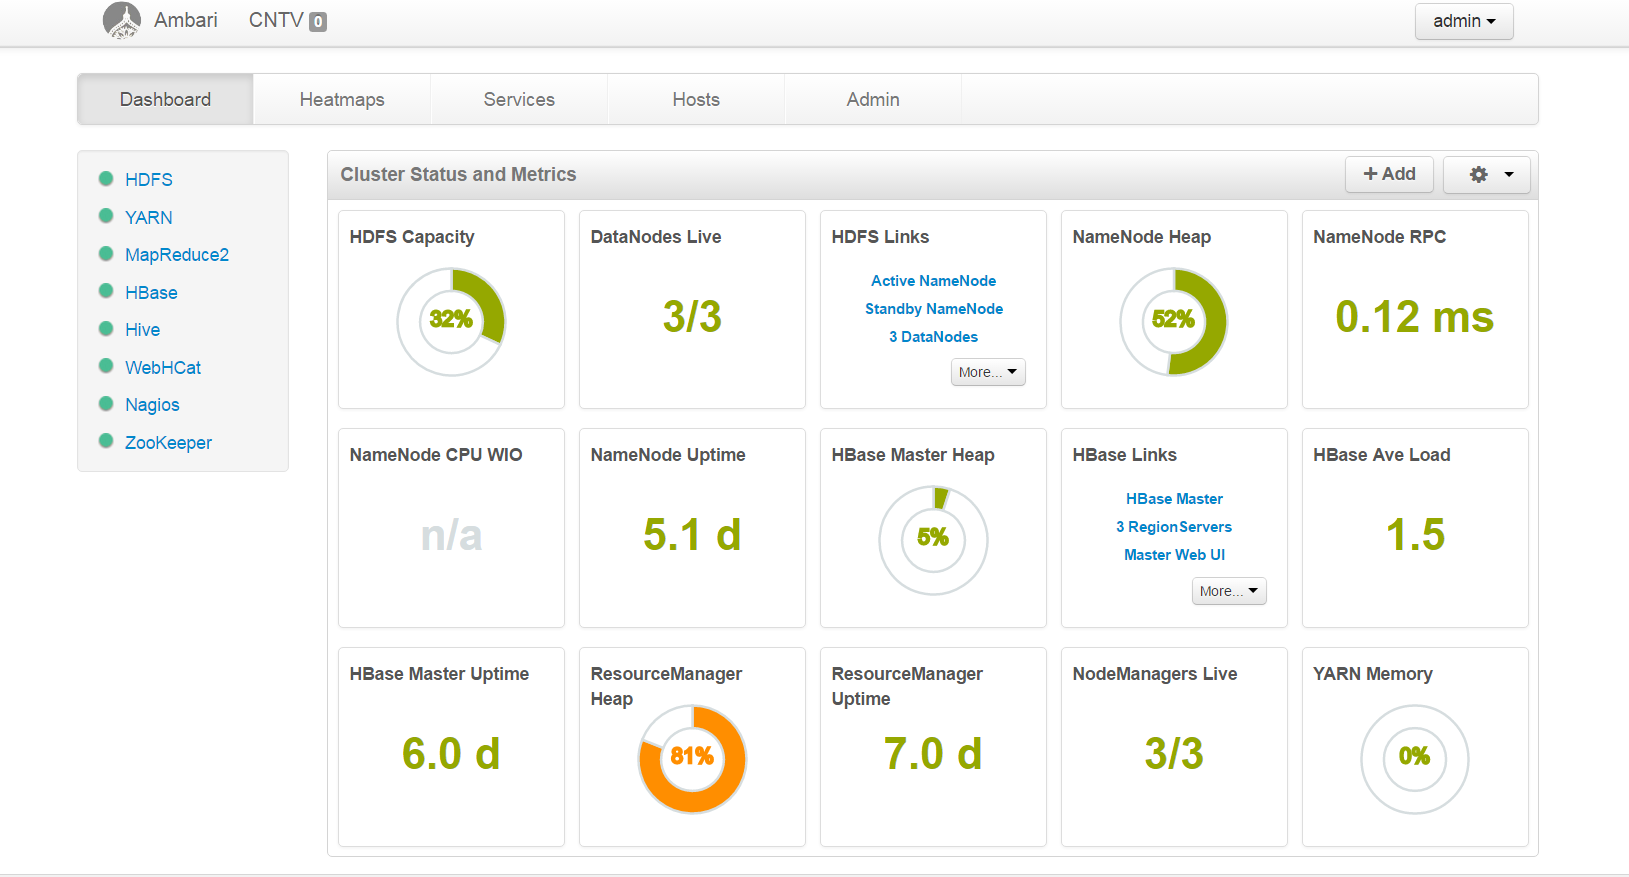
通过 Ambari 部署 hadoop 集群成功!
部署过程中遇到的问题:
1: 执行 os_type_check.sh 脚本执行失败导致的 Local OS is not compatible with cluster primary OS 报错,这是一个 BUG,可以直接修改该 os_type_check.sh,输出正确的结果。
2:ambari 没有复制过去正确的 hdp 源,所以手动将 hdp 源配置到 hadoop 的集群
$ vim hdp.repo [HDP-2.0.6] name=HDP baseurl=http://10.10.10.20/hdppath=/ enabled=1 gpgcheck=03:nagios 输入正确密码和用户名无法登陆,密码文件 httpd 用户没有权限,设置 777 后可以正常访问。
-rw-r—– 1 nagios nagios 26 Jun 9 11:54 /etc/nagios/htpasswd.users
4:jourenode 无法启动报错
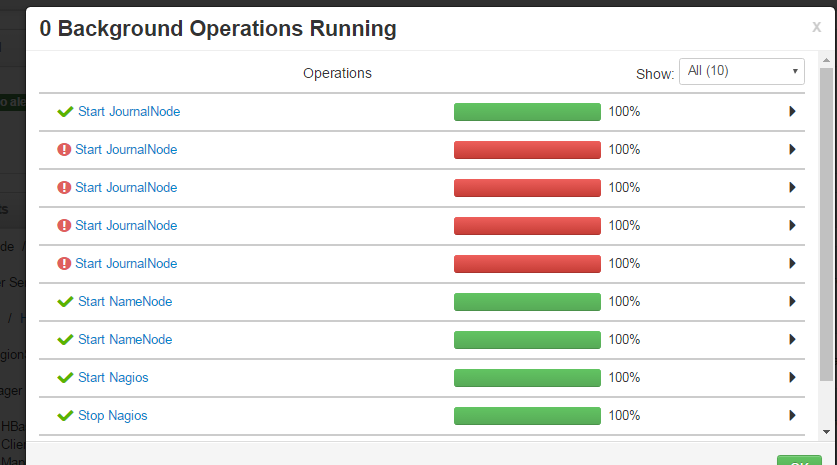
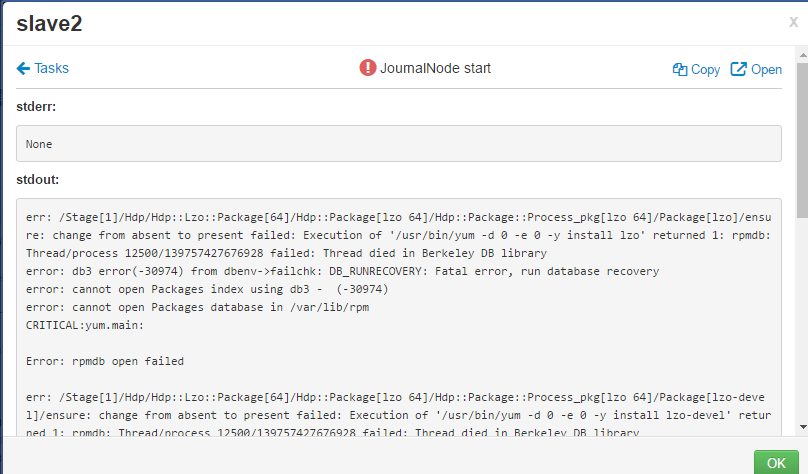
直接执行 yum 会报错
$ yum -d 0 -e 0 -y install net-snmp-utils
rpmdb: Thread/process 12500/139757427676928 failed: Thread died in Berkeley DB library
error: db3 error(-30974) from dbenv->failchk: DB_RUNRECOVERY: Fatal error, run database recovery
error: cannot open Packages index using db3 – (-30974)
error: cannot open Packages database in /var/lib/rpm
CRITICAL:yum.main:
解决办法:
$ rm -rf /var/lib/rpm/__db.*
更多 Hadoop 相关信息见 Hadoop 专题页面 http://www.linuxidc.com/topicnews.aspx?tid=13
本文永久更新链接地址 :http://www.linuxidc.com/Linux/2017-03/142136.htm
规划
OS:CentOS 6.5
Ambari-yumrepo 10.10.10.20 公网
Ambari-server 10.10.10.10 内网
Hadoop-master1 10.10.10.1 内网
hadoop-master2 10.10.10.2 内网
hadoop-slave1 10.10.10.3 内网
hadoop-slave2 10.10.10.4 内网
hadoop-slave3 10.10.10.5 内网

准备工作
(1)修改主机名
Ambari-server、master1、master2、slave1、slave2、slave3
$ hostname XXX && echo XXX >/etc/hostname$ cat >> /etc/hosts << EOF 10.10.10.1 master1 10.10.10.2 master2 10.10.10.3 slave1 10.10.10.4 slave2 10.10.10.5 slave3 10.10.10.10 ambari-server 10.10.10.20 ambari-yumrepo EOF(2)关闭 selinux 和防火墙
Ambari-server、master1、master2、slave1、slave2、slave3
$ setenforce 0 $ service iptables stop $ chkconfig iptables off(3)主从节点 ssh 互信
slave1、slave2、slave3
$ echo sshd:10.64.8.1 10.64.8.2 >>/etc/hosts.allowmaster1、master2
$ ssh-keygen -t rsa $ ssh-copy-id -i ~/.ssh/id_rsa.pub root@slave1 $ ssh-copy-id -i ~/.ssh/id_rsa.pub root@slave2 $ ssh-copy-id -i ~/.ssh/id_rsa.pub root@slave3(4)安装 jdk
Ambari-server、master1、master2、slave1、slave2、slave3
$ wget http://download.Oracle.com/otn-pub/Java/jdk/8u111-b14/jdk-8u111-linux-x64.rpm $ rpm -ivh jdk-8u111-linux-x64.rpm (5)格式化硬盘
Ambari-server、master1、master2、slave1、slave2、slave3
$ yes|mkfs.ext4 /dev/sdb$ mkdir /data$ mount /dev/sdb /data$ echo "mount /dev/sdb /data" >>/etc/rc.local (6) 系统参数调优
Ambari-server、master1、master2、slave1、slave2、slave3
$ cat >>/etc/sysctl.conf <<EOF net.ipv4.tcp_fin_timeout = 30 net.ipv4.tcp_keepalive_time = 1200 net.ipv4.tcp_syncookies = 1 net.ipv4.tcp_tw_reuse = 1 net.ipv4.tcp_tw_recycle = 1 net.ipv4.ip_local_port_range = 1024 65000 net.ipv4.tcp_max_syn_baklog = 8192 net.ipv4.tcp_max_tw_bukets = 5000 EOF文件打开数
$ cat >> /etc/security/limits.conf <<EOF * soft nofile 65535* hard nofile 65535 EOF重启
二:搭建内网 yum 源
注意:因为考虑到 hadoop 集群的机器可能是内网机器,没有公网访问权限,那么选择搭建一个内网的 yum 源,这个 yum 源的机器需要有公网权限。如果你的机器都可以出公网,也可以跳过这一步。
(1)添加 yum 源
Ambari-yumrepo
$ cd /opt$ wget http://public-repo-1.hortonworks.com/ambari/centos6/1.x/updates/1.4.1.25/ambari.repo $ cp ambari.repo /etc/yum.repos.d/
(2)同步 yum 源的包
Ambari-yumrepo
$ reposync -r HDP-UTILS-1.1.0.16 $ reposync -r Updates-ambari-1.4.1.25 $ reposync -r ambari-1.x会在当前目录生成三个目录。
(3)发布 yum 源
Ambari-yumrepo
需要一个 web 服务器来发布,已经安装了 nginx, 将上面下载包的三个目录移动到 nginx 发布目录下。
$ yum install nginx $ mkdir /usr/share/nginx/html/ambari$ cp -R ambari-1.x /usr/share/nginx/html/ambari/$ cp -R HDP-UTILS-1.1.0.16 /usr/share/nginx/html/ambari/$ cp -R Updates-ambari-1.4.1.25 /usr/share/nginx/html/ambari/
(4)创建 repo
Ambari-yumrepo
安装 createrepo 命令
$ yum install createrepo $ cd /usr/share/nginx/html/ambari/$ createrepo ./

(5)添加 HDP 源
Ambari-yumrepo
$ vim /etc/yum.repos.d/HDP.repo [HDP-2.0.6] name=HDP baseurl=http://public-repo-1.hortonworks.com/HDP/centos6/2.x/updates/2.0.6.0 enabled=1 gpgcheck=0

$ mkdir /usr/share/nginx/html/hdp$ cd /usr/share/nginx/html/hdp 同步网络源的包,1G 左右。$ reposync -r HDP-2.0.6 $ createrepo ./

这样就本地 yum 源就 OK 了!
(6)配置 yum.repo 配置文件,放在 web 目录下。
Ambari-yumrepo
注意:这个 ambari.repo 配置是给其他机器来使用的,不是本机的配置。
$ mkdir /usr/share/nginx/html/hadoop$ cd /usr/share/nginx/html/hadoop$ vim ambari.repo [ambari-1.x] name=Ambari 1.x baseurl=http://10.10.10.20/ambari/gpgcheck=0 enabled=1 [HDP-UTILS-1.1.0.16] name=Hortonworks Data Platform Utils Version - HDP-UTILS-1.1.0.16 baseurl=http://10.10.10.20/ambari/gpgcheck=0 enabled=1 [Updates-ambari-1.4.1.25] name=ambari-1.4.1.25 - Updates baseurl=http://10.64.10.20/ambari/gpgcheck= enabled=1$ vim hdp.repo [HDP-2.0.6] name=HDP baseurl=http://10.10.10.20/hdppath=/ enabled=1 gpgcheck=0 更多详情见请继续阅读下一页的精彩内容 :http://www.linuxidc.com/Linux/2017-03/142136p2.htm


