共计 4539 个字符,预计需要花费 12 分钟才能阅读完成。
今天把运维平台加上图形功能,就是把 Zabbix 的图片整合到 CMDB 平台;当然要是想要非常美观的显示图形的话也是不要建议这样做;参考了好几篇博客之后,自己也写篇总结文档:
主要思路是:
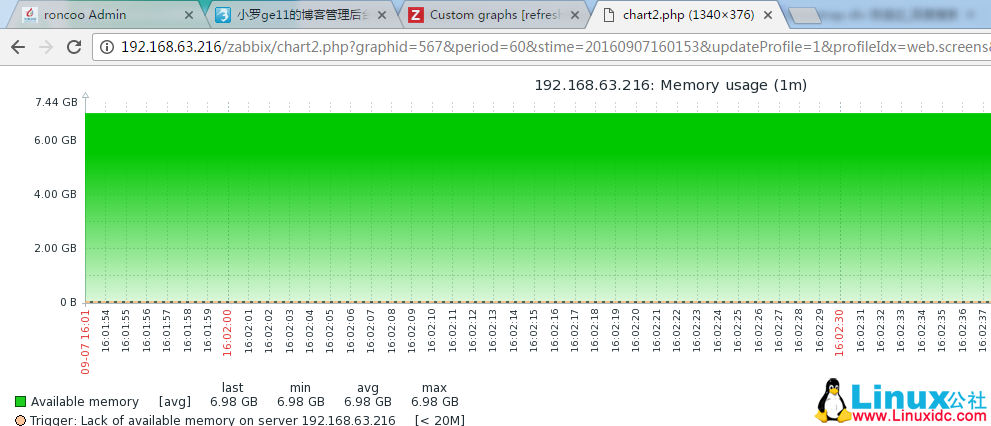
1、找到 zabbix 图片对应的 url。
2、读取 URL 的所有内容生成 jpg 文件。
3、遍历图片目录把图片文件返回前端 js 整合。
1、打开 zabbix,找到图片的路径:

http://192.168.63.216/zabbix/chart2.php?graphid=567&period=60&stime=20160907160153&updateProfile=1&profileIdx=web.screens&profileIdx2=567&width=1224&sid=0afbe713bbeb0519&screenid=&curtime=1473237848932
* 我们所要获取的关键参数是
*graphid: 图形 IP。
*stime: 开始时间;默认我们出当前时间。
*period: 时间长度:以秒为单位。
2、我们需要获取的就是 graphid 而已,所以通过 zabbix_client 模块把 id 给获取出来,风格跟我之前写的 api 管理 zabbix 一致,大家可以自行查看:
def get_graphid(self,hostid):
data = {
“selectGraphs”: [“graphid”,”name”],
“filter”: {“hostid”: hostid}
}
ret = self.zb.host.get(**data)
return ret[0][‘graphs’]
3、通过传入的 graphid 生成 jpg 图片文件,脚本:
#!/usr/bin/env Python
# -*- coding: utf-8 -*-
from . import app , jsonrpc
import util
import json, traceback
import datetime
import cookielib, urllib2,urllib
class Zabbix_api():
def __init__(self,url=”http://192.168.63.216/zabbix/index.php”,name=”Admin”,password=”zabbix”):
self.url=url
self.name=name
self.passwd=password
#初始化的时候生成 cookies
cookiejar = cookielib.CookieJar()
urlOpener = urllib2.build_opener(urllib2.HTTPCookieProcessor(cookiejar))
values = {“name”:self.name,’password’:self.passwd,’autologin’:1,”enter”:’Sign in’}
data = urllib.urlencode(values)
request = urllib2.Request(url, data)
try:
urlOpener.open(request,timeout=10)
self.urlOpener=urlOpener
except urllib2.HTTPError, e:
print e
def GetGraph(self,url=”http://192.168.63.216/zabbix/chart2.php”,values={‘width’: 800, ‘height’: 200, ‘graphid’: ‘564’, ‘stime’: ‘20160907090409’, ‘period’: 3600},image_dir=”/tmp”):
data=urllib.urlencode(values)
request = urllib2.Request(url,data)
url = self.urlOpener.open(request)
image = url.read()
imagename=”%s/%s_%s.jpg” % (image_dir, values[“graphid”], values[“stime”])
f=open(imagename,’wb’)
f.write(image)
return ‘1’
if __name__ == “__main__”:
graph = Zabbix_api()
values = {‘width’: 800, ‘height’: 200, ‘graphid’: ‘564’, ‘stime’: ‘20160907090409’, ‘period’: 3600}
graph.GetGraph(“http://192.168.63.216/zabbix/chart2.php”,values,”/tmp”)
4、后端程序处理,返回结果之后和前端结合吧图形加载到 html 即可:
js 处理请求:
/* 点击监控按钮,获取监控数据 */
$(“tbody”).on(‘click’,’.monitor-btn’,function(){
var id = $(this).attr(‘data-id’)
var url = “/getapi?method=”+”graph”+”&id=”+id
$.getJSON(url,function(data){
data = JSON.parse(data[‘result’])
console.log(data)
if (data[‘code’]==0){
var str = ”
$.each(data.result, function(n,value){
str +='<img src=\’#\'” /><br >’
})
console.log(str)
$(“#graph”).html(str)
$(‘#monitor’).modal(‘show’)
}else{
swal(“Error”, data[‘errmsg’], “error”)
}
})
})
5、html 页面:
<!– 监控查看 –>
<div id=”monitor” class=”modal fade text-center”>
<div class=”modal-dialog” style=”display: inline-block; width: 60%;”>
<div class=”modal-content”>
<div class=”modal-header”>
<button type=”button” class=”close” data-dismiss=”modal” aria-label=”Close”><span aria-hidden=”true”>×</span></button>
<h4 class=”modal-title”> 监控查看 </h4>
</div><!–modal-header end–>
<div class=”modal-body”>
<p hidden id=”errorMsg” class=”text-danger” style=”color:red”> 监控查看 </p> <!– foe error msg–>
<form class=”form-horizontal” id=”ChangePasswdForm”>
<input id=”passwdid” type=”hidden” name=”passwdid”> <!–update need id–>
<div class=”form-group”>
<div class=”col-sm-10″ id=”graph”>
</div>
</div>
<div class=”form-group”>
<div class=”modal-footer”>
<button class=”btn btn-warning” data-dismiss=”modal”> 退出 </button>
</div>
</div><!–button end–>
</form>
</div><!– /.modal-body–>
</div><!– /.modal-content –>
</div><!– /.modal-dialog –>
</div><!– /.modal –>
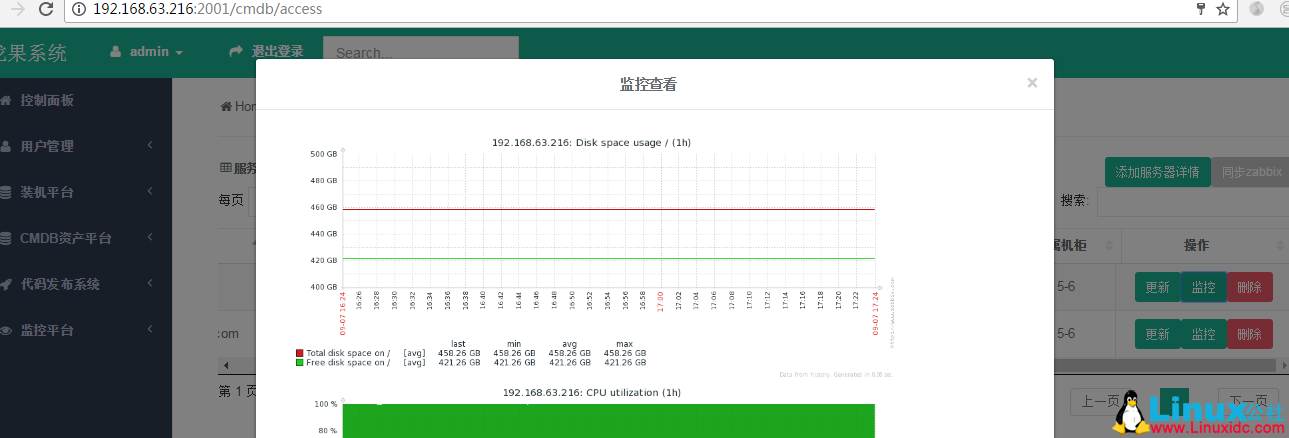
6、生成效果,在 CMDB 点击监控时候跳出相关监控图形方便查看:

或者也有运维工程师习惯把生成的图片用 html 的方式发送发送到邮箱也是可以数显的,主要是图片已经生成后续的操作也非常简单了。
一些 Zabbix 相关教程集合:
Ubuntu 14.04 下 Zabbix2.4.5 源码编译安装 http://www.linuxidc.com/Linux/2015-05/117657.htm
CentOS 7 LNMP 环境搭建 Zabbix3.0 http://www.linuxidc.com/Linux/2017-02/140134.htm
Ubuntu 16.04 安装部署监控系统 Zabbix2.4 http://www.linuxidc.com/Linux/2017-03/141436.htm
CentOS 6.6 搭建 Zabbix 3.0.3 过程 http://www.linuxidc.com/Linux/2017-04/142839.htm
Zabbix 监控安装部署及警报配置 http://www.linuxidc.com/Linux/2017-03/141611.htm
Ubuntu 16.04 下安装部署 Zabbix3.0 http://www.linuxidc.com/Linux/2017-02/140395.htm
CentOS 6.3 下 Zabbix 监控 apache server-status http://www.linuxidc.com/Linux/2013-05/84740.htm
CentOS 7 下 Zabbix 3.0 安装详解 http://www.linuxidc.com/Linux/2017-03/141716.htm
64 位 CentOS 6.2 下安装 Zabbix 2.0.6 http://www.linuxidc.com/Linux/2014-11/109541.htm
CentOS 7.2 下搭建 Zabbix 3.2 实践图解教程 http://www.linuxidc.com/Linux/2017-03/142077.htm
ZABBIX 的详细介绍:请点这里
ZABBIX 的下载地址:请点这里
本文永久更新链接地址:http://www.linuxidc.com/Linux/2017-05/143370.htm


