共计 2874 个字符,预计需要花费 8 分钟才能阅读完成。
0. 序
先吐槽一下网上旧版本的 Zeppelin 和 R 的安装,让我折腾了几个小时。
不过最终还是调通了也不容易,其实我现在一点 R 都没有学呢,只是刚看了一节课,但是这个工具既然出现在了 Spark 中,我想它还是蛮流行和好用的。
之前配置了 Zeppelin 的 Spark 的结合,但是那没有配置 R 的部分,但是 Zeppelin 既然能够有这么多的解释器,在我看来就是凸显他的一个别的软件所不具有的优势:那就是在一个 note 里你可以使用多种解释器来编写文字,生成图像,分析一个问题。
再加上方便的导入导出和存储功能,我个人感觉未来流行只是时间问题。
废话尽量少说,进入正题:
1. 安装 R 及相关的包:
注意我使用的是 CentOS7 的系统,如果你不是我的系统可能下载的包会不一致。不过请不要担心,我会尽量说明白如何找到对应系统的 R 的安装包。
首先访问官网 https://www.r-project.org/
然后我们找到这个:
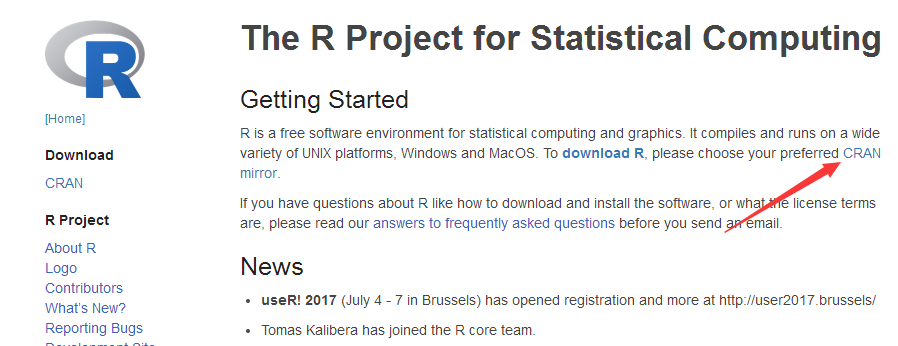
然后找到 China 那一栏,随便点一个地址就好。
然后我们选择这个:
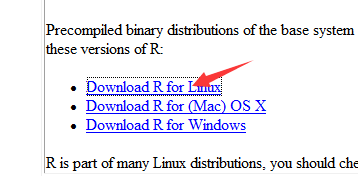
这下你应该能找到了吧,里面包含几种常用 Linux 发行版,我的是 CentOS,自然是选择 RedHat 系列了。
然后我们依次点下去,直到点开 README
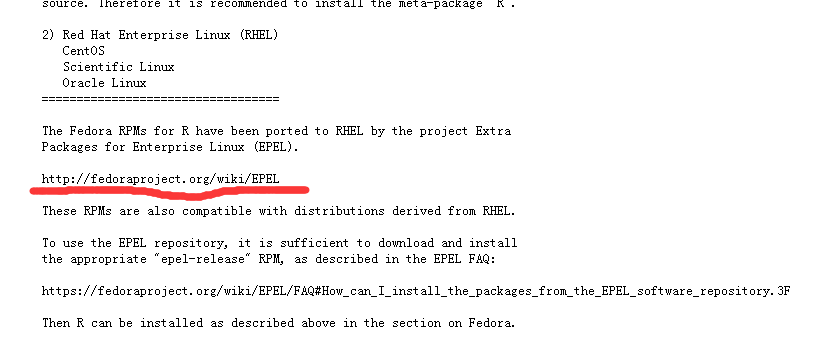
很好,这里似乎要安装一个 EPEL 的源来完成我们的 R 包的安装,这里我们进入划横线的网址:
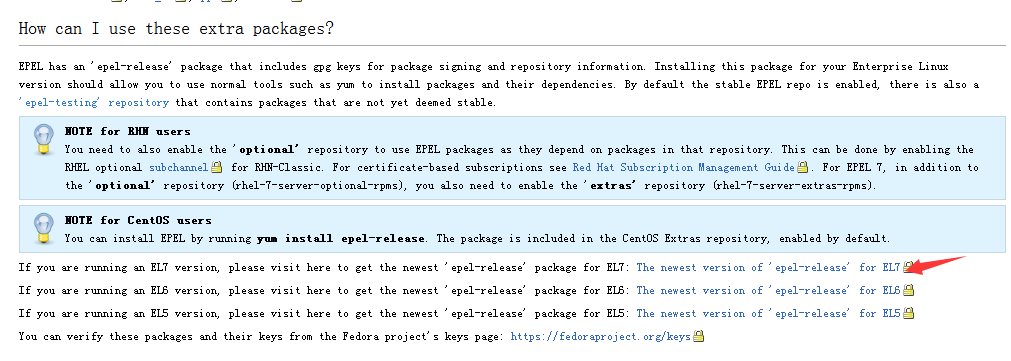
箭头所指是这个源的 RPM 包,下载并安装之!
| wget https://dl.Fedoraproject.org/pub/epel/epel-release-latest-7.noarch.rpm | |
| rpm -ivh epel-release-latest-7.noarch.rpm |
接下来我打开这个网址:https://zeppelin.apache.org/docs/0.6.2/interpreter/r.html
安装相关 R 以及相关依赖:
yum install R R-devel libcurl-devel openssl-devel
安装时间比较长,耐心等待,去喝杯咖啡或者看会别的,再回来吧!
不过你要是一直细心看的话,它竟然在处理依赖关系的时候自动给安装上了 open-jdk,没事,我们使用以下方式解决:
| wget --no-check-certificate --no-cookies --header "Cookie: Oraclelicense=accept-securebackup-cookie" http://download.oracle.com/otn-pub/Java/jdk/8u112-b15/jdk-8u112-linux-x64.rpm | |
| rpm -ivh jdk-8u112-linux-x64.rpm |
再给它安装回去 -。- 醉了。
安装一些官网所说的依赖:
R -e “install.packages(‘devtools’, repos = ‘http://cran.rstudio.com’)”
R -e “install.packages(‘knitr’, repos = ‘http://cran.rstudio.com’)”
R -e “install.packages(‘ggplot2’, repos = ‘http://cran.rstudio.com’)”
R -e “install.packages(c(‘devtools’,’mplot’, ‘googleVis’), repos = ‘http://cran.rstudio.com’); require(devtools); install_github(‘ramnathv/rCharts’)”
2. 配置 Zeppelin
复制官网的一段话:
Configuration
To run Zeppelin with the R Interpreter, the SPARK_HOME environment variable must be set. The best way to do this is by editing conf/zeppelin-env.sh. If it is not set, the R Interpreter will not be able to interface with Spark.
You should also copy conf/zeppelin-site.xml.template to conf/zeppelin-site.xml. That will ensure that Zeppelin sees the R Interpreter the first time it starts up.
两个步骤:
- 在 conf/zeppelin-env.sh 中加入 SPARK_HOME 这个环境变量
- cp
conf/zeppelin-site.xml.templateconf/zeppelin-site.xml
此处不再赘述。
3. 重启 Zeppelin:
/opt/zeppelin-0.6.2-bin-all/bin/zeppelin-daemon.sh restart
4. 验证环境是否装好:
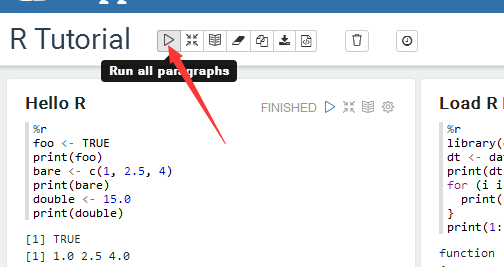
打开浏览器进入 Zeppelin 的地址,然后 notebook -> R Tutorial
如下图
等待编译完成,然后我截取了几张图片放在下面:
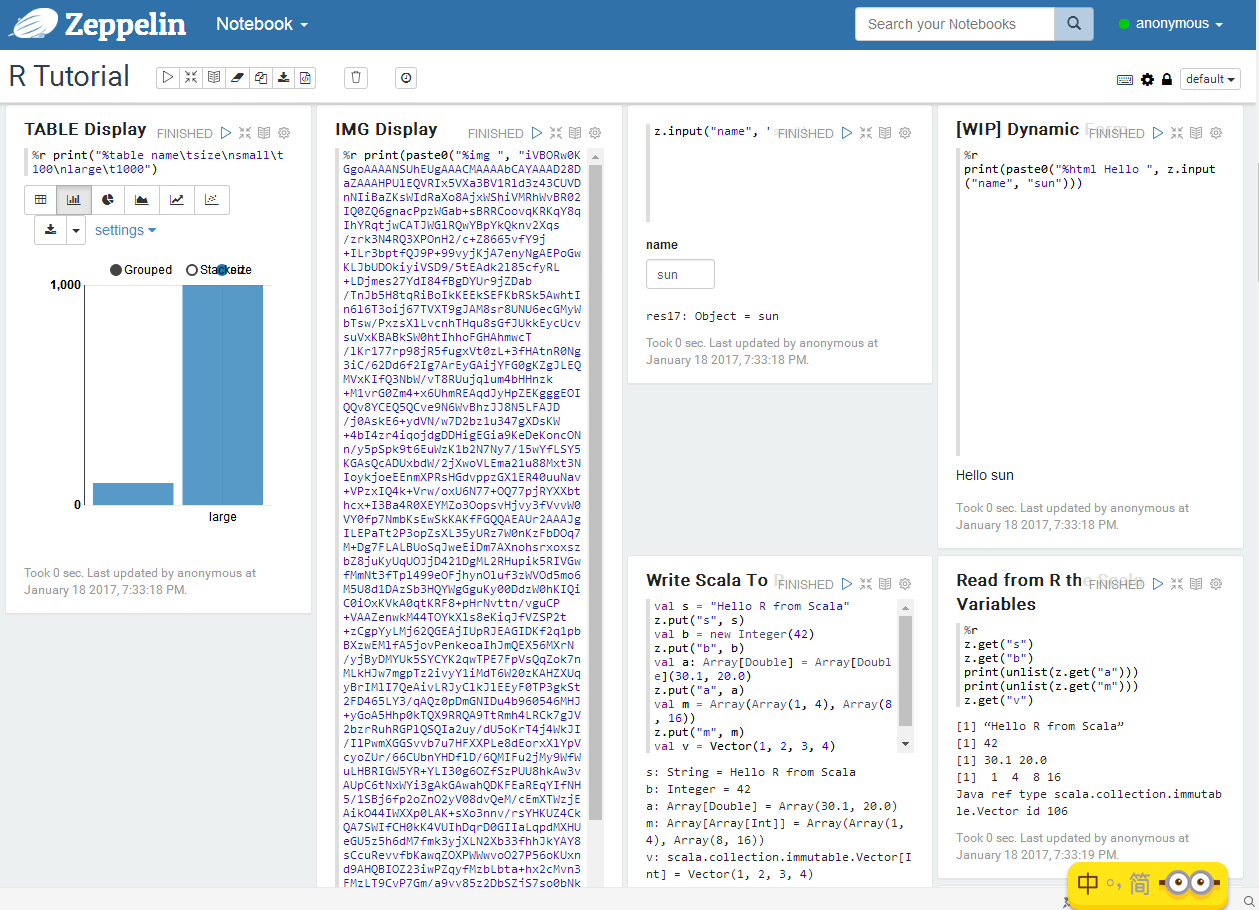
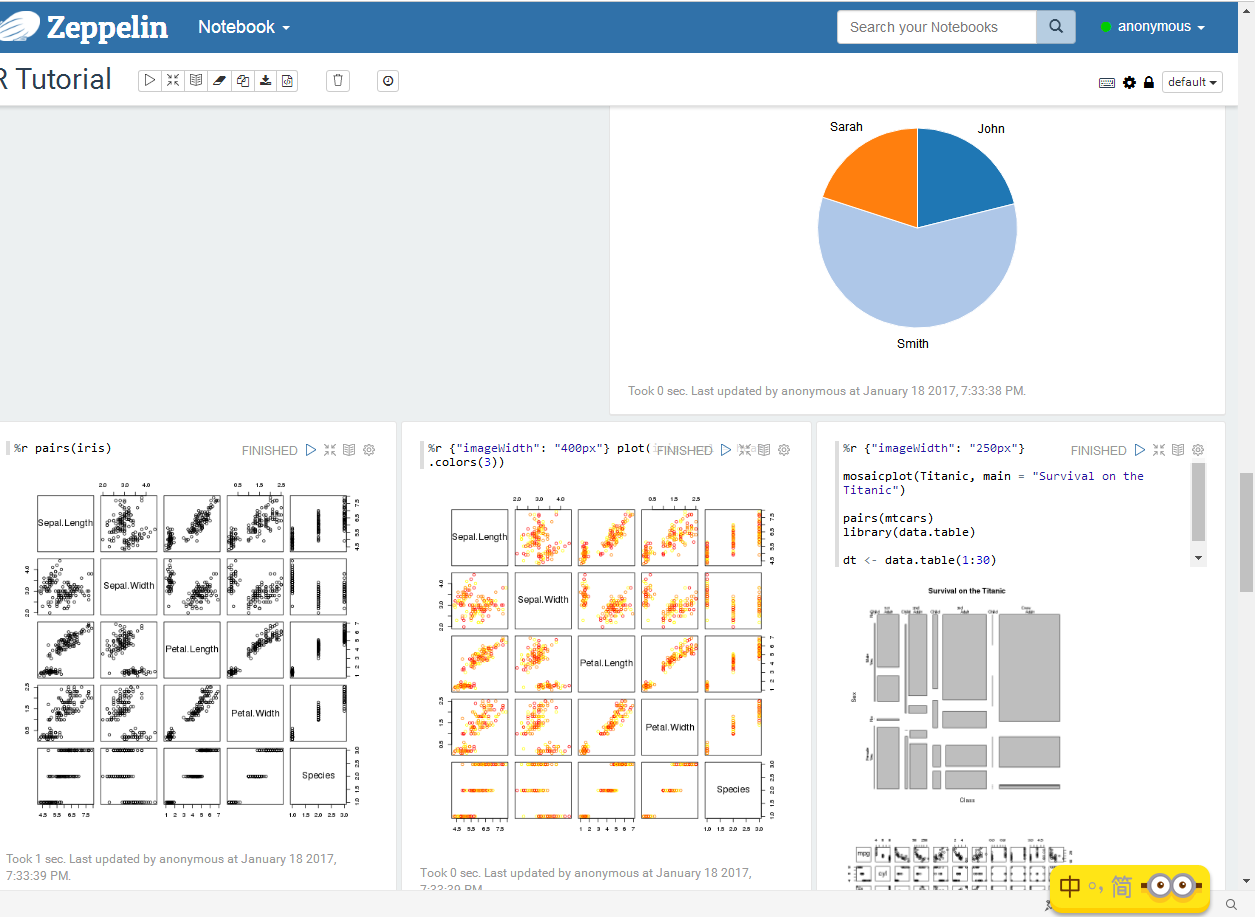
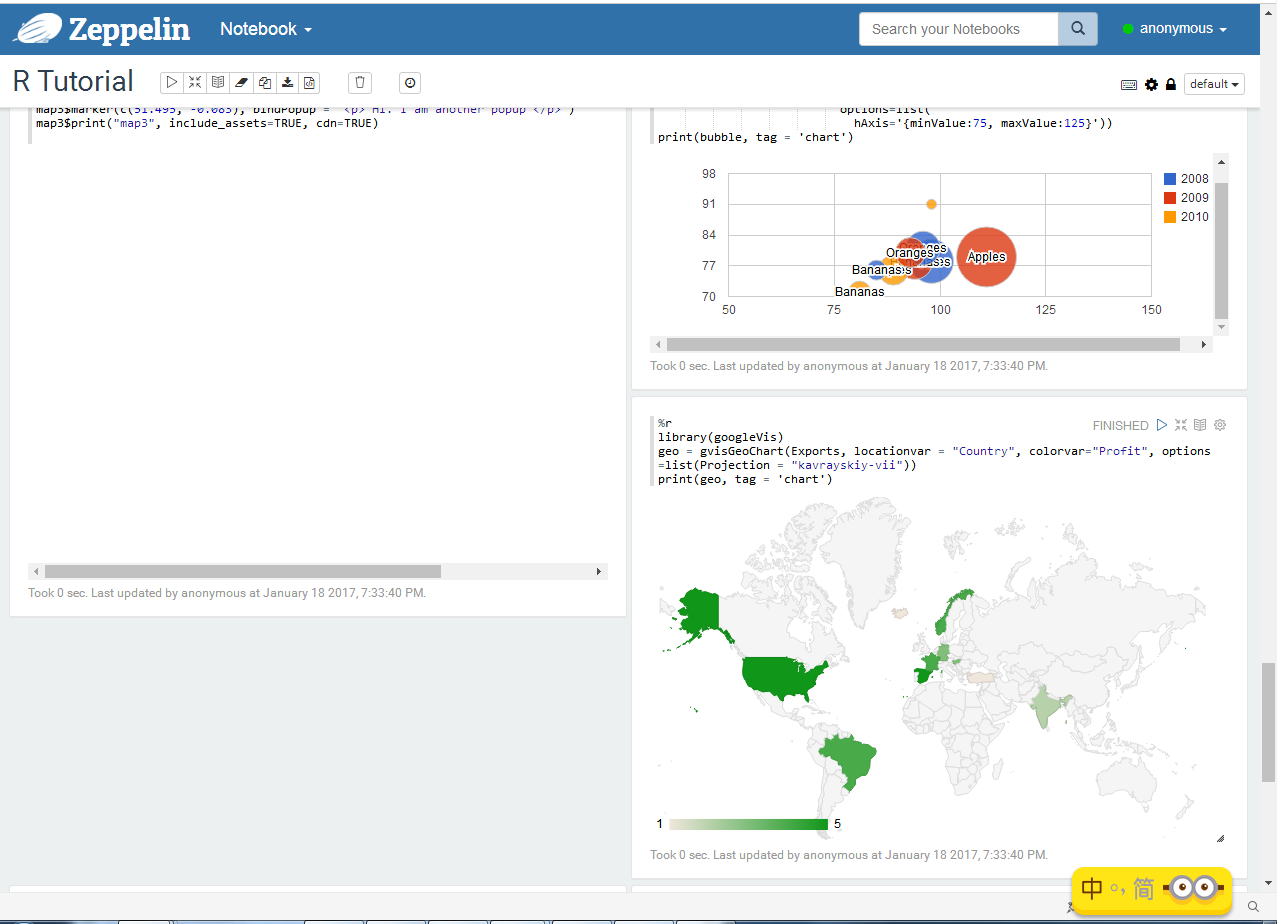
好,我们的 SparkR 环境搭建好了,Zeppelin 又多了一个新的工具,又强大了不少。
更多 Spark 相关教程见以下内容:
CentOS 7.0 下安装并配置 Spark http://www.linuxidc.com/Linux/2015-08/122284.htm
Spark1.0.0 部署指南 http://www.linuxidc.com/Linux/2014-07/104304.htm
Spark2.0 安装配置文档 http://www.linuxidc.com/Linux/2016-09/135352.htm
Spark 1.5、Hadoop 2.7 集群环境搭建 http://www.linuxidc.com/Linux/2016-09/135067.htm
Spark 官方文档 – 中文翻译 http://www.linuxidc.com/Linux/2016-04/130621.htm
CentOS 6.2(64 位)下安装 Spark0.8.0 详细记录 http://www.linuxidc.com/Linux/2014-06/102583.htm
Spark2.0.2 Hadoop2.6.4 全分布式配置详解 http://www.linuxidc.com/Linux/2016-11/137367.htm
Ubuntu 14.04 LTS 安装 Spark 1.6.0(伪分布式)http://www.linuxidc.com/Linux/2016-03/129068.htm
Spark2.0.2+Zeppelin0.6.2 环境搭建入门初探 http://www.linuxidc.com/Linux/2017-06/144929.htm
Spark 的详细介绍:请点这里
Spark 的下载地址:请点这里
本文永久更新链接地址:http://www.linuxidc.com/Linux/2017-06/144930.htm


