共计 4346 个字符,预计需要花费 11 分钟才能阅读完成。
Github 远程仓库
1、github.com 注册账户
2、在 github 上创建仓库
3、生成本地 ssh key
[root@localhost ~]# ssh-keygen -t rsa -C ‘maiya@163.com’ # 邮箱要与 github 上注册的相同
[root@localhost ~]# cat .ssh/id_rsa.pub
ssh-rsa
AAAAB3NzaC1yc2EAAAADAQABAAABAQDVThfq4brrlsPGtAknVB0TLPx+7Dd3qlxTbSIrUOsGC5Y8JuNqVTlIntZB
4oNj8cSQrWvec9CKm0a8o7WwaJIiqpxurz+YpQHP2KbapftKIxsX4hPf/z+p0El1U6arQa35/xmNsq+cJLH/bDdR
G+EMDhuCBmjVZOlLj/hEdeIT6s56AnnCkaWoF+sq58KCF7Tk54jRbs/YiyE4SN7FuA70r+07sA/uj0+lmuk4E190
KtQUELhjX/E9stivlqiRhxnKvVUqXDywsjfM8Rtvbi4Fg9R8Wt9fpd4QwnWksYUoR5qZJFYXO4hSZrUnSMruPK14
xXjDJcFDcP2eHIzKgLD1 maiya@163.com
4、复制以上的公钥, 在 github 中添加 ssh key
5、测试
[root@localhost ~]# yum install git
……..
[root@localhost ~]# ssh -T git@github.com
The authenticity of host ‘github.com (13.250.177.223)’ can’t be established.
RSA key fingerprint is SHA256:nThbg6kXUpJWGl7E1IGOCspRomTxdCARLviKw6E5SY8.
RSA key fingerprint is MD5:16:27:ac:a5:76:28:2d:36:63:1b:56:4d:eb:df:a6:48.
Are you sure you want to continue connecting (yes/no)? yes
Warning: Permanently added ‘github.com,13.250.177.223’ (RSA) to the list of known hosts.
Hi meteor! You’ve successfully authenticated, but GitHub does not provide shell access.
6、在本地添加远程仓库
[root@localhost ~]# git config –global user.name ‘maiya_by’
[root@localhost ~]# git config –global user.email ‘maiya@163.com’
[root@localhost ~]# git config –global color.ui true
[root@localhost ~]# git config –list | tail -3
user.name=maiya_by
user.email=maiya@163.com
color.ui=true
[root@localhost ~]#
[root@localhost ~]# ls .gitconfig
.gitconfig
[root@localhost ~]# cat .gitconfig
[user]
name = maiya_by
email = maiya@163.com
[color]
ui = true
7、连接远程仓库听方法

[root@localhost Python1804]# git remote -v
origin git@github.com:meteor/python1804.git (fetch)
origin git@github.com:meteor/python1804.git (push)
[root@localhost python1804]#git remote rm origin(如果连接远程的方式不是 ssh, 可以删除重新添加)
[root@localhost ~]# git remote add origin git@github.com:meteor/python1804.git
或
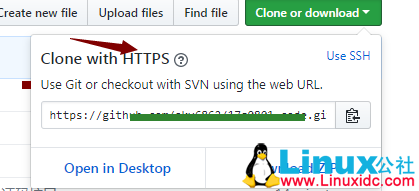
git remote add origin https://github.com/meteor/python1804.git
git push -u origin master
建立本地 Git 服务器
[root@localhost ~]# useradd git —————— 创建一个 git 用户
[root@localhost ~]# mkdir /git‐root/
[root@localhost ~]# cd /git‐root/
[root@localhost git‐root]# git init ‐‐bare shell.git ————– 初始化仓库
[root@localhost git‐root]# chown ‐R git.git shell.git ———- 把文件的属主和属组改成 git
[root@localhost git‐root]# su ‐ git ————– 切换成 git 用户
生成密钥
[git@localhost ~]$ ssh‐keygen ‐t rsa —————- 生成密钥
[git@localhost ~]$ cd .ssh/
[git@localhost .ssh]$ cp id_rsa.pub authorized_keys———– 新建授权公钥串
[git@localhost .ssh]$ exit
克隆仓库
[root@localhost ~]# cd /opt/
[root@localhost opt]# git clone git@192.168.1.102:/git‐root/shell.git———– 克隆本地仓库
Cloning into ‘shell’…
新建一个测试文件, 进行推送
[root@localhost opt]# cd shell/
[root@localhost shell]# vim test1.sh
[root@localhost shell]# git add test1.sh
[root@localhost shell]# git commit ‐m ‘first commit’
[root@localhost shell]# git push origin master
git 常用的命令
git
git init #—————— 初始化仓库
git clone https://github.com/kennethreitz/requests.gitCloning into ‘requests’… #—– 克隆建立远程库
git clone git@192.168.122.85:/git-root/liudelong.git #——- 克隆建立本地库
git add * #———— 提交
git commit -m “describe” #————— 对提交任务进行描述
git push origin master #—————- 上传
查看状态
git status #—————— 查看 git 的状态
git status -s #——————- 查看 git 的简要信息
显示信息:
A .gitignore
MM test2.py #—————— 第一个 M 表示 staging 有修改,第二个 M 表示 working directory 有修改
git diff #检查数据是否一致
git diff #————- 默认 git diff 只检查第二个标志位(即检查 working directory 与 staging 的数据是否一致
git diff HEAD #——————- 指针, 检查 working directory 与 history 是否一致,HEAD 指针就指向最后一次提交的内容
git diff –stat #—————– 输出简要信息
git diff –staged #—————– 表示检查 stage 与 history 中的数据是否一致
下载
git reset #—————- 下载历史 history 中的最后一个版本致 stage 中
git checkout #——————– 把历史区的文件恢复到工作区 - 下载 stage 中的数据到 working directory
git checkout HEAD #—————— 从 history 中直接下载历史版本到 working directory
git commit -am ‘third commit’ #—————– 直接由 working directory 提交到 history
删除数据:
git rm file #——————– 删除文件
git rm –cached test2.py #————— 仅删除 staging 中的文件, 此命令主要用来修改文件名
stash 暂存
git stash #————- 暂存当前正在进行的工作
git stash list #—————- 查看之前的暂存区
git stash pop #—————- 取出上次的暂存
branch 分支
git branch #—————- 查看分支 (* 表示当前的 branch)
git branch newidea #—————- 创建分支
git checkout newidea #————— 切换新的分支
cat .git/HEAD #—————- 查看当前 HEAD 指向 newidea 分支
ls .git/refs/heads/ #———- 查看现有分支的存储情况
cat .git/refs/heads/* #————— 查看两个分支都指向同一个 commit history
git branch -d newidea #—————– 删除指定分支
git checkout -b newcode #—————— 参数 -b 作用:检查如果没有 branch 则新建立
git merge newcode #————– 合并分支
git merge bugfix #————– 合并分支 Auto-merging test1.py


