共计 4369 个字符,预计需要花费 11 分钟才能阅读完成。
一、知识准备
- 在 nginx 优化中有个经常需要设置的参数,tcp_nodelay
- 该参数最核心的功能,就是把小包组成成大包,提高带宽利用率也就是著名的 nagle 算法
- tcp 协议中,有一个现象:应用层数据可能很低(比如 1 个字节),而传输层开销有 40 字节 (20 字节的 IP 头 +20 字节的 TCP 头)。这种情况下大部分都是控制包的传输,既加大了带宽的消耗,带宽利用率也不高
- nagle 算法就是为了解决这个问题。在发出去的数据还未被确认之前,或者说还没有收到对端的 ack 之前,新生成的小包是不允许被发送的,必须要凑满一个 MSS 或者等到收到确认后再发送,直至超时
二、环境准备
| 组件 | 版本 |
|---|---|
| OS | Ubuntu 18.04.1 LTS |
| docker | 18.06.0-ce |
客户端 : 192.168.17.171
服务端 : 192.168.17.173
三、打开 nagle 算法
192.168.17.173,先准备一个 nginx 配置文件,并且打开 nagle 算法,设置 tcp_nodelay off;
root@k8s-node2:/tmp# more nginx.conf
user  nginx;
worker_processes  1;

error_log  /var/log/nginx/error.log warn;
pid        /var/run/nginx.pid;


events {worker_connections  1024;
}


http {include       /etc/nginx/mime.types;
    default_type  application/octet-stream;

    log_format  main  '$remote_addr - $remote_user [$time_local] "$request"'
                      '$status $body_bytes_sent "$http_referer"'
                      '"$http_user_agent" "$http_x_forwarded_for"';

    access_log  /var/log/nginx/access.log  main;

    sendfile        on;
    tcp_nodelay off;

    keepalive_timeout  65;

    include /etc/nginx/conf.d/*.conf;
}
启动容器
root@k8s-node2:/tmp# docker run -d --name nginx_delay -v /tmp/nginx.conf:/etc/nginx/nginx.conf -p 80:80 nginx:latest
6b7d5a5d3c3ed021fed6847d138837754c5732979d1c829ec62107ec80440db8
root@k8s-node2:/tmp# docker ps | grep nginx_delay
6b7d5a5d3c3e        nginx:latest                                                        "nginx -g'daemon of…"   7 seconds ago       Up 6 seconds        0.0.0.0:80->80/tcp   nginx_delay
首先使用 tcpdump 抓取本机的 80 端口的流量:
root@k8s-node2:/tmp# tcpdump -i ens3 port 80 -afexnnvv -w nginx_ab.cap在 192.168.17.171,使用 ab 压测工具对该端口进行放量
注意:必须使用 -k 参数,使用 keepalived 模式下才能模拟出 nagle 算法
root@k8s-node2:~# ab -n 1000 -c 100 -k http://127.0.0.1/
This is ApacheBench, Version 2.3 <$Revision: 1807734 $>
Copyright 1996 Adam Twiss, Zeus Technology Ltd, http://www.zeustech.net/
Licensed to The Apache Software Foundation, http://www.apache.org/

...
Time per request:       44.619 [ms] (mean)
...
过滤掉大量信息,我们来到这个指标 Time per request,无论怎么测试,平均延时总是在 40ms 左右
我们来看下抓包信息,使用 wireshark 打开
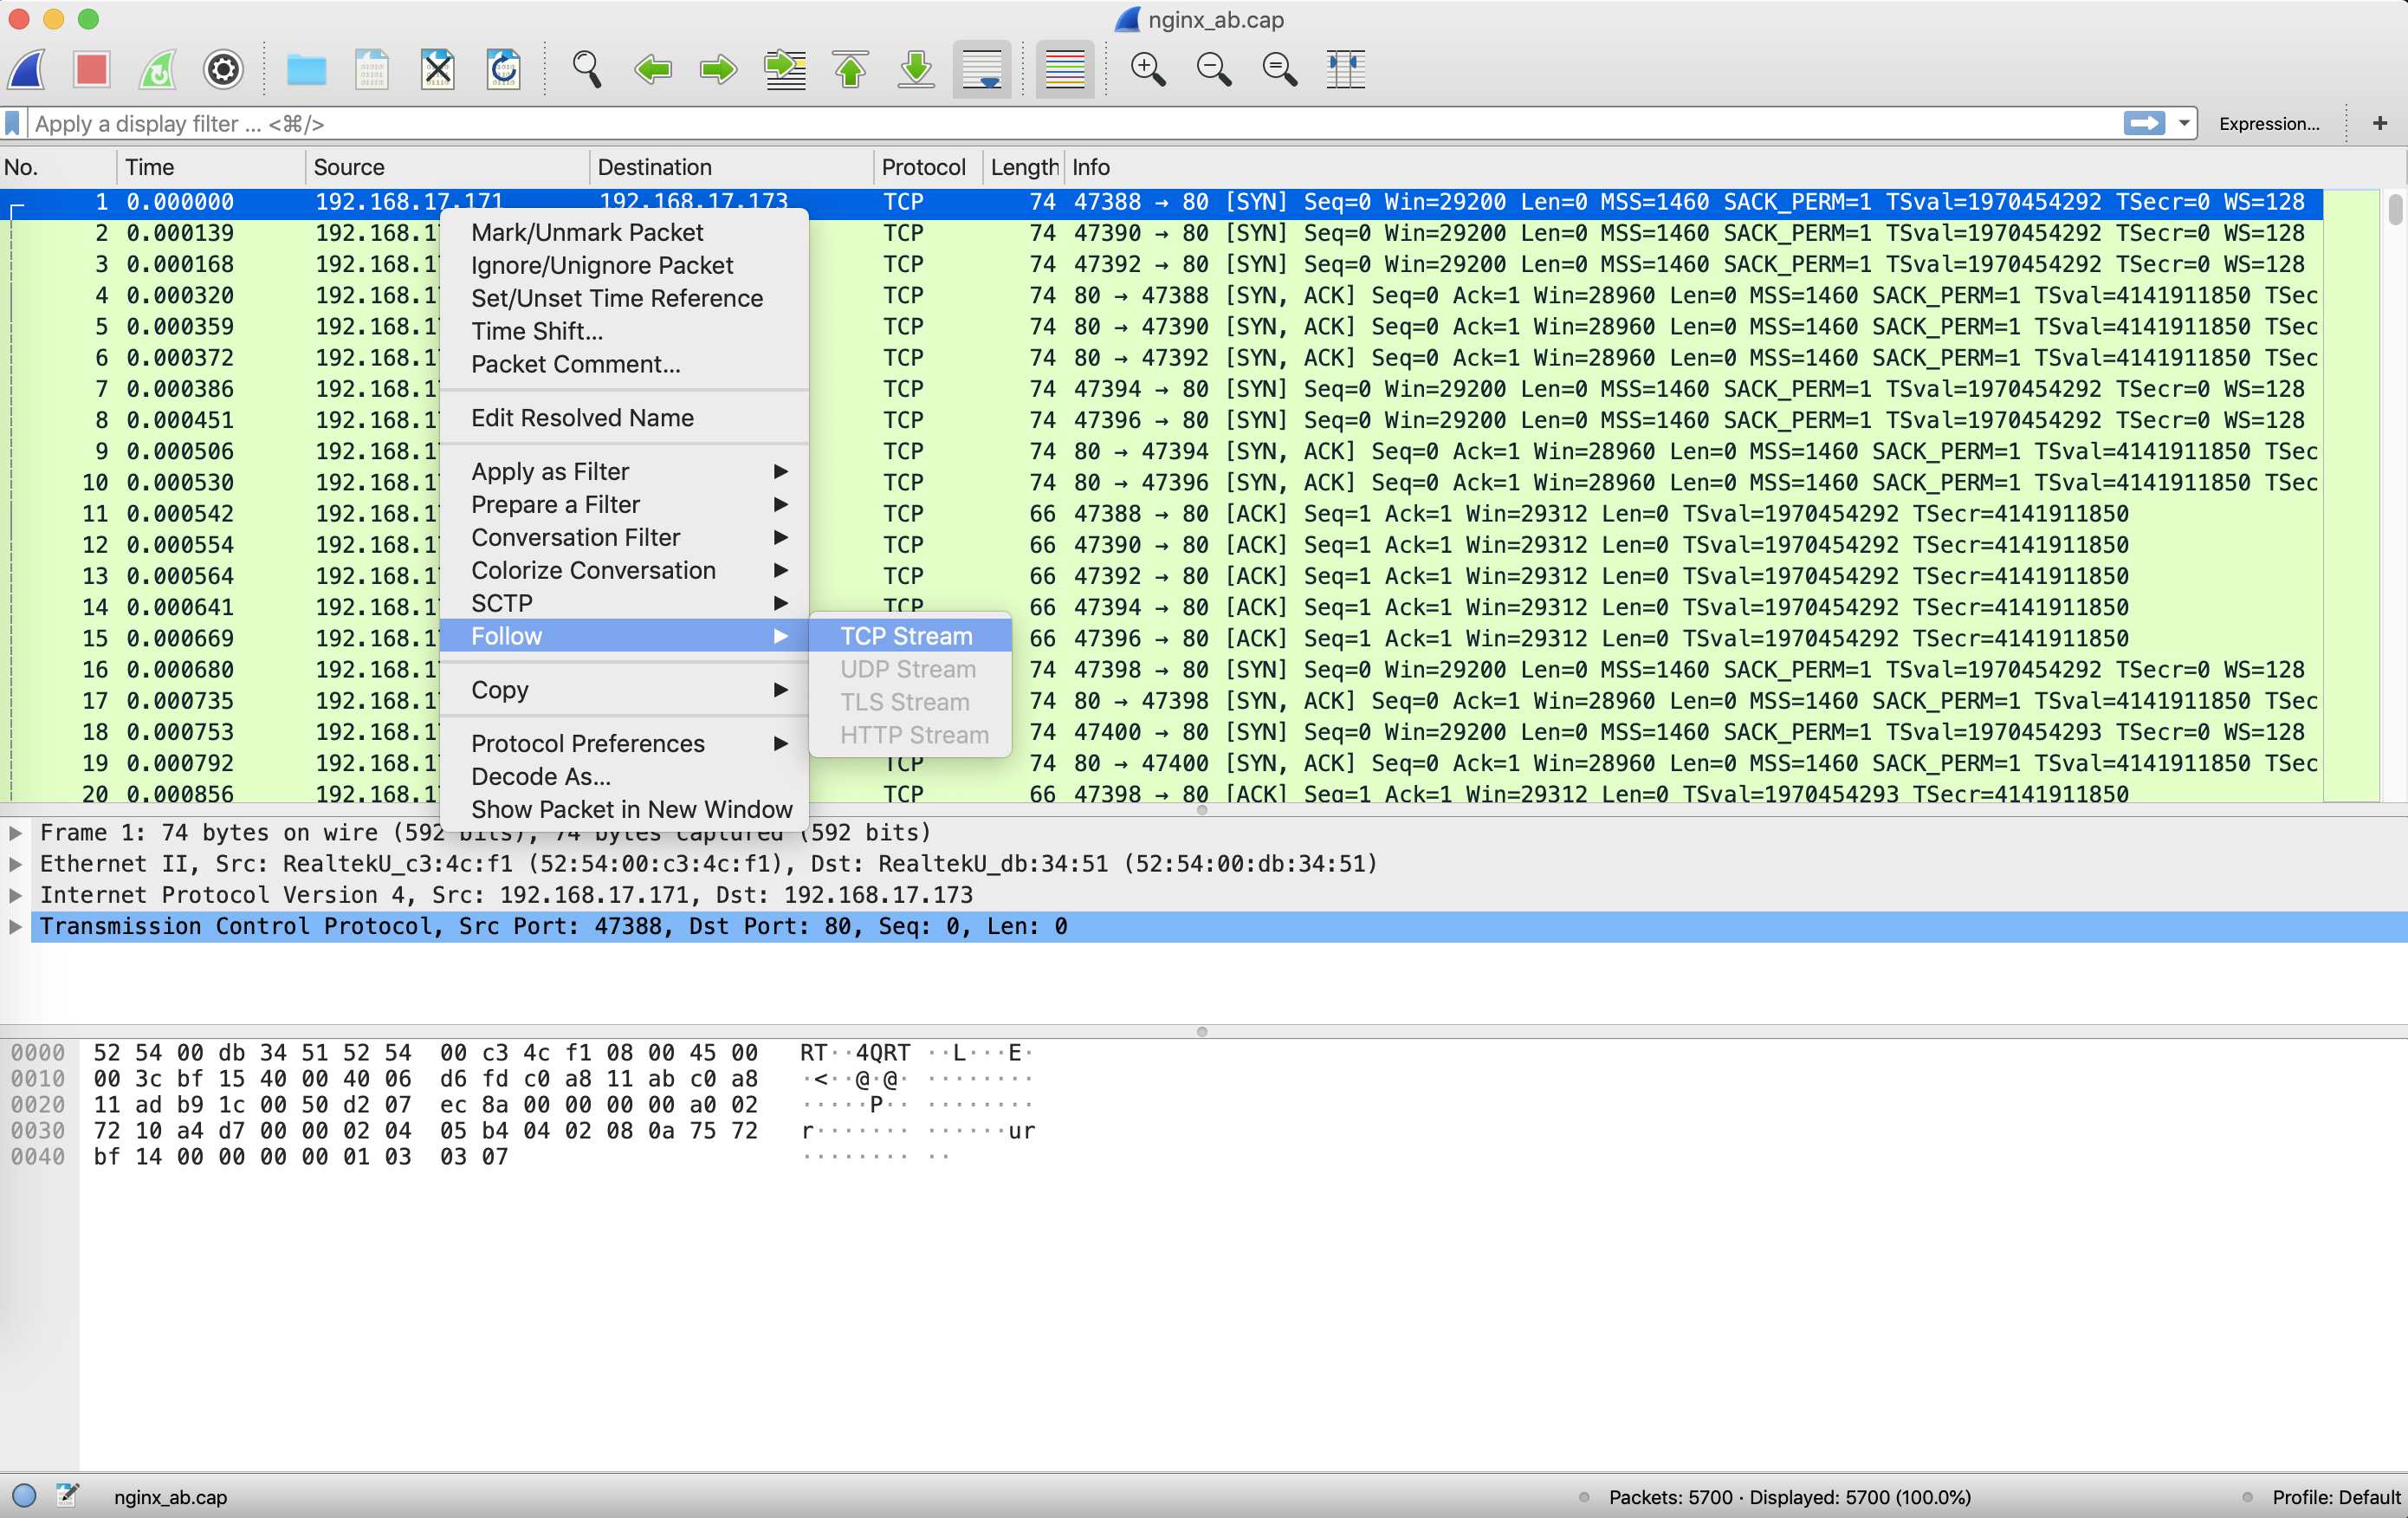
在大量的数据包中,我们先处理一下数据包,随便选取一个 syn,选取与该 syn 对应的 tcp 流

选取一个片段来分析

● 在 Linux 中,默认打开了延迟确认,所谓延迟确认,就是不是收到每个请求都发送一次 ack,而是等待一段时间,如果这段时间正好有包需要发送,就坐着“顺风车”一起发出,否则超时后单独发送。所以客户端会等待 40ms,再发送这个 ack
● 由于 nginx 也设置了 nagle 算法,如果没有收到 ack,它会等着包的到来,所以就会呈现这个样子
(1)192.168.17.171 首先发送一个 http get 请求(677 号包)
(2)192.167.17.173 发送 PSH,ACK(999 号包)
(3)此时由于 Linux 默认打开延迟确认,192.168.17.171 会等待 40ms,看看有没有“顺风车”;而 192.168.17.173 上的 nginx 由于关闭了 tcp_nodelay,它也会等待着 ack 的到来再回应
(4)40ms 过后,192.168.17.171 没有等到“顺风车”,此时发送 ack(1109 号包)
(5)192.168.17.173 收到 ack 后发送了 http 200(1118 号包)
(6)192.168.17.171 收到数据之后发送确认 ack(1127 号包)
192.168.17.171:47388                        192.168.17.173:80
     +-------+                                 +--------+
     |       |       no.677  http get          |        |
     |       +--------------------------------->        |
     |       |                                 |        |
     |       |       no.999  PSH,ACK           |        |
     |       <---------------------------------+        |
     |       |                                 |        |
     |       |                                 |        |
     |       |                                 |        |
     |       |          delay 40ms             |        |
     |       |                                 |        |
     |       |                                 |        |
     |       |                                 |        |
     |       |       no.1109  ACK              |        |
     |       +--------------------------------->        |
     |       |                                 |        |
     |       |       no.1118  http 200         |        |
     |       <---------------------------------+        |
     |       |                                 |        |
     |       |       no.1127  ACK              |        |
     |       +--------------------------------->        |
     |       |                                 |        |
     |       |                                 |        |
     +-------+                                 +--------+
四、关闭 nagle
只需要设置 tcp_nodelay on;
root@k8s-node2:/tmp# sed -i '/tcp_nodelay/s/off/on/g' nginx.conf
root@k8s-node2:/tmp# docker rm -f nginx_delay
nginx_delay
root@k8s-node2:/tmp# docker run -d --name nginx_delay -v /tmp/nginx.conf:/etc/nginx/nginx.conf -p 80:80 nginx:latest
bac9bcf7a6e392a7a07afae165c3d5b4e3fb2fc43d3470f35802e12d1e7ae70d
再用 ab 测试:
root@k8s-node2:~# ab -n 1000 -c 100 -k http://127.0.0.1/
This is ApacheBench, Version 2.3 <$Revision: 1807734 $>
Copyright 1996 Adam Twiss, Zeus Technology Ltd, http://www.zeustech.net/
Licensed to The Apache Software Foundation, http://www.apache.org/

...
Time per request:       14.285 [ms] (mean)
...
再来观察抓包的结果:

● 由于客户端依然打开了延迟确认,所以 192.168.17.171 收到数据包之后依然没有及时回应
● 但是 nginx,tcp_nodelay on,所以 192.168.17.173 收到数据包后会立即响应 ack
● 192.168.17.171 收到之后,已经有 2 个没有确认的数据包了,所以会立即发送 ack 进行确认:
(1)192.168.17.171 首先发送一个 http get 请求(447 号包)
(2)192.168.17.173 收到之后立即响应 psh,ack(740 号包)
(3)192.168.17.173 发送 http 200(741 号包)
(4)192.168.17.171 回应 ack(742 号包)
192.168.17.171:49718                        192.168.17.173:80
     +-------+                                 +--------+
     |       |       no.447  http get          |        |
     |       +--------------------------------->        |
     |       |                                 |        |
     |       |       no.740  PSH,ACK           |        |
     |       <---------------------------------+        |
     |       |                                 |        |
     |       |       no.741  http 200          |        |
     |       <---------------------------------+        |
     |       |                                 |        |
     |       |       no.742  ACK               |        |
     |       +--------------------------------->        |
     |       |                                 |        |
     |       |                                 |        |
     +-------+                                 +--------+
五、小结
● 本文复现了经典的 40ms 问题
● 本文中提到了 2 个名词,nagle 算法与延迟确认,它们看上去很相似,但是并不一样。nagle 算法是需要等到对端 ack 来临,或者凑满一个 mss 之后才发送数据包;而延迟确认针对的是 ack,ack 会等待“顺风车”,如果有,就乘坐顺风车发送,否则等待超时之后单独发送
● 本文中延迟确认是 Linux 默认打开的功能,所以在实验中,客户端都会有延时确认的情况,要关闭客户端延迟确认,需要设置 setsockopt 中的 TCP_QUICKACK
● 本文中主要讨论的是 nginx 的 nagle 算法,nagle 算法完全由 tcp 协议的 ack 机制决定,如果对端 ACK 回复很快的话,nagle 事实上不会拼接太多的数据包,虽然避免了网络拥塞,网络总体的利用率依然很低
● nagle 算法在与延迟确认互相作用的情况下,会产生严重的延时效果,这是需要警惕的
● nginx 中是否打开 nagle 算法,要取决于业务场景。比如在实验中看到:
(1)tcp_nodelay off,会增加通信的延时,但是会提高带宽利用率。在高延时、数据量大的通信场景中应该会有不错的效果
(2)tcp_nodelay on,会增加小包的数量,但是可以提高响应速度。在及时性高的通信场景中应该会有不错的效果
:


