共计 3468 个字符,预计需要花费 9 分钟才能阅读完成。
说明:
第一步:在 Ubuntu 下安装 Postgresql
root@server2-virtual-machine:~# apt-get install -y postgresql-9.1 postgresql-client-9.1 postgresql-contrib-9.1 postgresql-server-dev-9.1
第二步:修改 PostgreSQL 数据库的默认用户 postgres 的密码(注意不是 linux 系统帐号)
2.PostgreSQL 登录(使用 psql 客户端登录)
root@server2-virtual-machine:~# sudo -u postgres psql
// 其中,sudo -u postgres 是使用 postgres 用户登录的意思
//PostgreSQL 数据默认会创建一个 postgres 的数据库用户作为数据库的管理员,密码是随机的,所以这里
// 设定为‘postgres’
3. 修改 PostgreSQL 登录密码:
postgres=# ALTER USER postgres WITH PASSWORD ‘postgres’;
//postgres=# 为 PostgreSQL 下的命令提示符
4. 退出 PostgreSQL psql 客户端
postgres=# \q
[代码说明]
[功能说明]
第三步:修改 linux 系统的 postgres 用户的密码(密码与数据库用户 postgres 的密码相同)
1. 删除 PostgreSQL 用户密码
root@server2-virtual-machine:~# sudo passwd -d postgres
passwd: password expiry information changed.
//passwd -d 是清空指定用户密码的意思
2. 设置 PostgreSQL 用户密码
PostgreSQL 数据默认会创建一个 linux 用户 postgres,通过上面的代码修改密码为 ’postgres’(这取决于
第二步中的密码,只要与其相同即可)。
root@server2-virtual-machine:~#sudo -u postgres passwd
输入新的 UNIX 密码:
重新输入新的 UNIX 密码:
passwd:已成功更新密码
第四步:修改 PostgresSQL 数据库配置实现远程访问
root@server2-virtual-machine:~# vi /etc/postgresql/9.1/main/postgresql.conf
1. 监听任何地址访 问,修改连接权限
#listen_addresses =‘localhost’ 改为 listen_addresses =‘*’
2. 启用密码验证
#password_encryption = on 改为 password_encryption = on
3. 可访问的用户 ip 段
root@server2-virtual-machine:~# vi /etc/postgresql/9.1/main/pg_hba.conf, 并在文档末尾加上以下内容
# to allow your client visiting postgresql server
host all all 0.0.0.0 0.0.0.0 md5
4. 重启PostgreSQL 数据库
root@server2-virtual-machine:~# /etc/init.d/postgresql restart
第五步:管理 PostgreSQL 用户和数据库
1. 登录 postgre SQL 数据库
root@server2-virtual-machine:~# psql -U postgres -h 127.0.0.1
2. 创建新用户 zhaofeng,但不给建数据库的权限
postgres=# create user“zhaofeng”with password‘123456’nocreatedb;
// 注意 用户名要用双引号,以区分大小写,密码不用
3. 建立数据库,并指定所有者
postgres=# create database“testdb”with owner=”zhaofeng”;
4. 在外部命令行的管理命令
root@server2-virtual-machine:~# -u postgres createuser -D -P test1
//- D 该用户没有创建数据库的权利,- P 提示输入密码, 选择管理类型 y /n
root@server2-virtual-machine:~# -u postgres createdb -O test1 db1
//- O 设定所有者为 test1
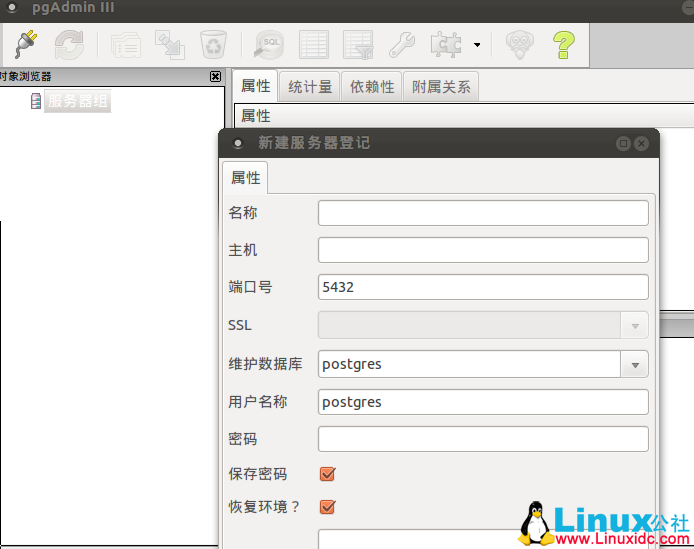
第六步:安装postgresql 数据库pgAdmin3 客户端管理程序
root@server2-virtual-machine:~# apt-get install -y pgadmin3

———————————— 华丽丽的分割线 ————————————
在 CentOS 6.5 上编译安装 PostgreSQL 9.3 数据库 http://www.linuxidc.com/Linux/2016-06/132272.htm
CentOS 6.3 环境下 yum 安装 PostgreSQL 9.3 http://www.linuxidc.com/Linux/2014-05/101787.htm
PostgreSQL 缓存详述 http://www.linuxidc.com/Linux/2013-07/87778.htm
Windows 平台编译 PostgreSQL http://www.linuxidc.com/Linux/2013-05/85114.htm
Ubuntu 下 LAPP(Linux+Apache+PostgreSQL+PHP)环境的配置与安装 http://www.linuxidc.com/Linux/2013-04/83564.htm
Ubuntu 上的 phppgAdmin 安装及配置 http://www.linuxidc.com/Linux/2011-08/40520.htm
CentOS 平台下安装 PostgreSQL9.3 http://www.linuxidc.com/Linux/2014-05/101723.htm
PostgreSQL 配置 Streaming Replication 集群 http://www.linuxidc.com/Linux/2014-05/101724.htm
———————————— 华丽丽的分割线 ————————————
PostgreSQL 的详细介绍:请点这里
PostgreSQL 的下载地址:请点这里
本文永久更新链接地址:http://www.linuxidc.com/Linux/2016-07/132952.htm


