共计 7900 个字符,预计需要花费 20 分钟才能阅读完成。
MySQL Profile 对于分析执行计划的开销来说,还是有一定的帮助,至少在分析一些性能问题的时候有很多的参考依据。
我在 5.6, 5.7 版本中进行了测试,没发现差别,还是以 5.7 为例进行演示吧。
mysql> select version();
+———–+
| version() |
+———–+
| 5.7.10 |
+———–+
1 row in set (0.00 sec)
传统的使用 Profile 都是使用 show profile 这样的命令方式,这个功能默认是关闭的。
mysql> show profiles;
Empty set, 1 warning (0.00 sec)
这个地方可以看到有一个警告,我们看看是什么警告。
mysql> show warnings;
+———+——+————————————————————————————————————–+
| Level | Code | Message |
+———+——+————————————————————————————————————–+
| Warning | 1287 | ‘SHOW PROFILES’ is deprecated and will be removed in a future release. Please use Performance Schema instead |
+———+——+————————————————————————————————————–+
1 row in set (0.00 sec)
原来这种方式已经过期了,新的功能是在 performance_schema 中开放。当然在 5.6,5.7 版本中测试还是可用,我们先简单了解一下,再来看 performance_schema 怎么用。
Profile 相关的几个参数如下:
mysql> show variables like ‘%profil%’;
+————————+——-+
| Variable_name | Value |
+————————+——-+
| have_profiling | YES |
| profiling | OFF |
| profiling_history_size | 15 |
+————————+——-+
3 rows in set (0.00 sec)
可以看到 Profileing 为 OFF, 当前默认值为 0, 代表的是一个意思。
mysql> SELECT @@profiling;
+————-+
| @@profiling |
+————-+
| 0 |
+————-+
1 row in set, 1 warning (0.00 sec)
have_profiling 用于控制是否开启或者禁用 Profiling
profiling_history_size 是保留 Profiling 的数目
当然本质上,Profile 的内容还是来自于 information_schema.profiling
mysql> select * from information_schema.profiling\G
Empty set, 1 warning (0.00 sec)
这个地方还是有一个警告,还是过期的提示。
mysql> show warnings;
+———+——+—————————————————————————————————————————–+
| Level | Code | Message |
+———+——+—————————————————————————————————————————–+
| Warning | 1287 | ‘INFORMATION_SCHEMA.PROFILING’ is deprecated and will be removed in a future release. Please use Performance Schema instead |
+———+——+—————————————————————————————————————————–+
1 row in set (0.00 sec)
我们开启 profiling
mysql> set profiling=1;
Query OK, 0 rows affected, 1 warning (0.00 sec)
查看所有的 profiles
mysql> show profiles;
+———-+————+—————+
| Query_ID | Duration | Query |
+———-+————+—————+
| 1 | 0.00018200 | show warnings |
+———-+————+—————+
1 row in set, 1 warning (0.00 sec)
我们顺便运行一条 SQL
mysql> select count(*)from information_schema.columns;
+———-+
| count(*) |
+———-+
| 3077 |
+———-+
1 row in set (0.07 sec)
然后再次查看,就会看到 query_ID 会得到刚刚运行的语句。
mysql> show profiles;
+———-+————+————————————————+
| Query_ID | Duration | Query |
+———-+————+————————————————+
| 1 | 0.00018200 | show warnings |
| 2 | 0.06627200 | select count(*)from information_schema.columns |
+———-+————+————————————————+
2 rows in set, 1 warning (0.00 sec)
可以使用如下的方式来查看 profile 的信息,比如涉及 CPU 的明细信息。
mysql> show profile cpu for query 2;
+———————-+———-+———-+————+
| Status | Duration | CPU_user | CPU_system |
+———————-+———-+———-+————+
| checking permissions | 0.000004 | 0.000000 | 0.000000 |
| checking permissions | 0.000053 | 0.000999 | 0.000000 |
| checking permissions | 0.000014 | 0.000000 | 0.000000 |
| checking permissions | 0.000006 | 0.000000 | 0.000000 |
。。。。。
| closing tables | 0.000005 | 0.000000 | 0.000000 |
| freeing items | 0.000052 | 0.000000 | 0.000000 |
| cleaning up | 0.000023 | 0.000000 | 0.000000 |
+———————-+———-+———-+————+
100 rows in set, 1 warning (0.00 sec)
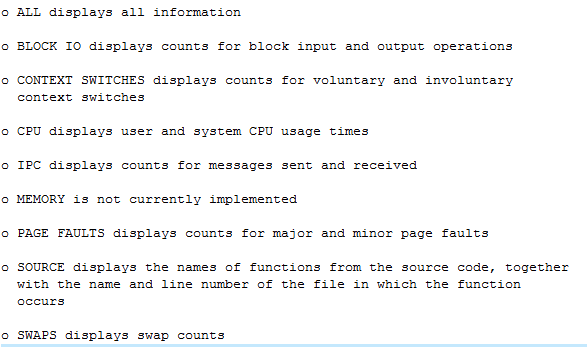
除此之外,还有哪些选项呢,可以自由选用。
上面的内容其实介于使用和过期之间,那么我们来看看新版本中推荐的 performace_schema 是怎么回事。
先切换到 performance_schema 下,这是 MySQL 新增的性能优化引擎,在 5.6 以前是关闭的,5。6,5.7 中是默认开启的,5.7 切换的时候还会有一句提示。
mysql> use performance_schema
Reading table information for completion of table and column names
You can turn off this feature to get a quicker startup with -A
Database changed
使用 profile 涉及几个表,setup_actors,setup_instruments,setup_consumers
说白了都是配置,都是套路。
默认表 setup_actors 的内容如下:
mysql> SELECT * FROM setup_actors;
+——+——+——+———+———+
| HOST | USER | ROLE | ENABLED | HISTORY |
+——+——+——+———+———+
| % | % | % | YES | YES |
+——+——+——+———+———+
1 row in set (0.00 sec)
按照官方的建议,默认是启用,可以根据需求禁用。
UPDATE performance_schema.setup_actors SET ENABLED = ‘NO’, HISTORY = ‘NO’
WHERE HOST = ‘%’ AND USER = ‘%’;
禁用后的内容如下:
mysql> select * from setup_actors;
+——+——+——+———+———+
| HOST | USER | ROLE | ENABLED | HISTORY |
+——+——+——+———+———+
| % | % | % | NO | NO |
+——+——+——+———+———+
1 row in set (0.00 sec)
然后加入指定的用户
INSERT INTO performance_schema.setup_actors (HOST,USER,ROLE,ENABLED,HISTORY)
VALUES(‘localhost’,’root’,’%’,’YES’,’YES’);
加入成功后的数据内容如下:
mysql> select * from setup_actors;
+———–+——+——+———+———+
| HOST | USER | ROLE | ENABLED | HISTORY |
+———–+——+——+———+———+
| % | % | % | NO | NO |
| localhost | root | % | YES | YES |
+———–+——+——+———+———+
2 rows in set (0.00 sec)
好了,setup_actors 的配置就这样,另外两个表的内容修改也是大同小异。
表 setup_consumers 描述各种事件,setup_instruments 描述这个数据库下的表名以及是否开启监控
我统计了一下,两个表的默认数据还不少。
setup_instruments 1006 rows
setup_consumers 15 rows
我们按照官方的建议来修改,可以看到修改的不是一行,而是相关的很多行。
mysql> UPDATE performance_schema.setup_instruments SET ENABLED = ‘YES’, TIMED = ‘YES’
-> WHERE NAME LIKE ‘%statement/%’;
Query OK, 0 rows affected (0.00 sec)
Rows matched: 192 Changed: 0 Warnings: 0
mysql> UPDATE performance_schema.setup_instruments SET ENABLED = ‘YES’, TIMED = ‘YES’
-> WHERE NAME LIKE ‘%stage/%’;
Query OK, 119 rows affected (0.00 sec)
Rows matched: 128 Changed: 119 Warnings: 0
mysql> UPDATE performance_schema.setup_consumers SET ENABLED = ‘YES’
-> WHERE NAME LIKE ‘%events_statements_%’;
Query OK, 1 row affected (0.01 sec)
Rows matched: 3 Changed: 1 Warnings: 0
mysql> UPDATE performance_schema.setup_consumers SET ENABLED = ‘YES’
-> WHERE NAME LIKE ‘%events_stages_%’;
Query OK, 3 rows affected (0.00 sec)
Rows matched: 3 Changed: 3 Warnings: 0
好了配置完成,我们来简单测试一下怎么用。
创建一个 test 数据库。
mysql> create database test;
Query OK, 1 row affected (0.00 sec)
切换到 test 数据库
mysql> use test
Database changed
创建一个测试表 test_profile,插入几行数据。
mysql> create table test_profile as select * from information_schema.columns limit 1,5;
Query OK, 5 rows affected (0.10 sec)
Records: 5 Duplicates: 0 Warnings: 0
运行一下,我们根据这个语句来得到一些详细的统计信息。
mysql> select * from test.test_profile limit 1,2;
根据下面的语句查询一个历史表,从表名可以看出是和事件相关的,感觉越来越像 Oracle 了。
mysql> SELECT EVENT_ID, TRUNCATE(TIMER_WAIT/1000000000000,6) as Duration, SQL_TEXT
-> FROM performance_schema.events_statements_history_long WHERE SQL_TEXT like ‘%limit 1,2%’;
+———-+———-+——————————————-+
| EVENT_ID | Duration | SQL_TEXT |
+———-+———-+——————————————-+
| 4187 | 0.000424 | select * from test.test_profile limit 1,2 |
+———-+———-+——————————————-+
1 row in set (0.00 sec)
我们通过上面的语句可以得到一个概览,对应的事件和执行时间。
然后到 stage 相关的历史表中查看事件的详细信息,这就是我们期望的性能数据了。如此一来应该就明白上面的配置表中所要做的工作是什么意思了。
mysql> SELECT event_name AS Stage, TRUNCATE(TIMER_WAIT/1000000000000,6) AS Duration
-> FROM performance_schema.events_stages_history_long WHERE NESTING_EVENT_ID=4187;
+——————————–+———-+
| Stage | Duration |
+——————————–+———-+
| stage/sql/starting | 0.000113 |
| stage/sql/checking permissions | 0.000008 |
| stage/sql/Opening tables | 0.000025 |
| stage/sql/init | 0.000062 |
| stage/sql/System lock | 0.000013 |
。。。
| stage/sql/freeing items | 0.000031 |
| stage/sql/cleaning up | 0.000002 |
+——————————–+———-+
15 rows in set (0.01 sec)
整体来看,看到这个特性的输出,让我忍不住想起了 Oracle 中的 Datapump,因为输出实在是太像了,很有条理嘛。
本文永久更新链接地址:http://www.linuxidc.com/Linux/2016-10/136035.htm


