共计 4604 个字符,预计需要花费 12 分钟才能阅读完成。
环境是 CentOS 6.5 x86_64 系统
Zabbix 版本:3.0.4
MySQL Server 版本:5.6.29 二进制安装
zabbix_agentd.conf 的配置文件如下:
[root@linuxidc alertscripts]# cat /usr/local/zabbix/etc/zabbix_agentd.conf | grep -v ‘^#’ | grep -v ‘^$’
LogFile=/tmp/zabbix_agentd.log
EnableRemoteCommands=1
Server=10.18.3.193
ListenPort=10050
ServerActive=10.18.3.193
Hostname=10.18.3.191
AllowRoot=1
Include=/usr/local/zabbix/etc/zabbix_agentd.conf.d/*.conf
UnsafeUserParameters=1
# 下面两行是自定义的 key
UserParameter=mysql.slave,/usr/local/zabbix/share/zabbix/alertscripts/check_mysql_slave.sh | grep -c ‘ok’
UserParameter=mysql.status[*],/usr/local/zabbix/share/zabbix/alertscripts/mysql_server_status.sh $1
查看 mysql 授权:

mysql 授权需要密码才能访问,但是使用密码 mysql 会提示明文密码,就会有下面的提示:
[root@linuxidc alertscripts]# sh check_mysql_slave.sh
Warning: Using a password on the command line interface can be insecure.
ok -slave is running
解决办法如下:
[root@linuxidc alertscripts]# cat /etc/my.cnf | tail -4
[client]
user = root
host = localhost
password = 1qaz@WSX
再次运行脚本:
[root@linuxidc alertscripts]# sh check_mysql_slave.sh
ok -slave is running
mysql 主从监控脚本,脚本中去掉用户,密码直接使用命令。
[root@linuxidc alertscripts]# cat check_mysql_slave.sh
#!/bin/bash
declare -a slave_is
slave_is=($(/data/mysql/bin/mysql -e “show slave status\G”|grep -E “Slave_IO_Running|Slave_SQL_Running:”|awk ‘{print $2}’))
if [“${slave_is[0]}” = “Yes” -a “${slave_is[1]}” = “Yes” ];then
echo “ok -slave is running”
exit 0
else
echo “down -slave is not running”
exit 2
fi
mysql_server_status 脚本,这块上面 my.cnf 填写以后,使用 mysqladmin 也就不提示了:
[root@linuxidc alertscripts]# cat mysql_server_status.sh
#!/bin/bash
source /etc/profile
mysqladmin=`which mysqladmin`
case $1 in
Uptime)
result=`${mysqladmin} status|cut -f2 -d”:”|cut -f1 -d”T”`
echo $result
;;
Com_update)
result=`${mysqladmin} extended-status |grep -w “Com_update”|cut -d”|” -f3`
echo $result
;;
Slow_queries)
result=`${mysqladmin} status |cut -f5 -d”:”|cut -f1 -d”O”`
echo $result
;;
Com_select)
result=`${mysqladmin} extended-status |grep -w “Com_select”|cut -d”|” -f3`
echo $result
;;
Com_rollback)
result=`${mysqladmin} extended-status |grep -w “Com_rollback”|cut -d”|” -f3`
echo $result
;;
Questions)
result=`${mysqladmin} status|cut -f4 -d”:”|cut -f1 -d”S”`
echo $result
;;
Com_insert)
result=`${mysqladmin} extended-status |grep -w “Com_insert”|cut -d”|” -f3`
echo $result
;;
Com_delete)
result=`${mysqladmin} extended-status |grep -w “Com_delete”|cut -d”|” -f3`
echo $result
;;
Com_commit)
result=`${mysqladmin} extended-status |grep -w “Com_commit”|cut -d”|” -f3`
echo $result
;;
Bytes_sent)
result=`${mysqladmin} extended-status |grep -w “Bytes_sent” |cut -d”|” -f3`
echo $result
;;
Bytes_received)
result=`${mysqladmin} extended-status |grep -w “Bytes_received” |cut -d”|” -f3`
echo $result
;;
Com_begin)
result=`${mysqladmin} extended-status |grep -w “Com_begin”|cut -d”|” -f3`
echo $result
;;
*)
echo “Usage:$0(Uptime|Com_update|Slow_queries|Com_select|Com_rollback|Questions|Com_insert|Com_delete|Com_commit|Bytes_sent|Bytes_received|Com_begin)”
;;
esac
在 zabbix_server 获取 key 值,或是查看 zabbix_server.log 文件都可以排错。
[root@linuxidc bin]# ./zabbix_get -s 10.18.3.191 -k mysql.status[Uptime]
ZBX_NOTSUPPORTED: Unsupported item key.
[root@linuxidc bin]# ./zabbix_get -s 10.18.3.191 -k mysql.status[Uptime]
/usr/local/zabbix/share/zabbix/alertscripts/mysql_server_status.sh: line 4: mysqladmin: command not found
[root@linuxidc bin]# ./zabbix_get -s 10.18.3.191 -k mysql.status[Uptime]
414242
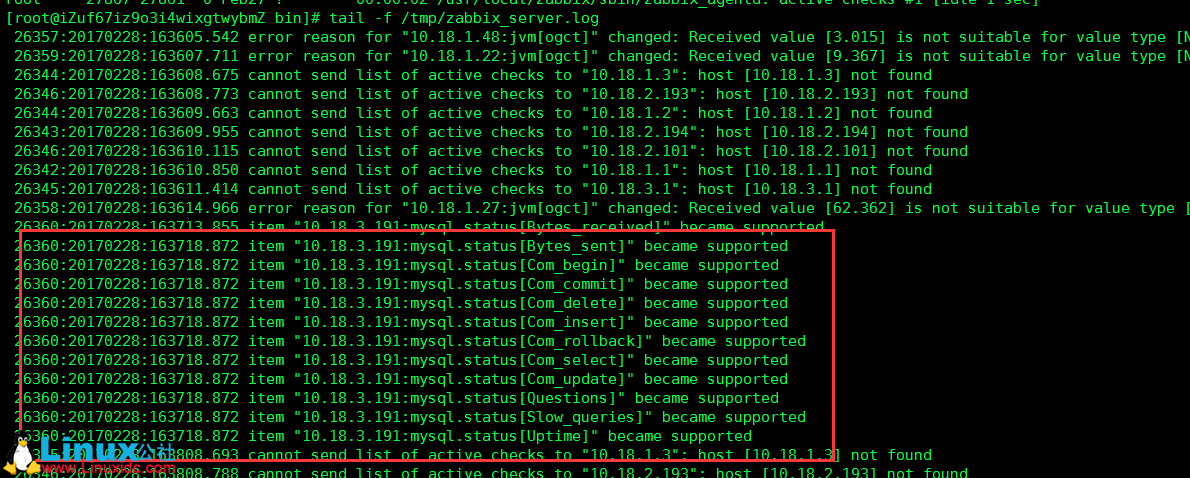
zabbix_agent.log 可以看到已经获取到自定义的 key:
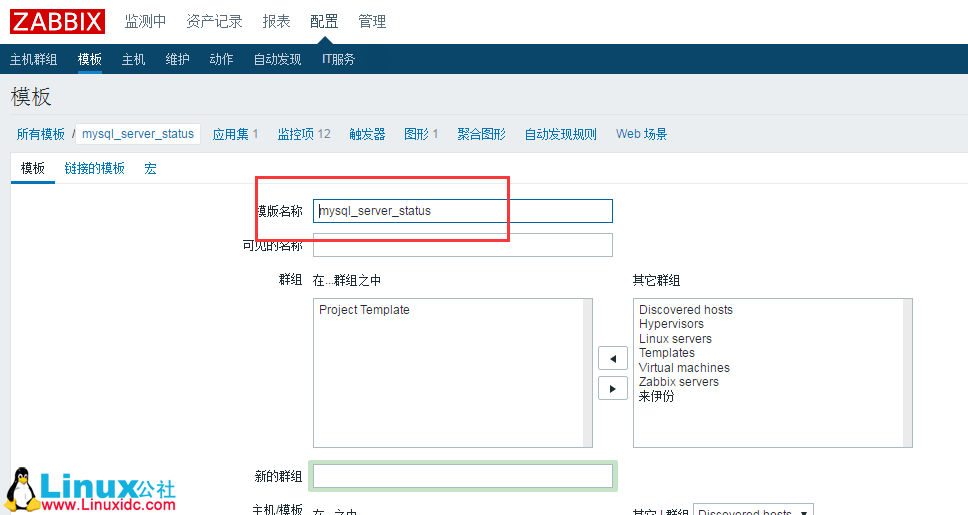
添加自定义模板,模板名称随意给个和 mysql 相关的:
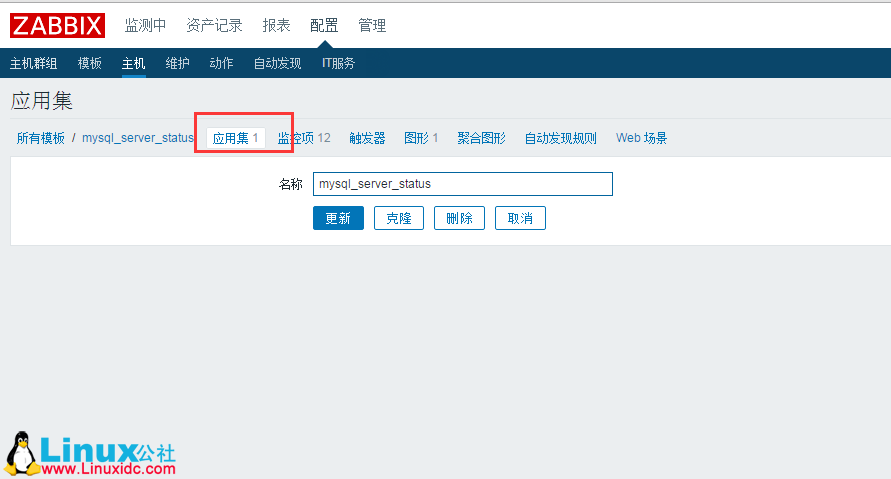
创建应用集:
添加监控项,一个 key 一个 key 添加,把脚本的 key 都添加进去。
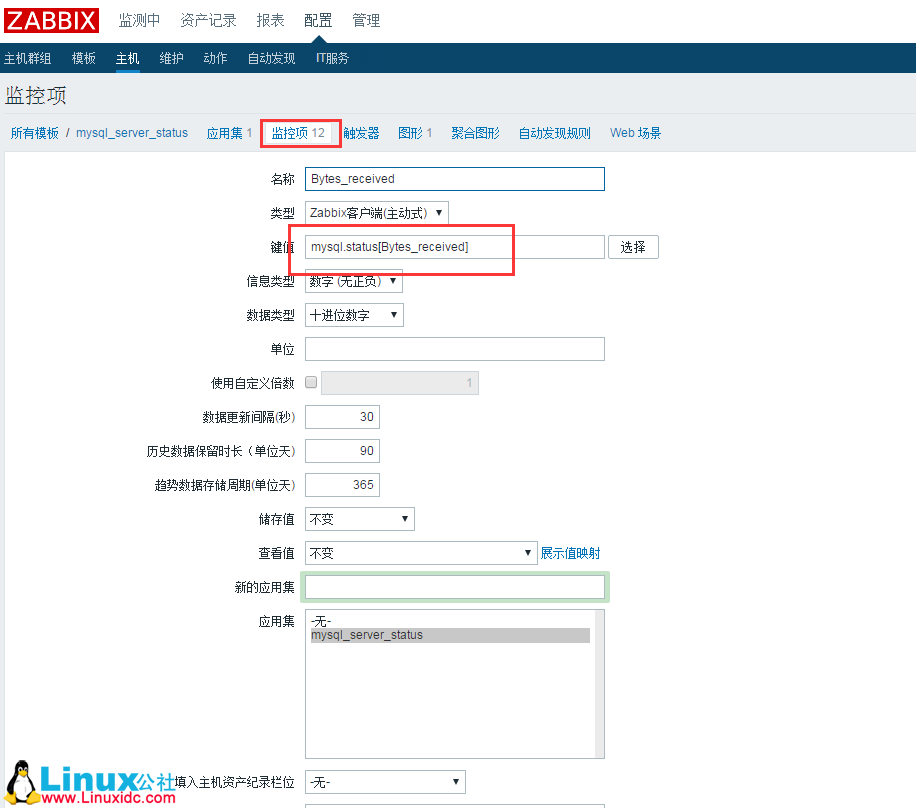
如下所示:
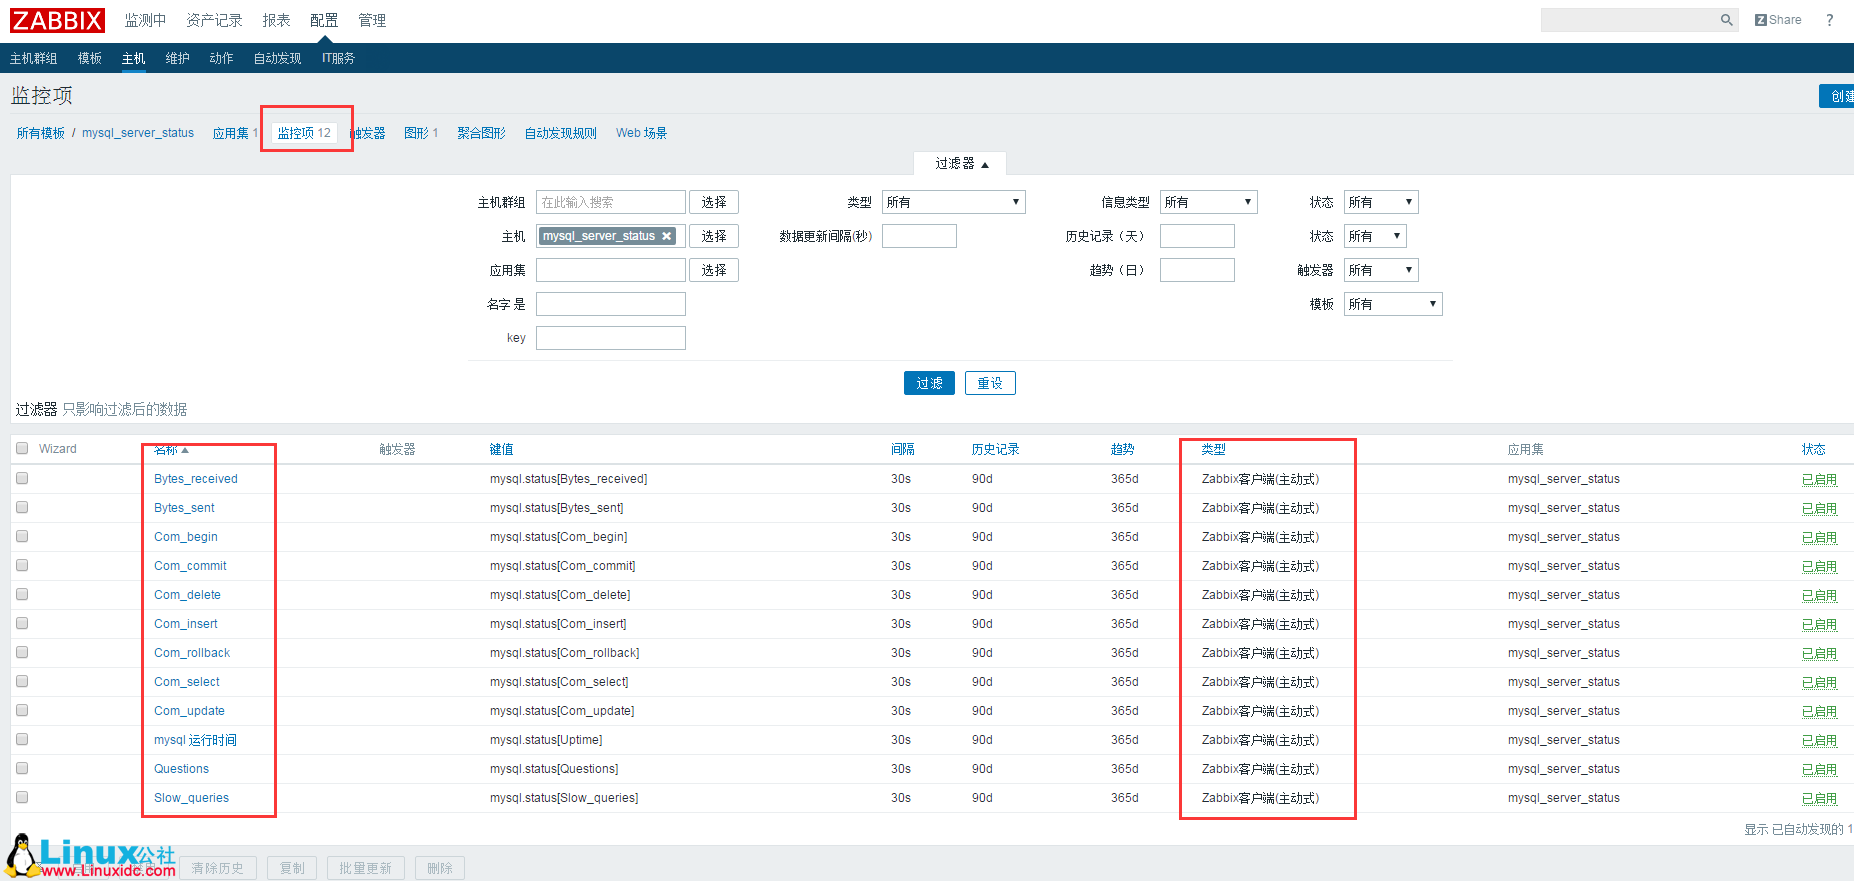
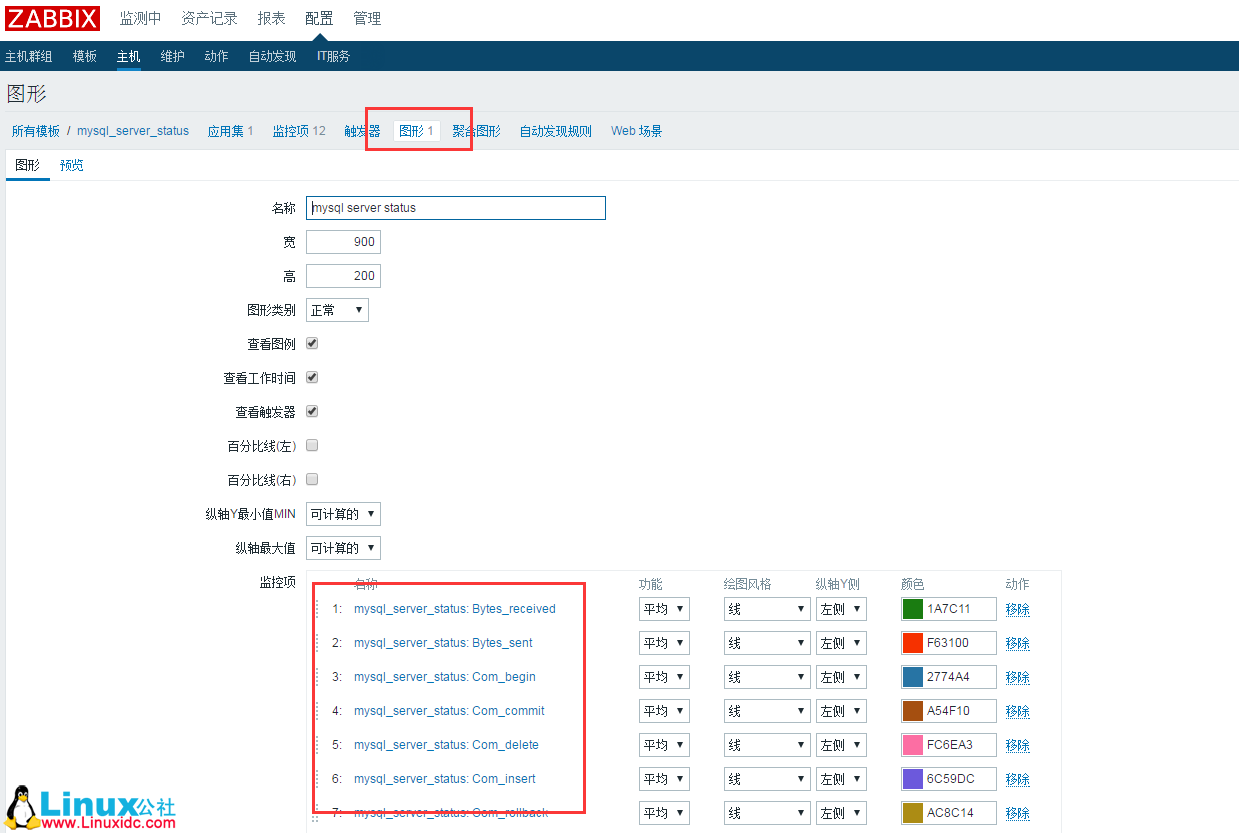
mysql 状态这块只做了图形查看,并没有做触发器,只做了主从的触发器,需要的可以自己添加:
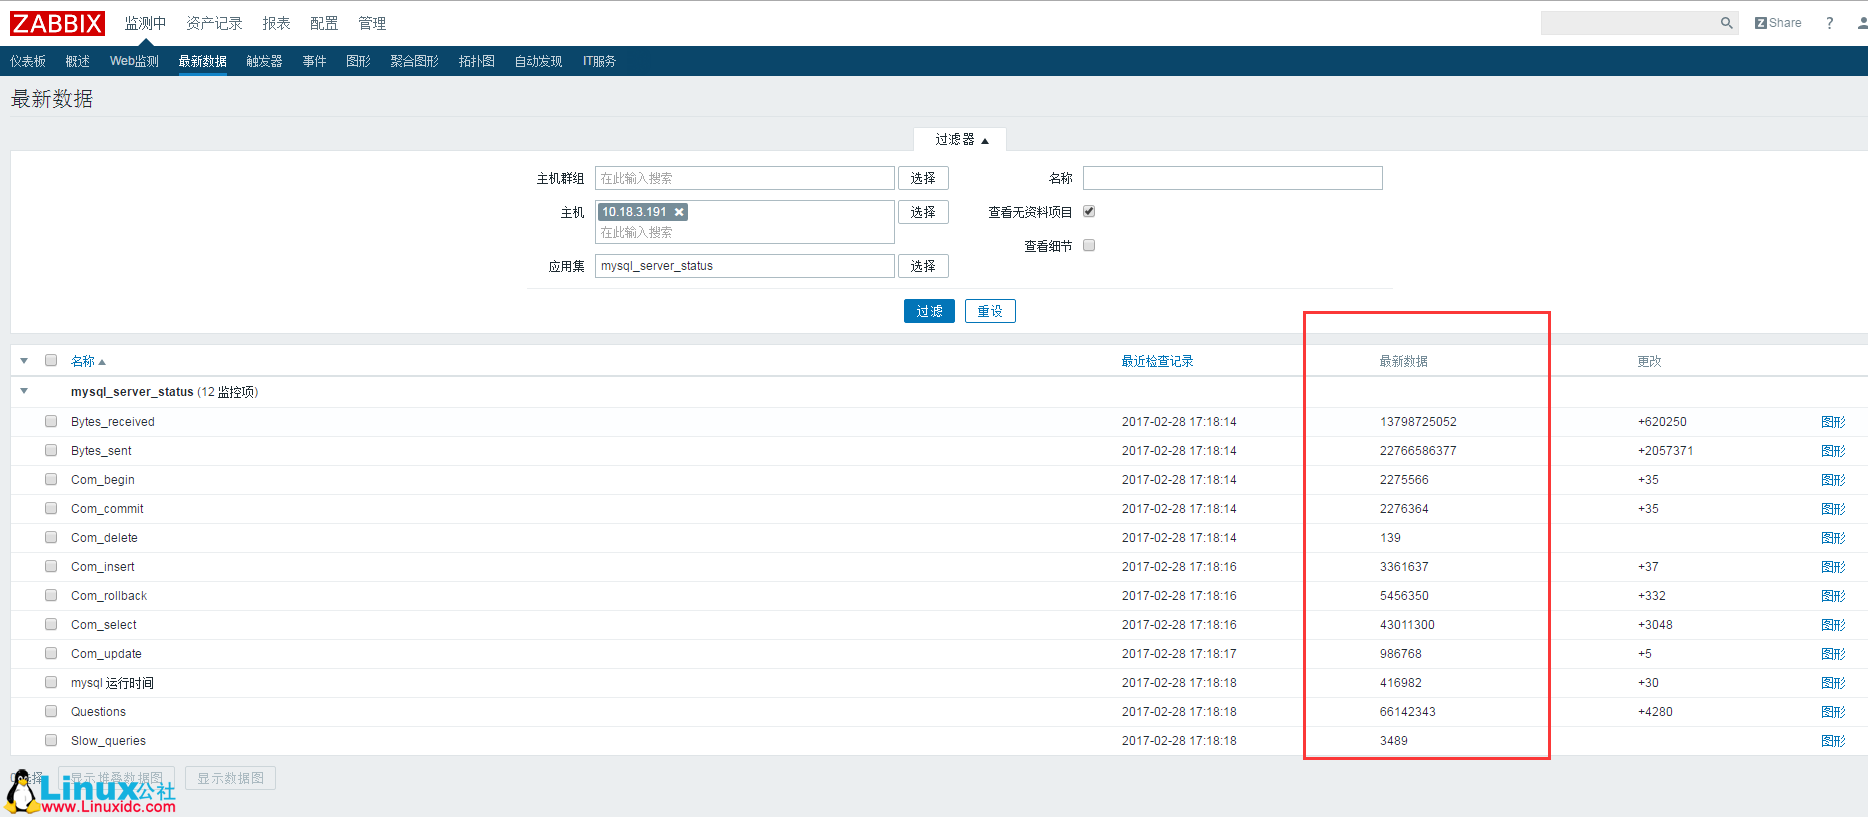
添加完成后可以添加一台 mysql 数据库查看下最新数据,是否成功了。
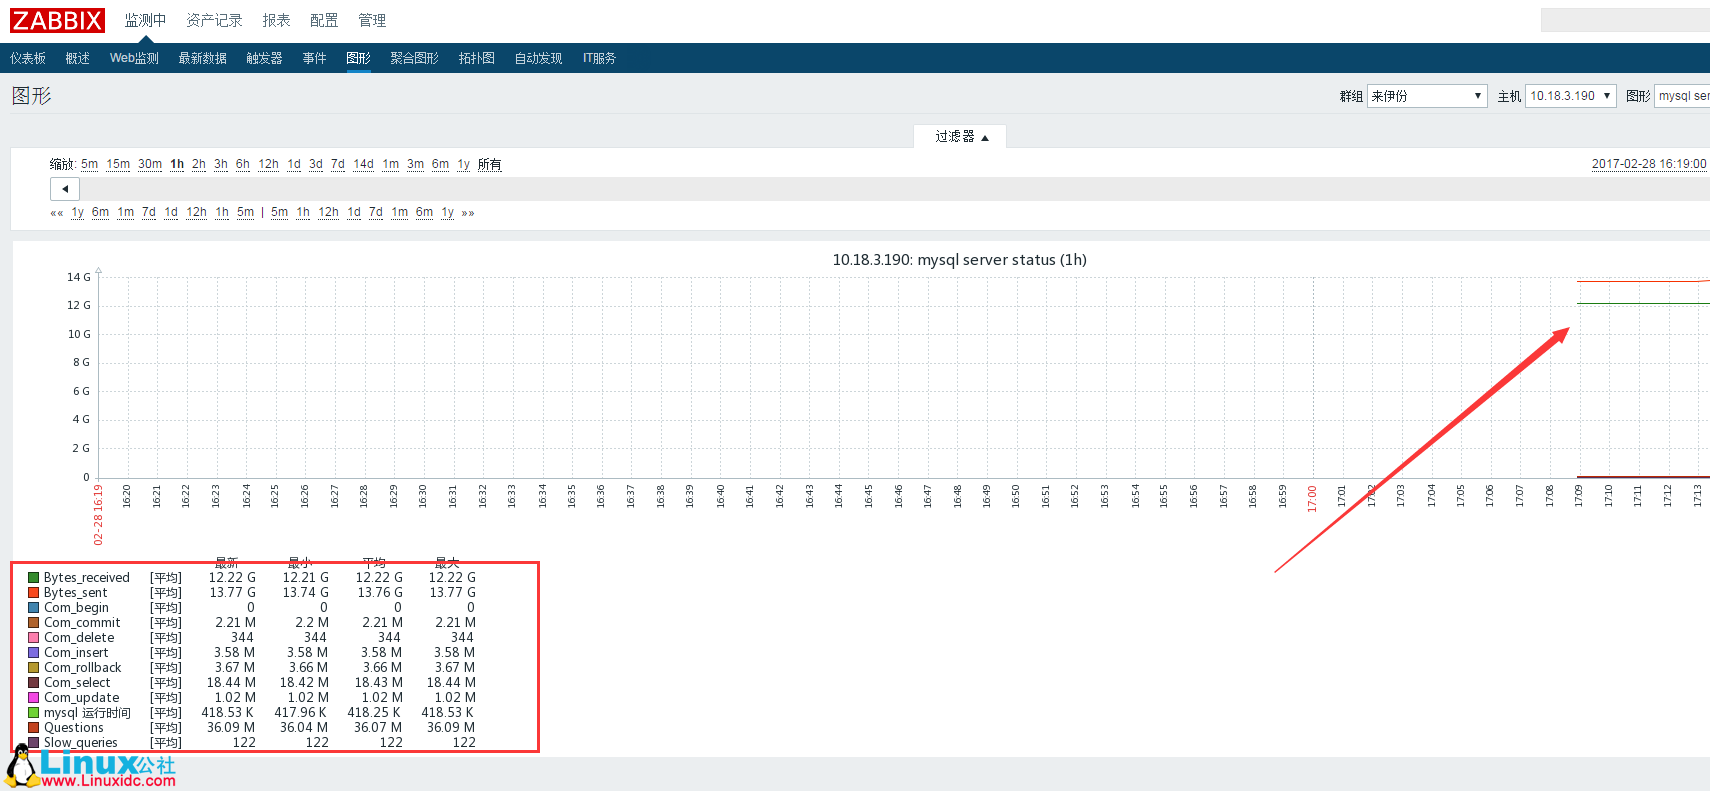
查看图形监控数据:
模板可以到 Linux 公社资源站下载:
—————————————— 分割线 ——————————————
免费下载地址在 http://linux.linuxidc.com/
用户名与密码都是www.linuxidc.com
具体下载目录在 /2017 年资料 / 3 月 /22 日 /Zabbix 自定义监控 MySQL 性能状态 /
下载方法见 http://www.linuxidc.com/Linux/2013-07/87684.htm
—————————————— 分割线 ——————————————
一些 Zabbix 相关教程集合:
Ubuntu 14.04 下 Zabbix2.4.5 源码编译安装 http://www.linuxidc.com/Linux/2015-05/117657.htm
CentOS 7 LNMP 环境搭建 Zabbix3.0 http://www.linuxidc.com/Linux/2017-02/140134.htm
Ubuntu 16.04 安装部署监控系统 Zabbix2.4 http://www.linuxidc.com/Linux/2017-03/141436.htm
Zabbix 监控安装部署及警报配置 http://www.linuxidc.com/Linux/2017-03/141611.htm
Ubuntu 16.04 下安装部署 Zabbix3.0 http://www.linuxidc.com/Linux/2017-02/140395.htm
CentOS 6.3 下 Zabbix 监控 apache server-status http://www.linuxidc.com/Linux/2013-05/84740.htm
CentOS 7 下 Zabbix 3.0 安装详解 http://www.linuxidc.com/Linux/2017-03/141716.htm
64 位 CentOS 6.2 下安装 Zabbix 2.0.6 http://www.linuxidc.com/Linux/2014-11/109541.htm
ZABBIX 的详细介绍:请点这里
ZABBIX 的下载地址:请点这里
本文永久更新链接地址:http://www.linuxidc.com/Linux/2017-03/142042.htm


