共计 3379 个字符,预计需要花费 9 分钟才能阅读完成。
1. 背景
前一章介绍了 Memcached 安装,此次介绍 NoSQL 另一款明星产品 —–>redis。
许多 Web 应用程序都将数据保存到 RDBMS 中,应用服务器从中读取数据并在浏览器中显示。但随着数据量的增大,访问的集中,就会出现 REBMS 的负担加重,数据库响应恶化,网站显示延迟等重大影响。Memcached 是高性能的分布式内存缓存服务器。一般的使用目的是通过缓存数据库查询结果,减少数据库的访问次数,以提高动态 Web 应用的速度、提高扩展性.
* redis 比 memcached 优势
- 丰富的数据类型: redis 支持二进制的 string list hashe set zset 五大基础数据类型存储.
- 原子性:redis 的所有操作都是原子性的,同时 redis 还支持对几个操作全并后的原子性执行.
- 消息订阅: redis 支持 publish/subscribe。
- 持久化存储数据: redis 支持 Aof 与 RDB 两种数据持久化支持.
2. 环境

4. 安装 (/usr/local/src)
下载: wget http://download.redis.io/releases/redis-3.2.8.tar.gz
解压: tar zxvf redis-3.2.8.tar.gz
进入目录: cd redis-3.2.8
编译并指定安装目录: make PREFIX=/usr/local/redis-3.2.8 install
创建软链接: ln -s /usr/local/redis-3.2.8 /usr/local/redis
5. 配置文件 (当前还在 redis 源码目录[/usr/local/src/redis-3.2.8] 内)
cp redis.conf /etc/redis.conf
编辑 /etc/redis.conf
daemonize no ==> daemonize yes (设置 redis 为后台 daemon 进程)
6. 创建 redis 用户
[root@redis-server ~]# useradd -r -s /sbin/nologin -M redis
7. 创建启动脚本 /etc/init.d/redis
#!/bin/sh
#
# redis init file for starting up the redis daemon
#
# chkconfig: – 20 80
# description: Starts and stops the redis daemon.
# Source function library.
#!/bin/sh
#
# redis init file for starting up the redis daemon
#
# chkconfig: – 20 80
# description: Starts and stops the redis daemon.
# Source function library.
. /etc/rc.d/init.d/functions
name=”redis-server”
exec=”/usr/local/redis/bin/$name”
pidfile=”/var/run/redis/redis.pid”
REDIS_CONFIG=”/etc/redis.conf”
[-e /etc/sysconfig/redis] && . /etc/sysconfig/redis
lockfile=/var/lock/subsys/redis
start() {
[-f $REDIS_CONFIG] || exit 6
[-x $exec] || exit 5
echo -n $”Starting $name: “
daemon –user ${REDIS_USER-redis} “$exec $REDIS_CONFIG”
retval=$?
echo
[$retval -eq 0] && touch $lockfile
return $retval
}
stop() {
echo -n $”Stopping $name: “
killproc -p $pidfile $name
retval=$?
echo
[$retval -eq 0] && rm -f $lockfile
return $retval
}
restart() {
stop
start
}
reload() {
false
}
rh_status() {
status -p $pidfile $name
}
rh_status_q() {
rh_status >/dev/null 2>&1
}
case “$1” in
start)
rh_status_q && exit 0
$1
;;
stop)
rh_status_q || exit 0
$1
;;
restart)
$1
;;
reload)
rh_status_q || exit 7
$1
;;
force-reload)
force_reload
;;
status)
rh_status
;;
condrestart|try-restart)
rh_status_q || exit 0
restart
;;
*)
echo $”Usage: $0 {start|stop|status|restart|condrestart|try-restart}”
exit 2
esac
exit $?
8. 修改脚本文件权限
[root@redis-server ~]# chmod 755 /etc/init.d/redis
9. 添加进 service 服务管理并设置开机启动
[root@redis-server ~]# chkconfig –add redis
[root@redis-server ~]# chkconfig redis on
10. redis 服务测试
service redis start

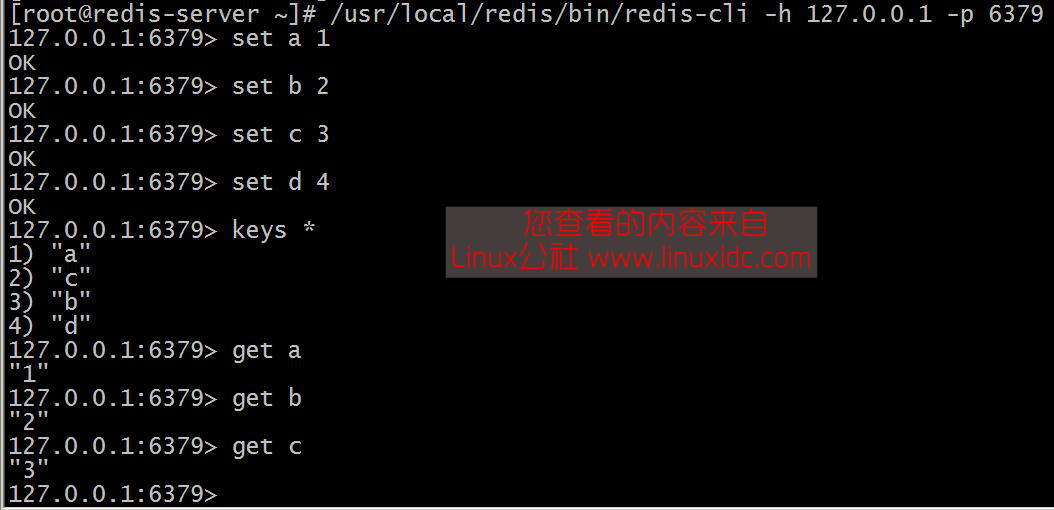
11. 连接测试(通过自带 redis-cli 命令连接测试)
[root@redis-server ~]# /usr/local/redis/bin/redis-cli -h 127.0.0.1 -p 6379

连接测试成功
下面关于 Redis 的文章您也可能喜欢,不妨参考下:
Ubuntu 14.04 下 Redis 安装及简单测试 http://www.linuxidc.com/Linux/2014-05/101544.htm
Redis 主从复制基本配置 http://www.linuxidc.com/Linux/2015-03/115610.htm
CentOS 7 下 Redis 的安装与配置 http://www.linuxidc.com/Linux/2017-02/140363.htm
Ubuntu 14.04 安装 Redis 与简单配置 http://www.linuxidc.com/Linux/2017-01/139075.htm
Ubuntu 16.04 环境中安装 PHP7.0 Redis 扩展 http://www.linuxidc.com/Linux/2016-09/135631.htm
Redis 单机 & 集群离线安装部署 http://www.linuxidc.com/Linux/2017-03/141403.htm
CentOS 7.0 安装 Redis 3.2.1 详细过程和使用常见问题 http://www.linuxidc.com/Linux/2016-09/135071.htm
Ubuntu 16.04 环境中安装 PHP7.0 Redis 扩展 http://www.linuxidc.com/Linux/2016-09/135631.htm
Ubuntu 15.10 下 Redis 集群部署文档 http://www.linuxidc.com/Linux/2016-06/132340.htm
Redis 实战 中文 PDF http://www.linuxidc.com/Linux/2016-04/129932.htm
Redis 热迁移实战总结 http://www.linuxidc.com/Linux/2017-02/141083.htm
Redis3.0 配置文件详解 http://www.linuxidc.com/Linux/2017-03/141369.htm
本文永久更新链接地址:http://www.linuxidc.com/Linux/2017-04/143024.htm


