共计 3040 个字符,预计需要花费 8 分钟才能阅读完成。
首先安装 php,需要 php 版本大于等于 5.6
CentOS 6.5 的 epel 及 remi 源。
# rpm -Uvh http://ftp.iij.ad.jp/pub/linux/Fedora/epel/6/x86_64/epel-release-6-8.noarch.rpm
# rpm -Uvh http://rpms.famillecollet.com/enterprise/remi-release-6.rpm
以下是 CentOS 7.0 的源。
# yum install epel-release
# rpm -ivh http://rpms.famillecollet.com/enterprise/remi-release-7.rpm
使用 yum list 命令查看可安装的包 (Packege)。
# yum list –enablerepo=remi –enablerepo=remi-php56 | grep php
安装 PHP5.6
yum 源配置好了,下一步就安装 PHP5.6。
# yum install –enablerepo=remi –enablerepo=remi-php56 php php-opcache php-devel php-mbstring php-mcrypt php-mysqlnd php-phpunit-PHPUnit php-pecl-xdebug php-pecl-xhprof
用 PHP 命令查看版本。
[root@Xxxxxx 15:13:48 ~]# php -v
# /etc/init.d/php-fpm restart
Stopping php-fpm: [OK]
Starting php-fpm: [OK]
安装 nginx:
yum install nginx
修改 nginx 的配置文件
# cat /etc/nginx/conf.d/admin.conf
server
{
listen 80;
server_name _;
index index.html index.php;
root /data;
location ~ .*\.php$ {
include fastcgi_params;
fastcgi_pass 127.0.0.1:9000;
fastcgi_index index.php;
fastcgi_param SCRIPT_FILENAME $document_root$fastcgi_script_name;
}
}
注释:$document_root 这个 nginx 变量取的是 root 的值。
安装 Mysql 服务:
这块已经封装好的直接 rpm 安装好后,启动 Mysql 服务,登录 Mysql 授权:
mysql> grant all privileges on *.* to ‘root’@’%’ identified by ‘password’;
Query OK, 0 rows affected (0.01 sec)
mysql> flush privileges;
Query OK, 0 rows affected (0.00 sec)
下载 PhpMyAdmin 软件配置 PhpMyAdmin 配置文件.
首先将已经下载的
phpMyAdmin-4.7.0-all-languages.tar.gz
解压 phpMyAdmin 压缩包重新命名.
tar zxf phpMyAdmin-4.7.0-all-languages.tar.gz
mv phpMyAdmin-4.7.0-all-languages phpMyAdmin
注释:将 phpMyAdmin 移动到 nginx root 目录下.
修改 PhpMysqlAdmin 的配置文件:
vim /data/phpMyAdmin/libraries/config.default.php
# 修改为自己浏览器登录访问的 url.
$cfg[‘PmaAbsoluteUri’] = ‘http://172.16.2.24/phpMyAdmin/’;
#cookie 的加密密码,防止模拟 cookie 破解,自己定义.
$cfg[‘blowfish_secret’] = ‘1qaz@WSX’;
#Mysql server 的 ip
$cfg[‘Servers’][$i][‘host’] = ‘172.16.2.24’;
#Mysql 的端口.
$cfg[‘Servers’][$i][‘port’] = ‘3306’;
# 基于 cookie 认证的方式,默认为 cookie.
$cfg[‘Servers’][$i][‘auth_type’] = ‘cookie’;
# 用户随便给,登录 phpMyAdmin 用 Mysql 授权的账户和密码就能登录
$cfg[‘Servers’][$i][‘user’] = ‘root’;
# 密码随便给,登录 phpMyAdmin 用 Mysql 授权的账户和密码就能登录
$cfg[‘Servers’][$i][‘password’] = ‘123456’;
# 允许 root 登录,默认开启.
$cfg[‘Servers’][$i][‘AllowRoot’] = true;
# 关闭无密码登录,默认为关闭.
$cfg[‘Servers’][$i][‘AllowNoPassword’] = false;
# 修改 PhpMysqlAdmin 登录默认的语言.
$cfg[‘DefaultLang’] = ‘zh’;
重启 php 程序:
# /etc/init.d/php-fpm restart
Stopping php-fpm: [OK]
Starting php-fpm: [OK]
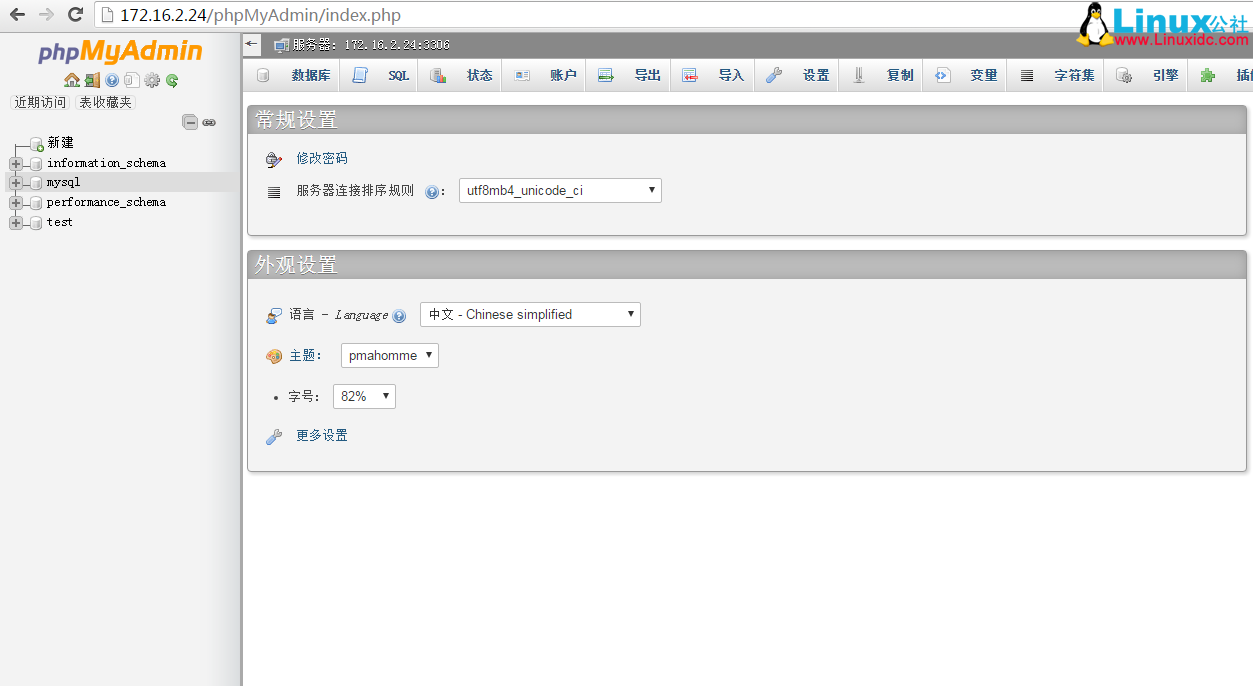
访问浏览器:http://172.16.2.24/phpMyAdmin/

用户 / 密码:Mysql 授权的用户和密码
网上很多资料说需要 cp 一份 config.sample.inc.php 为 config.inc.php,修改里面一些参数,根本不需要。
LAMP 架构协同应用的实例——phpMyAdmin http://www.linuxidc.com/Linux/2013-07/87645.htm
LAMP 应用之 phpMyAdmin、Wordpress http://www.linuxidc.com/Linux/2013-04/82757.htm
phpMyAdmin 老出现登陆超时解决方法 http://www.linuxidc.com/Linux/2012-09/70715.htm
Ubuntu 16.04 安装 phpMyAdmin 数据库管理工具 http://www.linuxidc.com/Linux/2016-11/137483.htm
Ubuntu 安装 phpMyAdmin 与 Adminer http://www.linuxidc.com/Linux/2012-08/69419.htm
在 LAMP 基础上实现 SSL 功能并安装 phpMyAdmin http://www.linuxidc.com/Linux/2012-07/66905.htm
Ubuntu 14.04 配置 LAMP+phpMyAdmin PHP(5.5.9) 开发环境 http://www.linuxidc.com/Linux/2014-10/107924.htm
phpMyAdmin 的详细介绍 :请点这里
phpMyAdmin 的下载地址 :请点这里
本文永久更新链接地址 :http://www.linuxidc.com/Linux/2017-05/144216.htm


