共计 4671 个字符,预计需要花费 12 分钟才能阅读完成。
这篇文章介绍了如何在 CentOS 7.2 下使用 Prometheus 和 Grafana 对 MySQL 服务器性能进行监控。内容基于这篇文章,结合了自己的实际实践并根据最新版本的应用进行了调整。
一、Prometheus 是一个开源的服务监控系统和时间序列数据库。:
官方 GitHub 地址为:https://github.com/prometheus/prometheus
官方地址:https://prometheus.io/
官方拓扑图如下
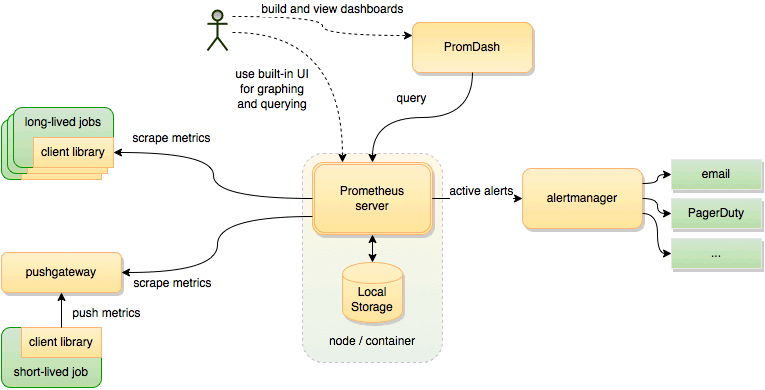
特性:
- 高维度数据模型
- 自定义查询语言
- 可视化数据展示
- 高效的存储策略
- 易于运维
- 提供各种客户端开发库
- 警告和报警
- 数据导出
二、安装 Prometheus(服务器环境为 CentOS 7.2,本实验服务端跟被监控 MySQL 在同一台服务器)
前提条件请关闭 SELinux 与 Firewalld(centos6 为 iptables)
下载安装 prometheus
$ wget https://github.com/prometheus/prometheus/releases/download/v1.7.1/prometheus-1.7.1.linux-amd64.tar.gz
$ mkdir /opt/prometheus
$ tar zxf prometheus-1.7.1.linux-amd64.tar.gz -C /opt/prometheus –strip-components=1
编辑配置 prometheus.yml 文件,内容如下:
global:
scrape_interval: 15s
evaluation_interval: 15s
external_labels:
monitor: ‘codelab-monitor’
rule_files:
scrape_configs:
– job_name: ‘prometheus’
static_configs:
– targets: [‘192.168.1.199:9090’]
– job_name: linux
static_configs:
– targets: [‘192.168.1.199:9100’]
labels:
instance: db1
– job_name: mysql
static_configs:
– targets: [‘192.168.1.199:9104’]
labels:
instance: db1
后台启动 prometheus
nohup /opt/prometheus/prometheus -config.file=prometheus.yml &
tail -200f nohup.out
time=”2017-06-12T11:51:16+08:00″ level=info msg=”Starting prometheus (version=1.7.0, branch=master, revision=bfa37c8ee39d11078662dce16c162a61dccf616c)” source=”main.go:88″
time=”2017-06-12T11:51:16+08:00″ level=info msg=”Build context (go=go1.8.3, user=root@7a6329cc02bb, date=20170607-09:43:48)” source=”main.go:89″
time=”2017-06-12T11:51:16+08:00″ level=info msg=”Host details (Linux 3.10.0-327.el7.x86_64 #1 SMP Thu Nov 19 22:10:57 UTC 2015 x86_64 monitor (none))” source=”main.go:90″
time=”2017-06-12T11:51:16+08:00″ level=info msg=”Loading configuration file prometheus.yml” source=”main.go:252″
time=”2017-06-12T11:51:16+08:00″ level=info msg=”Loading series map and head chunks…” source=”storage.go:428″
time=”2017-06-12T11:51:16+08:00″ level=info msg=”2200 series loaded.” source=”storage.go:439″
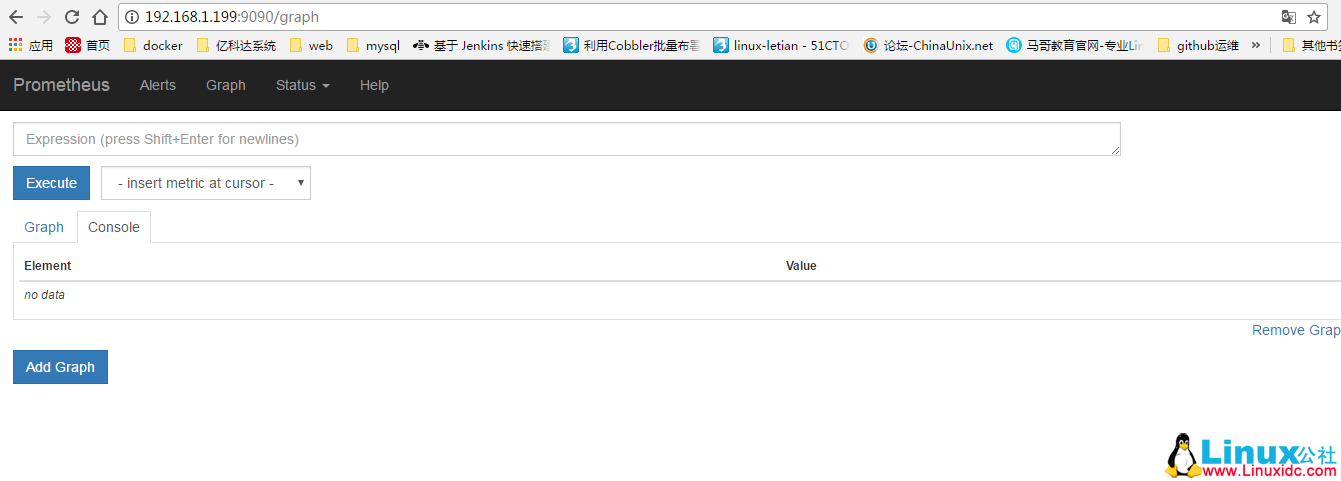
time=”2017-06-12T11:51:16+08:00″ level=info msg=” source=”web.go:259″Prometheus 提供一个内置的 web 界面。我们可以通过 http://192.168.1。199:9090 访问
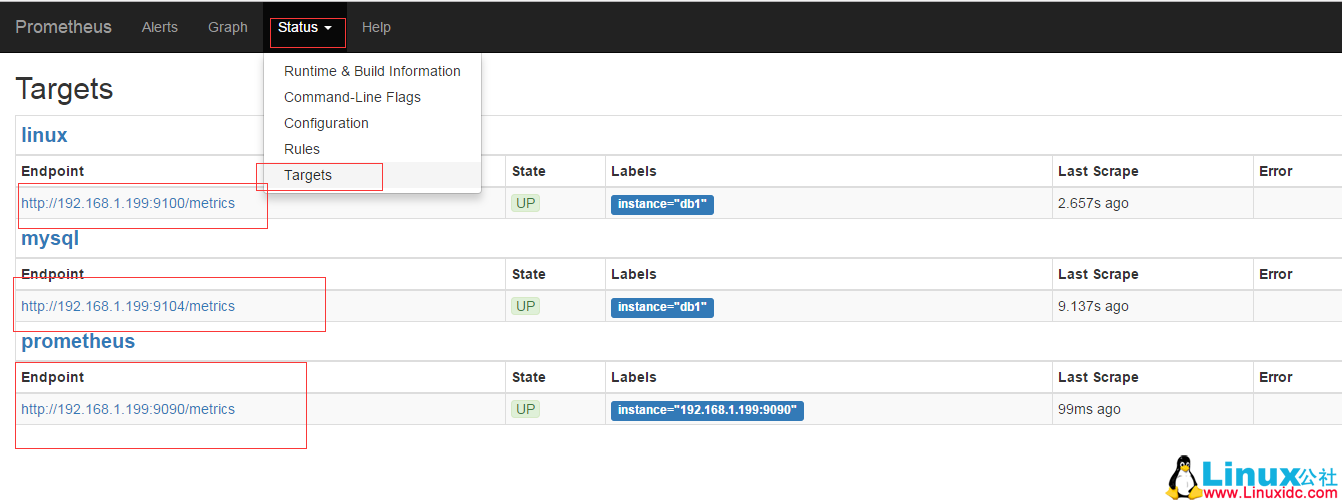
在 Status -> Targets 页面下,我们可以看到我们配置的两个 Target,它们的 State
三、接下来我们安装 client 客户端
1、安装 client
$ wget https://github.com/prometheus/node_exporter/releases/download/v0.14.0/node_exporter-0.14.0.linux-amd64.tar.gz
$ wget https://github.com/prometheus/mysqld_exporter/releases/download/v0.10.0/mysqld_exporter-0.10.0.linux-amd64.tar.gz
$ mkdir /opt/prometheus_exporters
$ tar zxf node_exporter-0.14.0.linux-amd64.tar.gz -C /opt/prometheus_exporters –strip-components=1 && tar zxf mysqld_exporter-0.10.0.linux-amd64.tar.gz -C /opt/prometheus_exporters –strip-components=1
2、启动 os 监控 client
nohup /opt/prometheus_exporters/node_exporter &
tail -200f nohup.out
time=”2017-06-12T11:28:52+08:00″ level=info msg=” – hwmon” source=”node_exporter.go:162″
time=”2017-06-12T11:28:52+08:00″ level=info msg=” – netstat” source=”node_exporter.go:162″
time=”2017-06-12T11:28:52+08:00″ level=info msg=” – stat” source=”node_exporter.go:162″
time=”2017-06-12T11:28:52+08:00″ level=info msg=” – vmstat” source=”node_exporter.go:162″
time=”2017-06-12T11:28:52+08:00″ level=info source=”node_exporter.go:186″
3、mysqld_exporter 需要连接到 MySQL, 需要授权
mysql> GRANT REPLICATION CLIENT, PROCESS ON *.* TO ‘monitor’@’localhost’ identified by ‘test123’;
mysql> GRANT SELECT ON performance_schema.* TO ‘monitor’@’localhost’;
4、创建 .my.cnf 文件并运行 mysqld_exporter
[root@monitor prometheus_exporters]# cat .my.cnf
[client]
user=monitor
password=test123
启动 mysqld_exporter
nohup /opt/prometheus_exporters/mysqld_exporter -config.my-cnf=”.my.cnf” &
tail -200f nohup.out
time=”2017-06-12T11:30:07+08:00″ level=info msg=”Starting mysqld_exporter (version=0.10.0, branch=master, revision=80680068f15474f87847c8ee8f18a2939a26196a)” source=”mysqld_exporter.go:460″
time=”2017-06-12T11:30:07+08:00″ level=info msg=”Build context (go=go1.8.1, user=root@3b0154cd9e8e, date=20170425-11:24:12)” source=”mysqld_exporter.go:461″
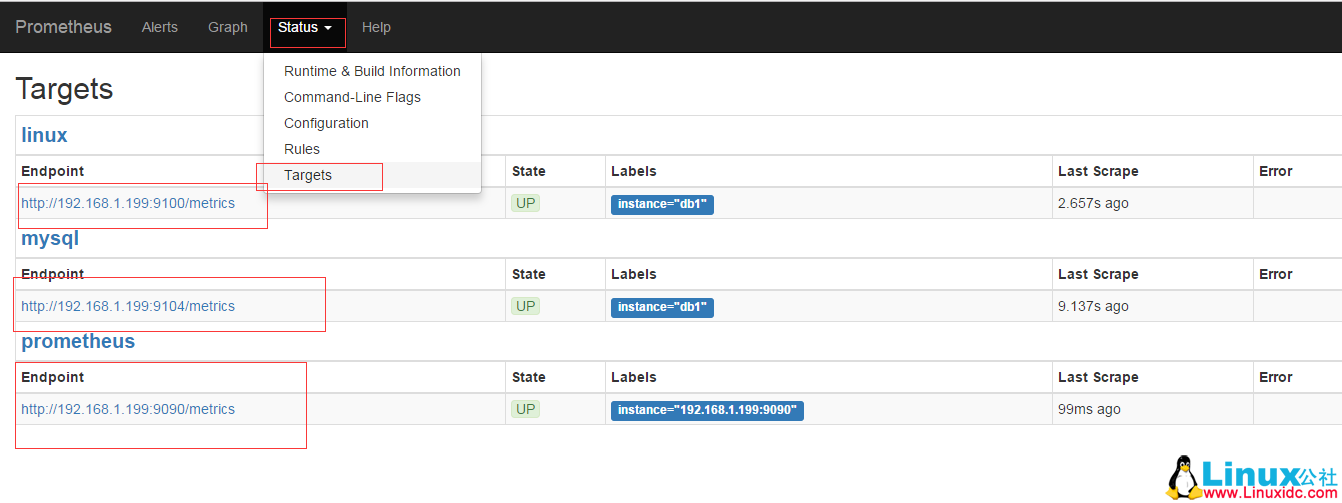
time=”2017-06-12T11:30:08+08:00″ level=info msg=” source=”mysqld_exporter.go:479″ 我们回到 192.168.1.199:9090,可以看到
Status -> Targets 页面
四、安装和运行 Grafana
1、安装 Grafana
#wget https://s3-us-west-2.amazonaws.com/grafana-releases/release/grafana-4.3.2-1.x86_64.rpm
#yum localinstall grafana-4.3.2-1.x86_64.rpm
2、编辑配置文件 /etc/grafana/grafana.ini,修改 dashboards.json 段落下两个参数的值:
[dashboards.json]
enabled = true
path = /var/lib/grafana/dashboards
3、运行 Grafana
systemctl start grafana-server
# [root@monitor prometheus_exporters]# ps aux |grep grafana
root 3211 0.0 0.0 112664 972 pts/1 S+ 11:40 0:00 grep –color=auto grafana
grafana 21241 0.3 0.8 805720 39620 ? Ssl 6 月 12 4:42 /usr/sbin/grafana-server –config=/etc/grafana/grafana.ini –pidfile= cfg:default.paths.logs=/var/log/grafana cfg:default.paths.data=/var/lib/grafana cfg:default.paths.plugins=/var/lib/grafana/plugins 我们可通过 http://192.168.1.199:3000 访问 Grafana 网页界面(缺省的帐号 / 密码为 admin/admin):
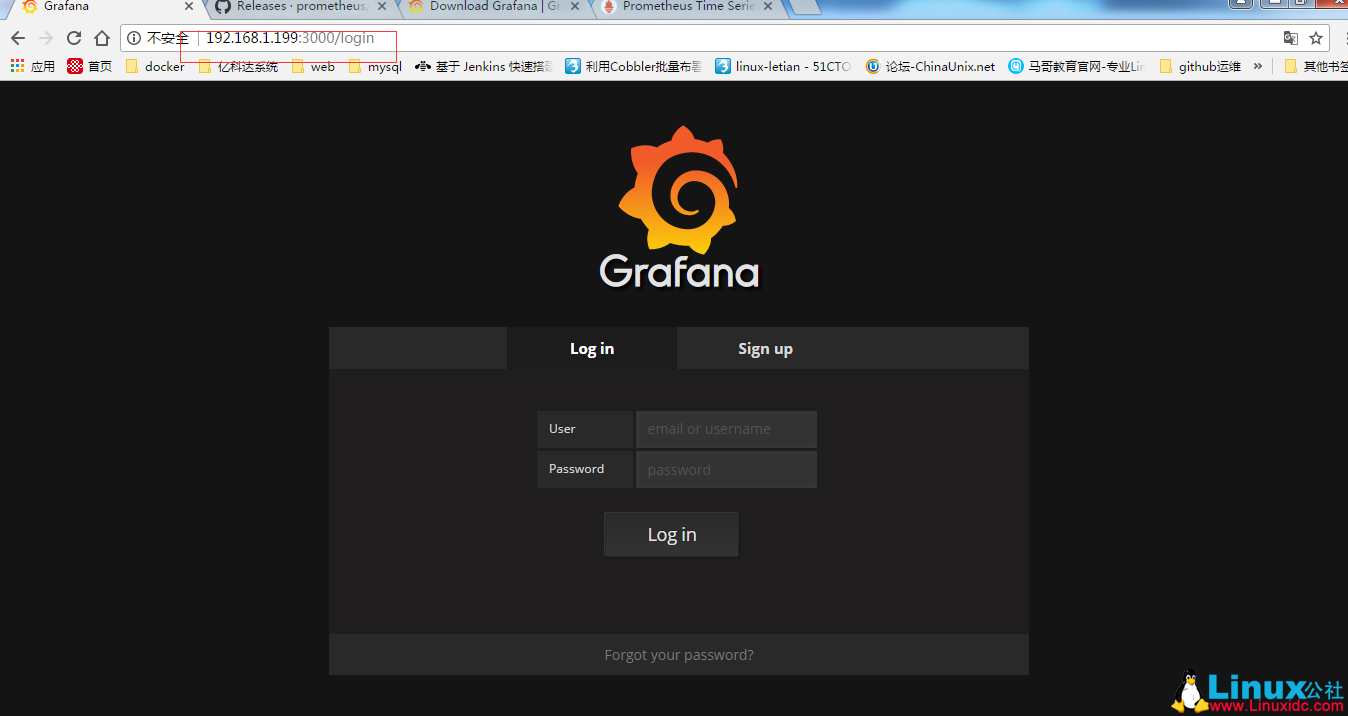
登录并设置数据源
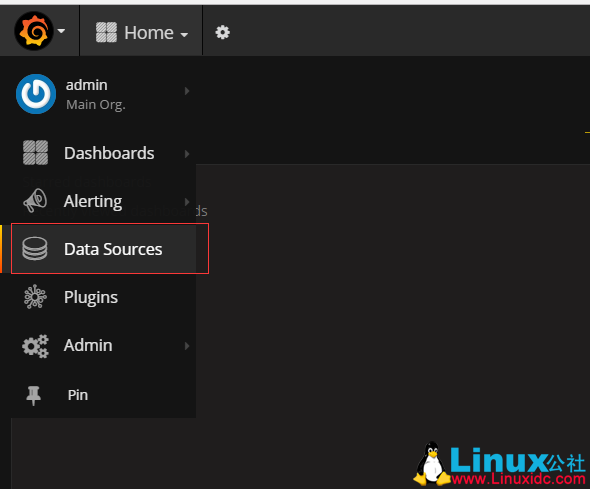
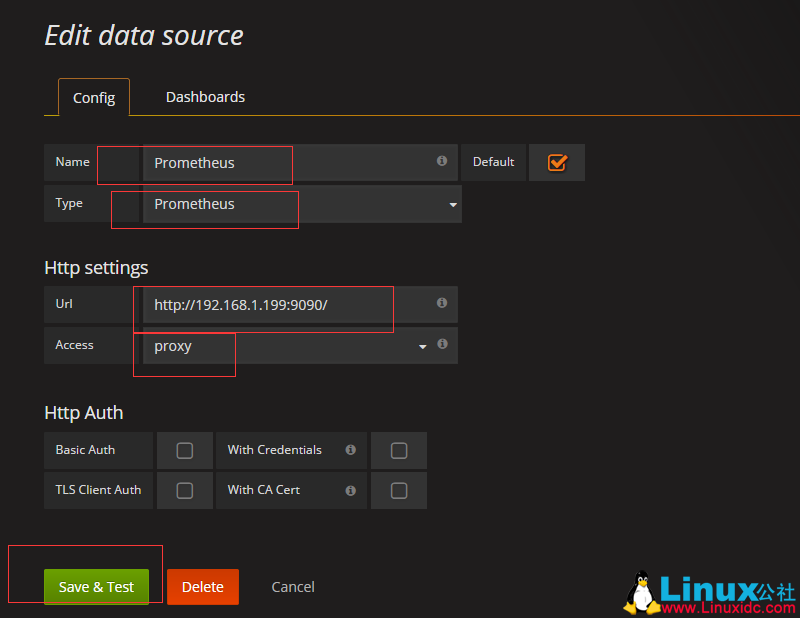
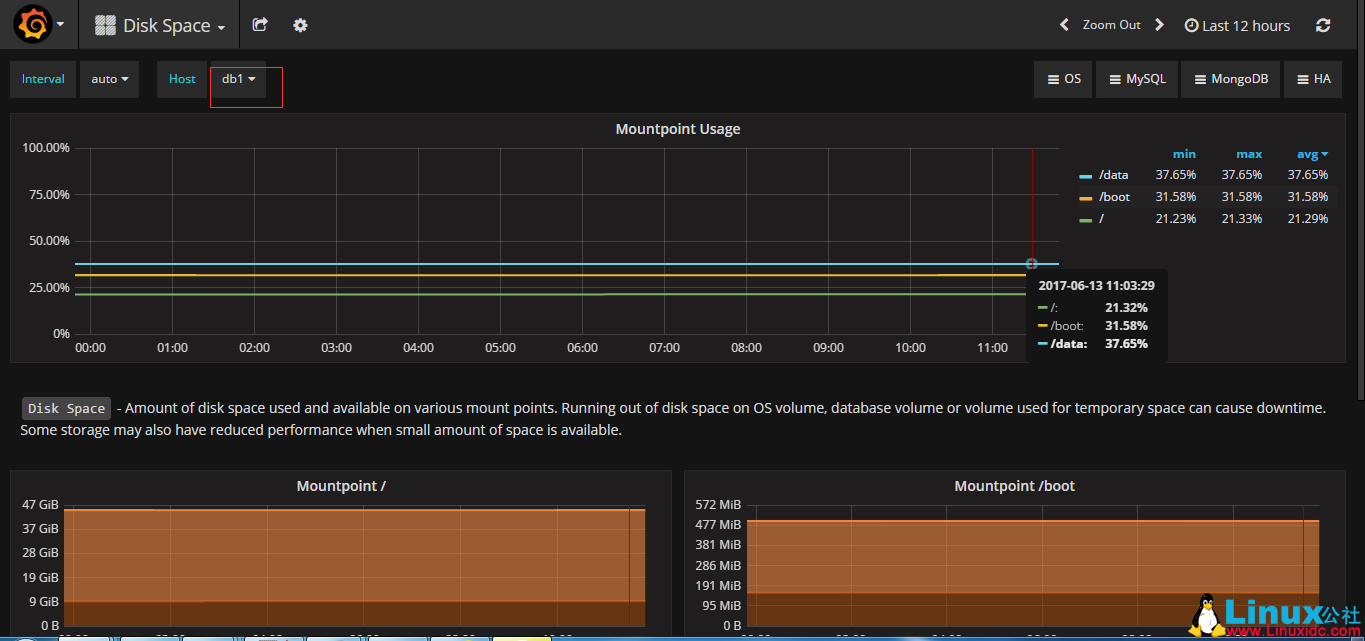
至此大功告成
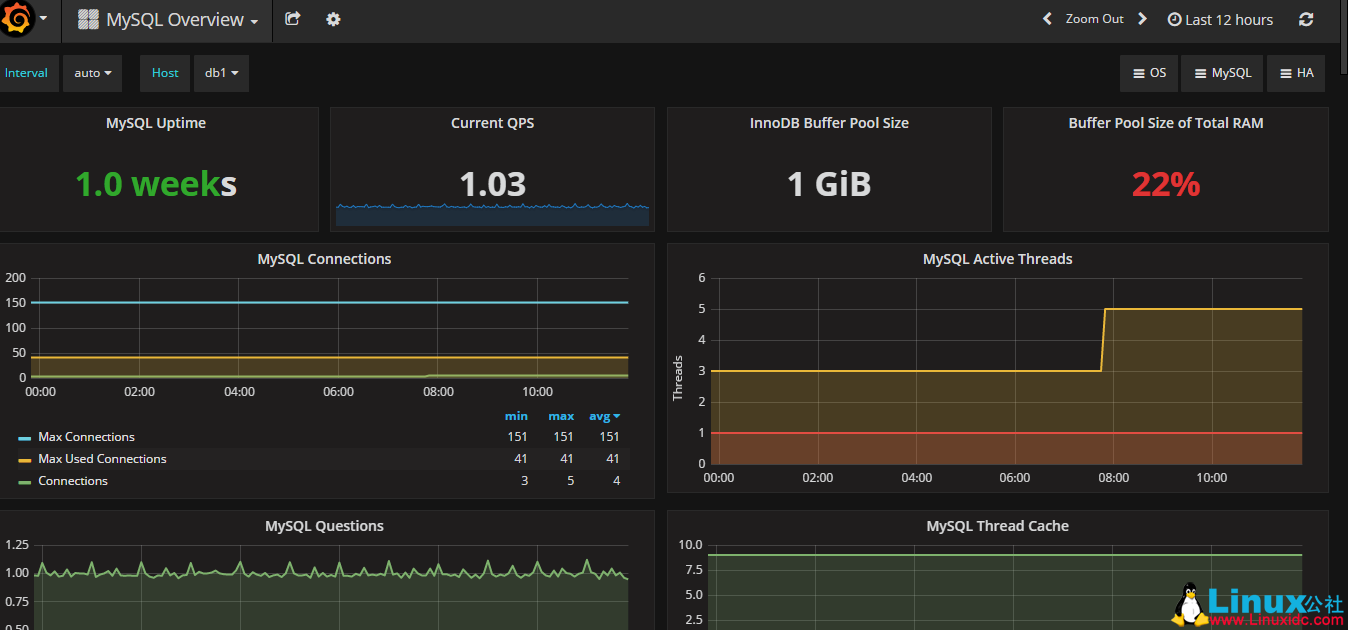
我们可以看到 os 与数据库监控数据了
本文永久更新链接地址 :http://www.linuxidc.com/Linux/2017-06/144972.htm


