共计 4467 个字符,预计需要花费 12 分钟才能阅读完成。
注:如果 实在无法连上图形化界面,可选择该方案。
安装之前:
打开 XShell,以 root 用户身份创建/oraInventory 文件夹。
- [root@Pet ~]# mkdir /oraInventory
- [root@Pet ~]# cd /
- [root@Pet /]# chown –R Oracle:oinstall oraInventory
- [root@XLJ181 ~]# export DISPLAY=:0.0
- [root@XLJ181 ~]# xhost +
- access control disabled, clients can connect from any host
(在 /etc/hosts 文件中加入用户)如下:

1. 找到 oracle 数据库对应的应答文件。

2.切换 到Oracle 用户,修改对应的应答文件内容并 执行相关命令。
一、db_install.rsp 安装 Oracle 数据库软件
先进入/Oracle_11g/database 目录
修改response 文件的如下选项:
oracle.install.option=INSTALL_DB_SWONLY
UNIX_GROUP_NAME=oinstall
INVENTORY_LOCATION=/oraInventory
ORACLE_HOME=/Oracle_11g/oracle
ORACLE_BASE=/Oracle_11g
oracle.install.db.InstallEdition=EE
oracle.install.db.DBA_GROUP=dba
oracle.install.db.OPER_GROUP=oinstall
DECLINE_SECURITY_UPDATES=true
然后执行命令: ./runInstaller -ignoreSysPrereqs -ignorePrereq -silent -responseFile /Oracle_11g/database/response/db_install.rsp -debug
注意:
1.-ignoreSysPrereqs linux 上必须加上此项
2. 静默安装,如果发现错误“SEVERE: Email Address Not Specified …….”,需要设置:
DECLINE_SECURITY_UPDATES=true
执行 后出现如下提示:
安装到这里会有两个脚本需要用root 用户运行的。打开 XShell,以 root 用户运行这两个脚本。
[root@Pet ~]# /oraInventory/orainstRoot.sh
[root@Pet ~]# /Oracle_11g/oracle/root.sh
待脚本运行完后,Oracle 11g R2 数据库软件已经安装完成。
二、netca.rsp 配置监听程序
[oracle@XLJ182 database]$ /Oracle_11g/oracle/bin/netca -silent -responseFile /Oracle_11g/database/response/netca.rsp
运行 后,出现如下提示:
- Parsing command line arguments:
- Parameter “silent” = true
- Parameter “responsefile” = /Oracle_11g/database/response/netca.rsp
- Done parsing command line arguments.
- Oracle Net Services Configuration:
- Profile configuration complete.
- Oracle Net Listener Startup:
- Running Listener Control:
- /Oracle_11g/oracle/bin/lsnrctl start LISTENER
- Listener Control complete.
- Listener started successfully.
- Listener configuration complete.
- Oracle Net Services configuration successful. The exit code is 0
如果此处出现类似异常,需要用root 权限用户登录服务器,在 /etc/hosts 文件中添加:
IP hostname

三、dbca.rsp 创建数据库
修改response 文件的如下选项:
GDBNAME = “cams“
SID = “cams“
SYSPASSWORD = “**********”
SYSTEMPASSWORD = “**********”
SYSMANPASSWORD = “**********”
DBSNMPPASSWORD = “**********”
CHARACTERSET = “UTF8” – 字符集
NATIONALCHARACTERSET = “UTF8” – 国家字符集,默认值
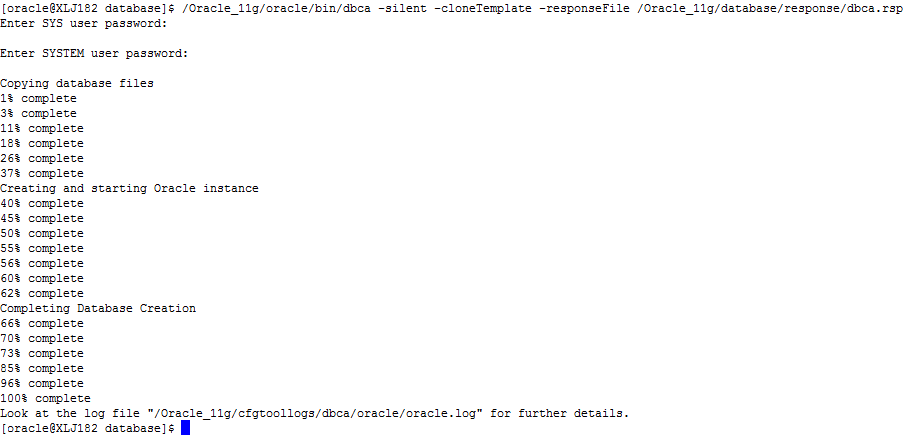
然后执行 命令: /Oracle_11g/oracle/bin/dbca -silent -cloneTemplate -responseFile /Oracle_11g/database/response/dbca.rsp

注意:
如果安装期间出现如下错误:
Initializing Java Virtual Machine from /tmp/OraInstall2014-11-27_08-53-23AM/jdk/jre/bin/java. Please wait…
./runInstaller: line 92: 11535 Segmentation fault (core dumped) $CMDDIR/install/.oui $*
执行:
- [oracle@XLJ182 database]$ cat runInstaller | tail –n +80 | head –n 50
- PATH=/usr/bin:/usr/ccs/bin:$CMDDIR/install
- export PATH
- fi
- # Determine whether there is an existing CRS or not.
- # Local is value of local_only in ocr.loc.
- # False means there is an existing CRS installation on the system.
- if [ –r $OCR_LOC ]; then
- LOCAL=`$AWK –F= /$LOCALONLY/‘{print $2}’ $OCR_LOC |\
- $SED ‘y/aeflrstu/AEFLRSTU/’`
- fi
- case “$BUNDLE” in
- db)
- # One–click: only if there is no cmd line argument and it‘s not on CRS node
- if [$# -gt 0 -o “$LOCAL” = “FALSE” -o \
- ! -r $CMDDIR/install/oneclick.properties ]; then
- $CMDDIR/install/.oui $*
- else
- $CMDDIR/install/.oui -oneclick
- fi
- ;;
- client)
- $CMDDIR/install/.oui $* CLUSTER_NODES={}
- ;;
- crs)
- $CMDDIR/install/.oui $* -formCluster
- ;;
- dv)
- $CMDDIR/install/.oui $* -oneclick
- ;;
- dbbundle)
- for arg in “$@”
- do
- arg=`echo $arg | $SED ‘y/ABCDEFGHIJKLMNOPQRSTUVWXYZ/abcdefghijklmnopqrstuvwxyz/
92 行的代码为:$CMDDIR/install/.oui $* -oneclick
执行:
- [oracle@XLJ182 tmp]$ /Oracle_11g/database/install/.oui $* –oneclick
- Starting Oracle Universal Installer...
- Checking Temp space: must be greater than 120 MB. Actual 30005 MB Passed
- Checking swap space: must be greater than 150 MB. Actual 3967 MB Passed
- Checking monitor: must be configured to display at least 256 colors
- >>> Could not execute auto check for display colors using command /usr/bin/xdpyinfo. Check if the DISPLAY variable is set. Failed <<<<
- Some requirement checks failed. You must fulfill these requirements before
- continuing with the installation,
- Continue? (y/n) [n] n
- User Selected: No
- Exiting Oracle Universal Installer, log for this session can be found at /tmp/OraInstall2014–11–27_09–23–40AM/installActions2014–11–27_09–23–40AM.log
解决方案:
- [oracle@XLJ182 tmp]$ su – root
- [root@XLJ182 ~]# export DISPLAY=:0.0
- [root@XLJ182 ~]# xhost +
- access control disabled, clients can connect from any host
- [oracle@XLJ182 oracle]$ /Oracle_11g/database/install/.oui $* –oneclick
- Starting Oracle Universal Installer...
- Checking Temp space: must be greater than 120 MB. Actual 29995 MB Passed
- Checking swap space: must be greater than 150 MB. Actual 3967 MB Passed
- Checking monitor: must be configured to display at least 256 colors. Actual 16777216 Passed
- Preparing to launch Oracle Universal Installer from /tmp/OraInstall2014–11–27_09–43–13AM. Please wait ...
更多 Oracle 相关信息见Oracle 专题页面 http://www.linuxidc.com/topicnews.aspx?tid=12
本文永久更新链接地址:http://www.linuxidc.com/Linux/2017-07/145983.htm


